Create custom fields
Overview
Each installation of Skedulo for Salesforce includes a standard set of data objects and fields that power the app. You can add custom fields to the existing data structure within your service platform.
Note
It is best not to edit or remove the existing data structure, as this may cause unexpected issues that prevent Skedulo from working properly.You can create new fields for the existing objects or add entirely new objects that can then be used within the Skedulo app. See Create custom objects in Salesforce.
Prerequisites
You must have the required permission to add new fields within Salesforce. Refer to this Salesforce documentation.
Add a custom field in Salesforce
Adding a custom field to one of Skedulo’s existing data objects should be done through the normal process of adding fields to objects provided by your service platform. See this Salesforce documentation.
Important
Only custom fields on theJobs object will appear on the Skedulo mobile app.
For this example, we will go through adding a custom field named Name to the Skedulo Job object using Salesforce.
Add a custom field using Salesforce Classic
To add a custom field to the Jobs object using Salesforce Classic, do the following steps:
-
Navigate to Setup > Build > Create > Objects.
-
On the Custom Objects page, locate and select the
Jobsrecord (this record has Sked as the Installed Package).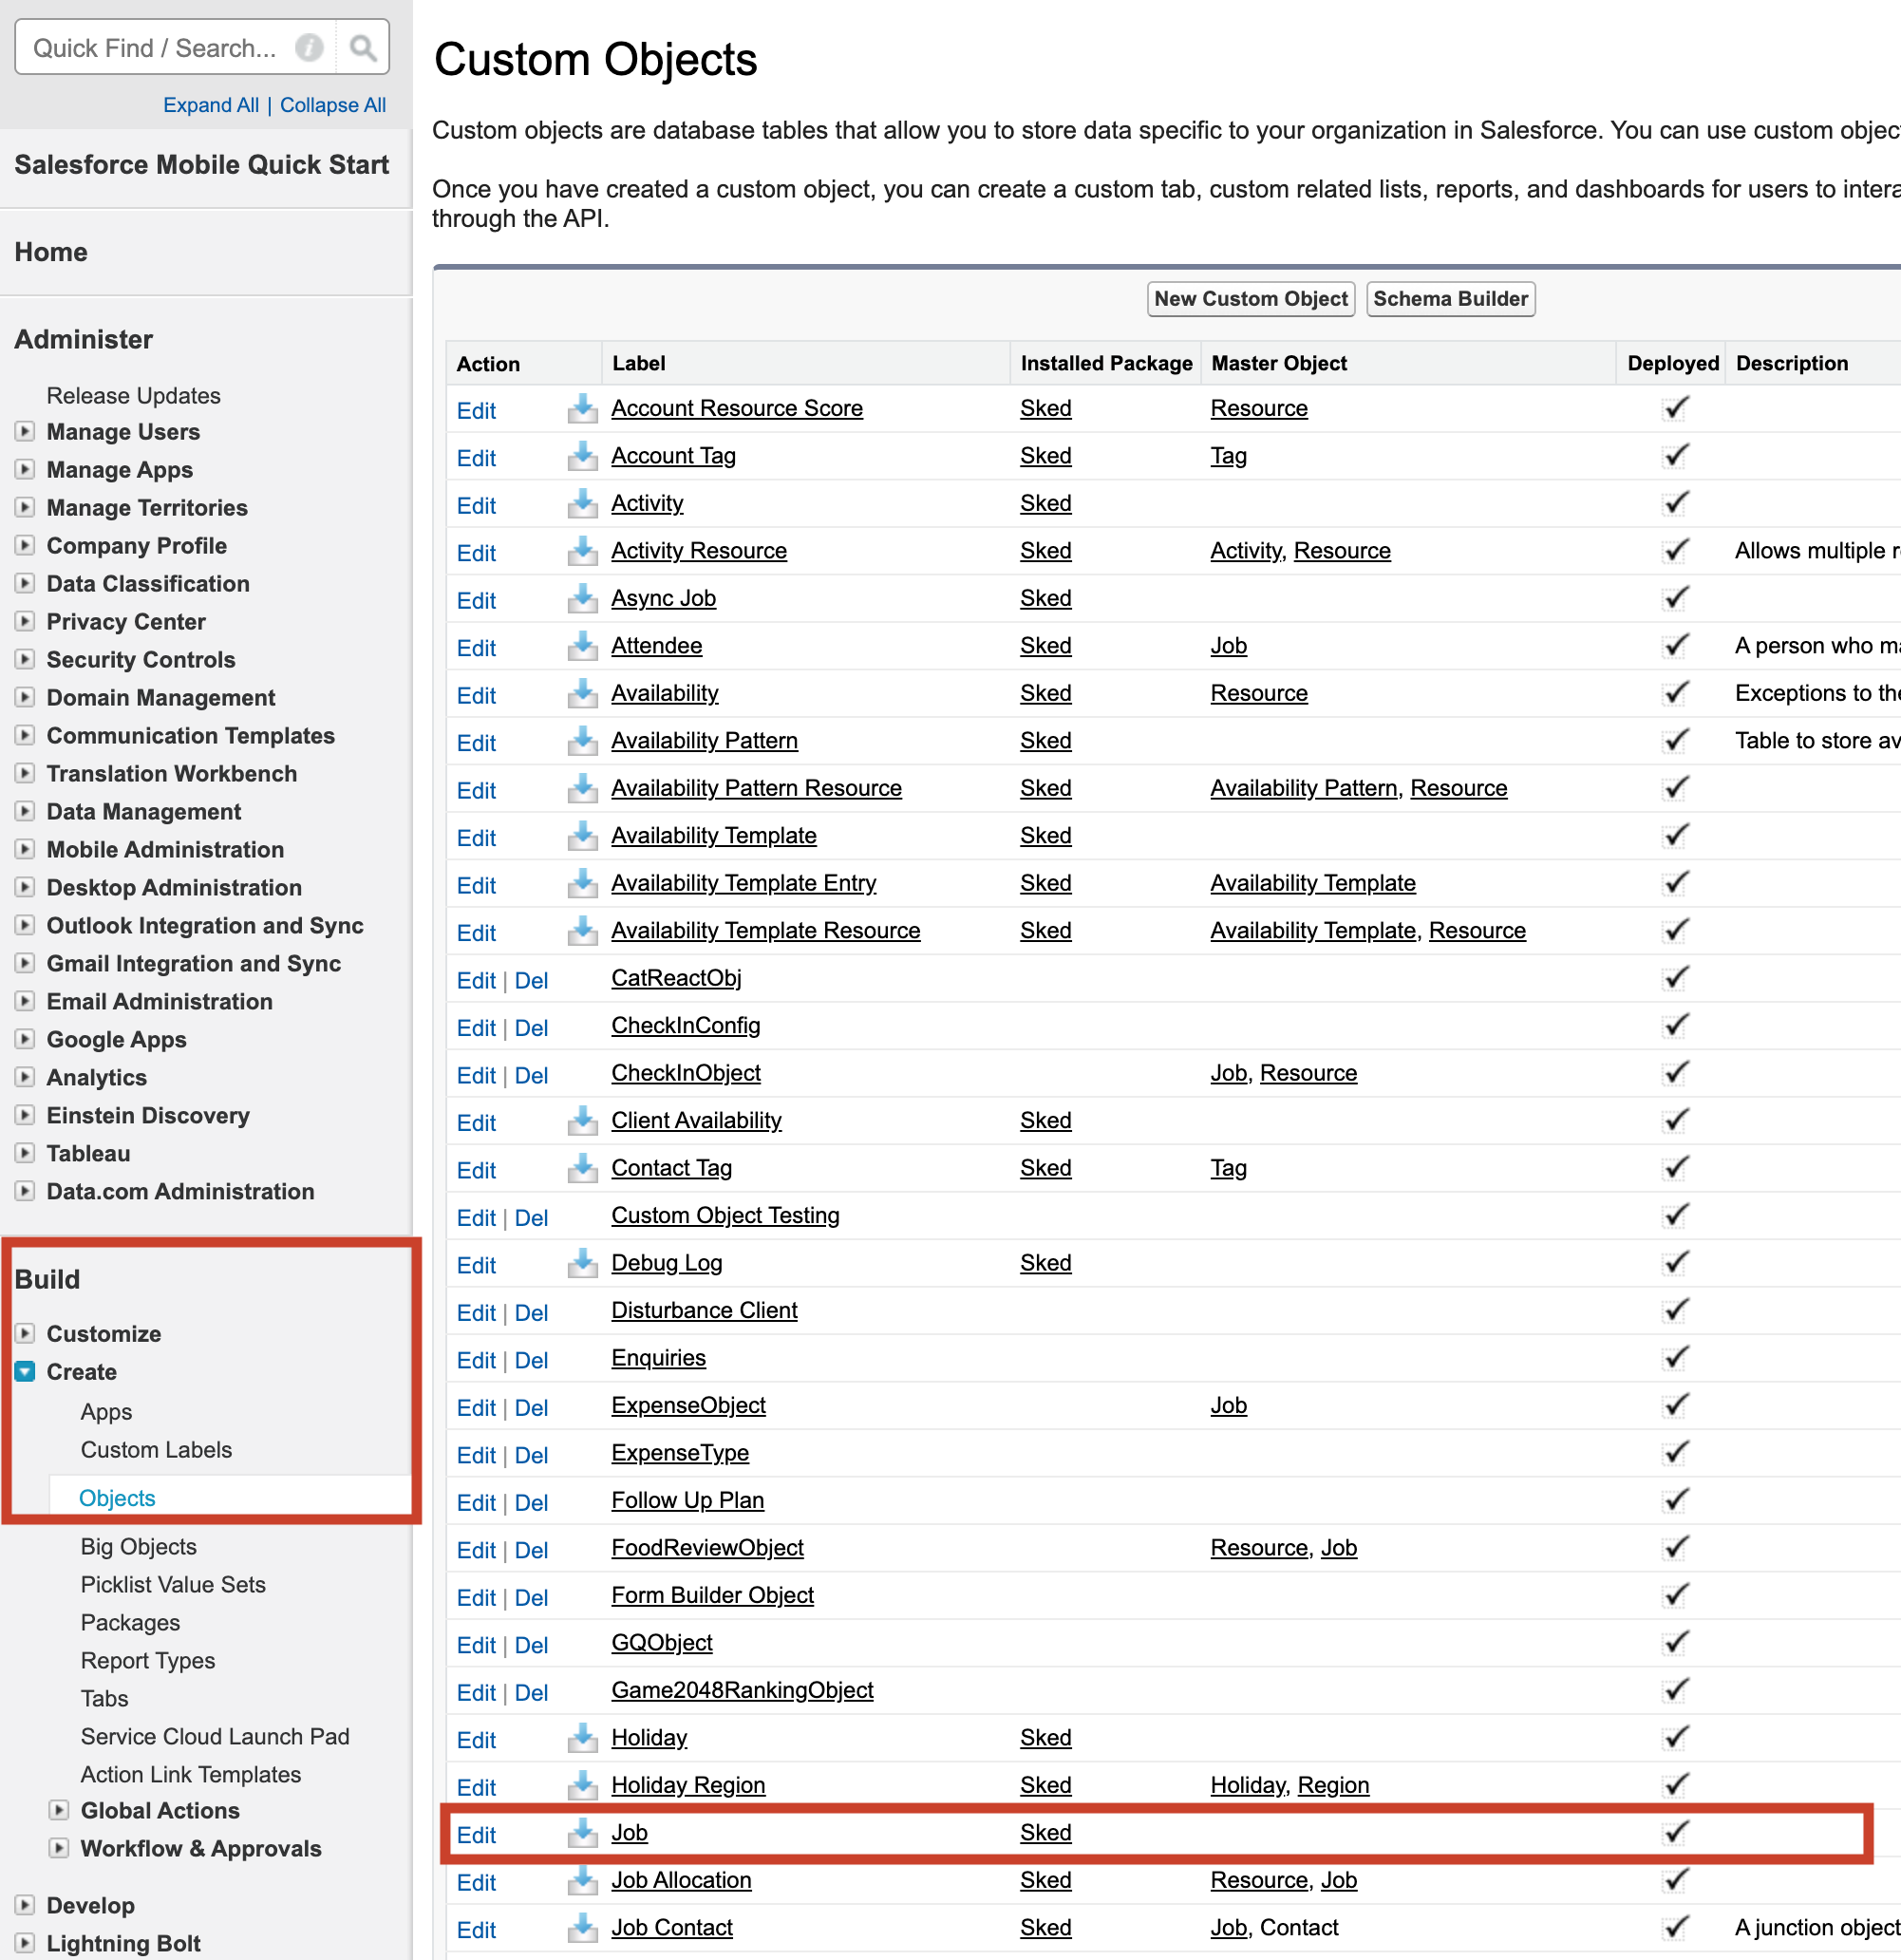
-
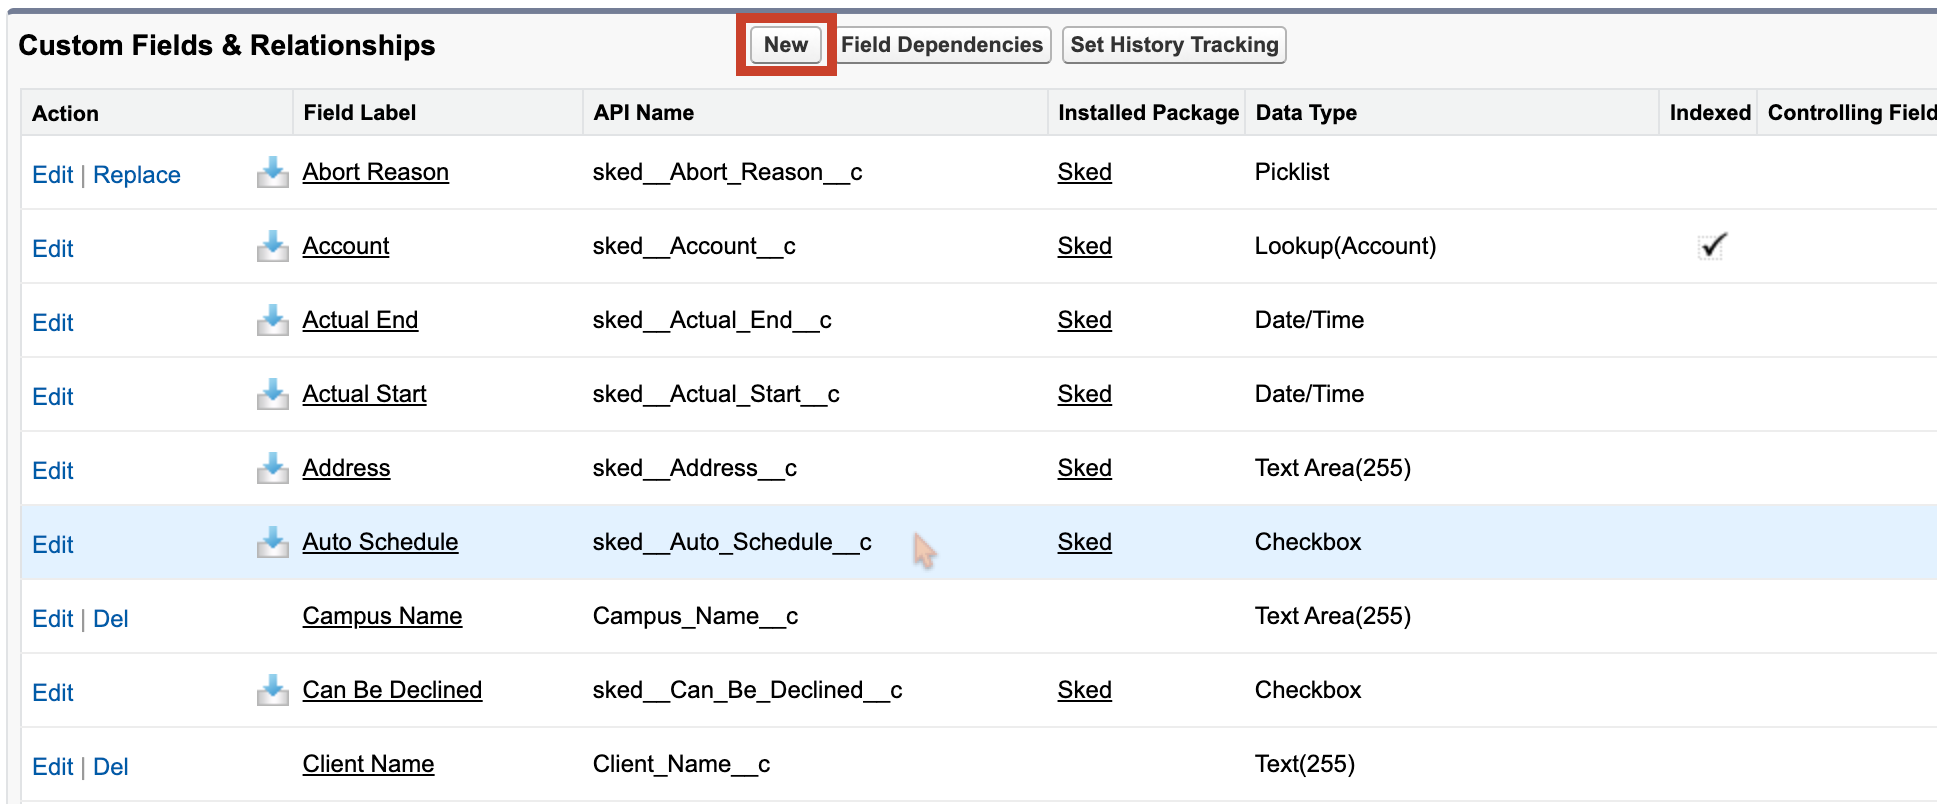
Navigate to the Custom Fields & Relationships section. Then select New to add a new field.
Add a custom field using Salesforce Lightning
To add a custom field to the Jobs object using Salesforce Lightning, do as follows:
-
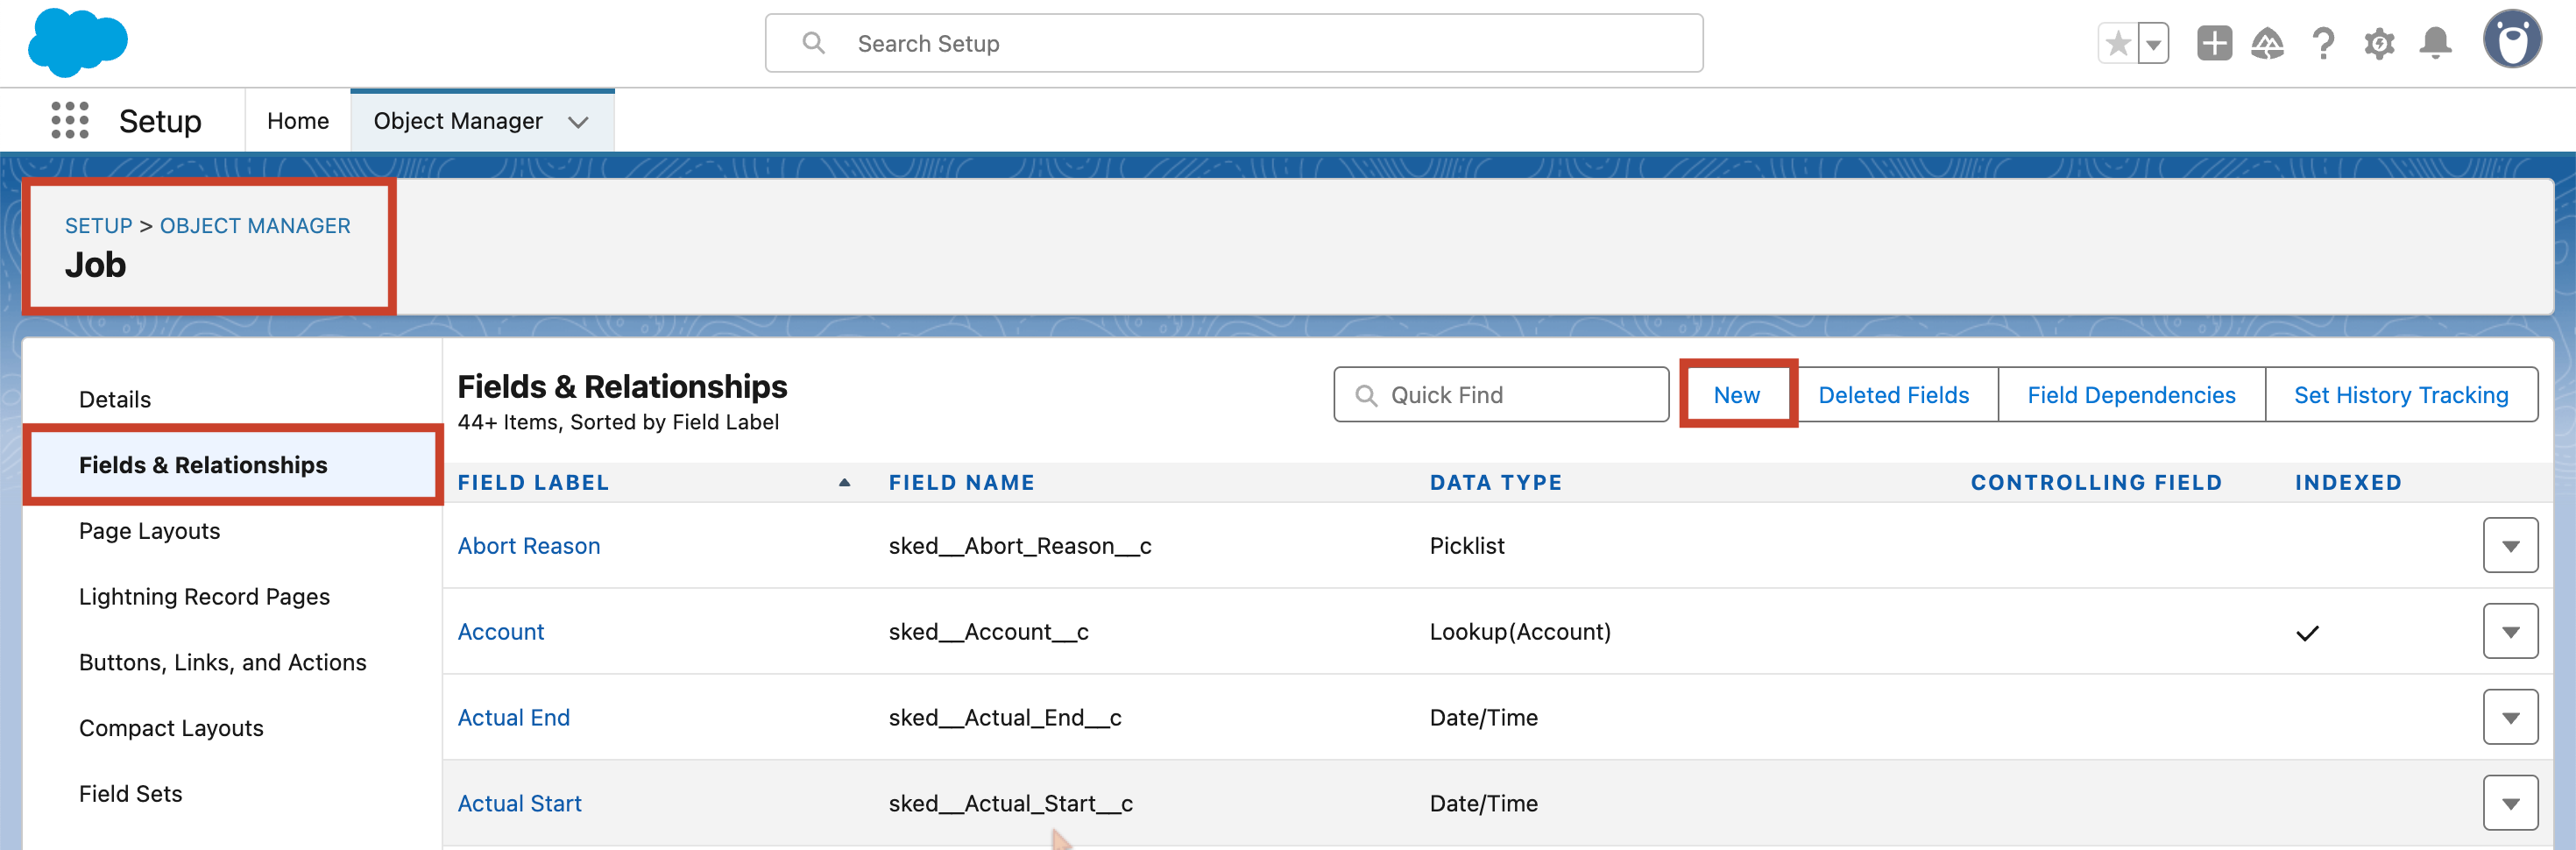
Navigate to Setup > Object Manager > Job > Fields & Relationships.
-
From the
Jobsobject, add a new field by selecting New.
Add a new field
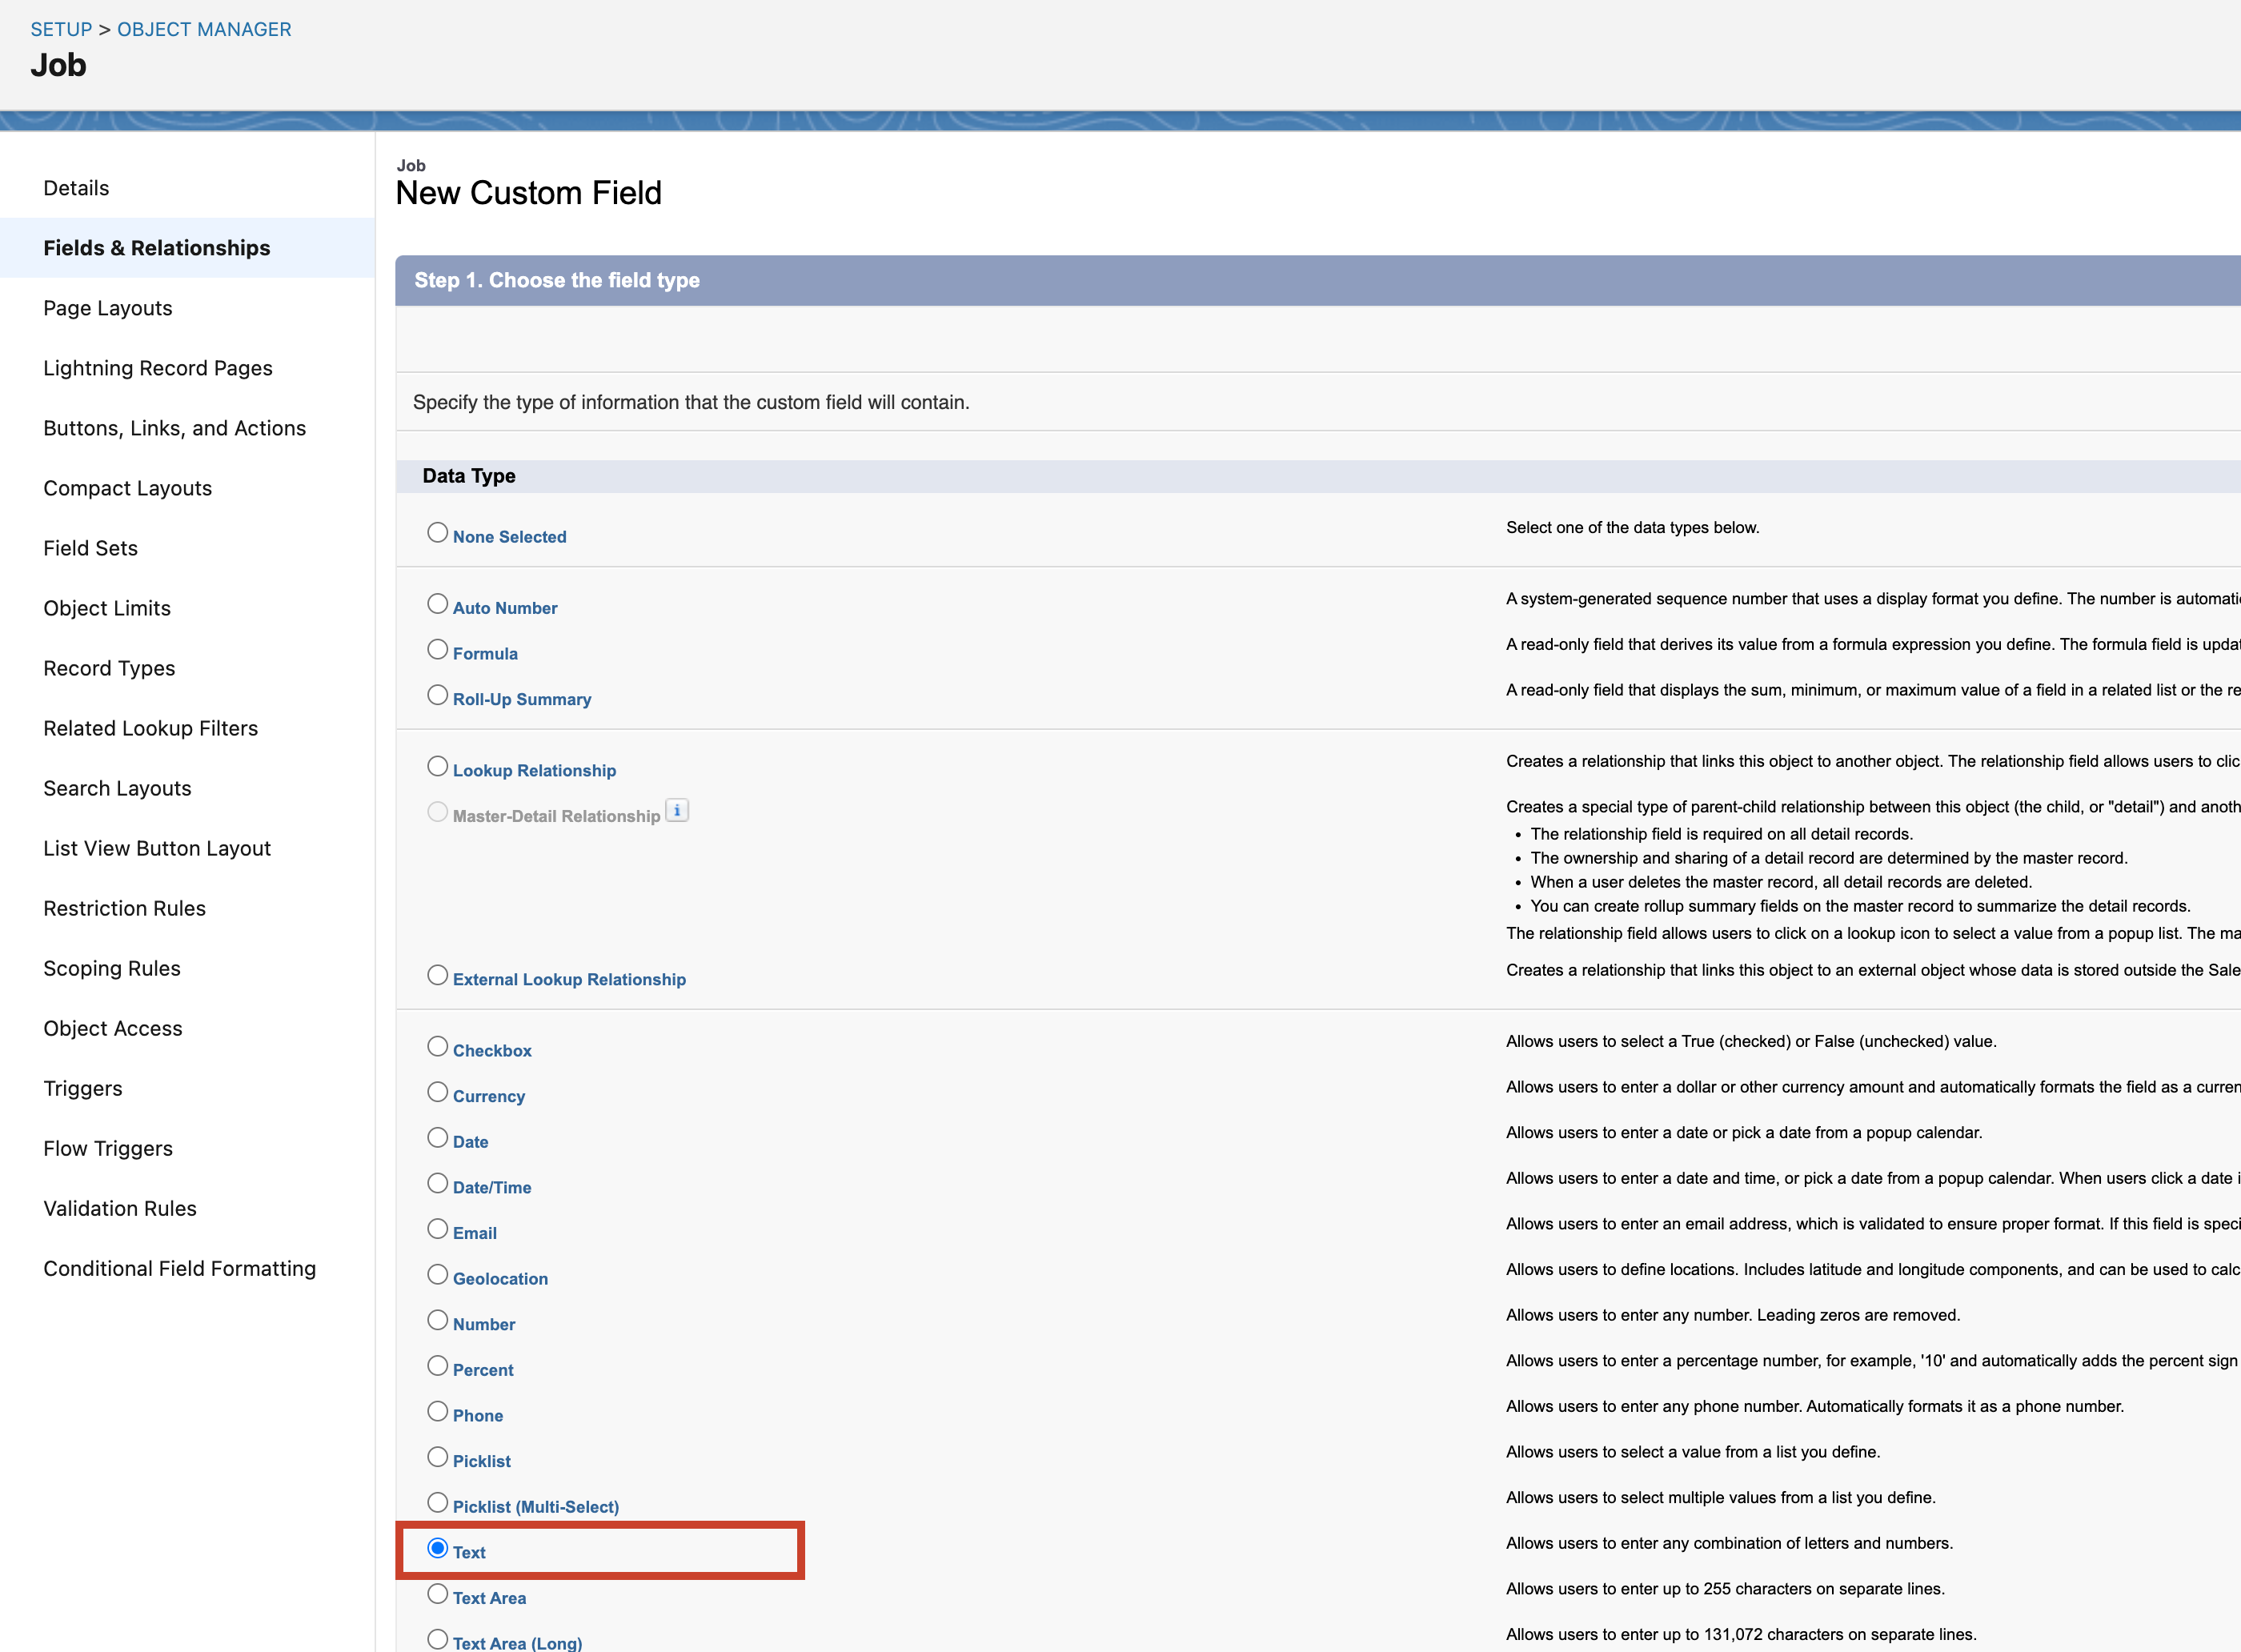
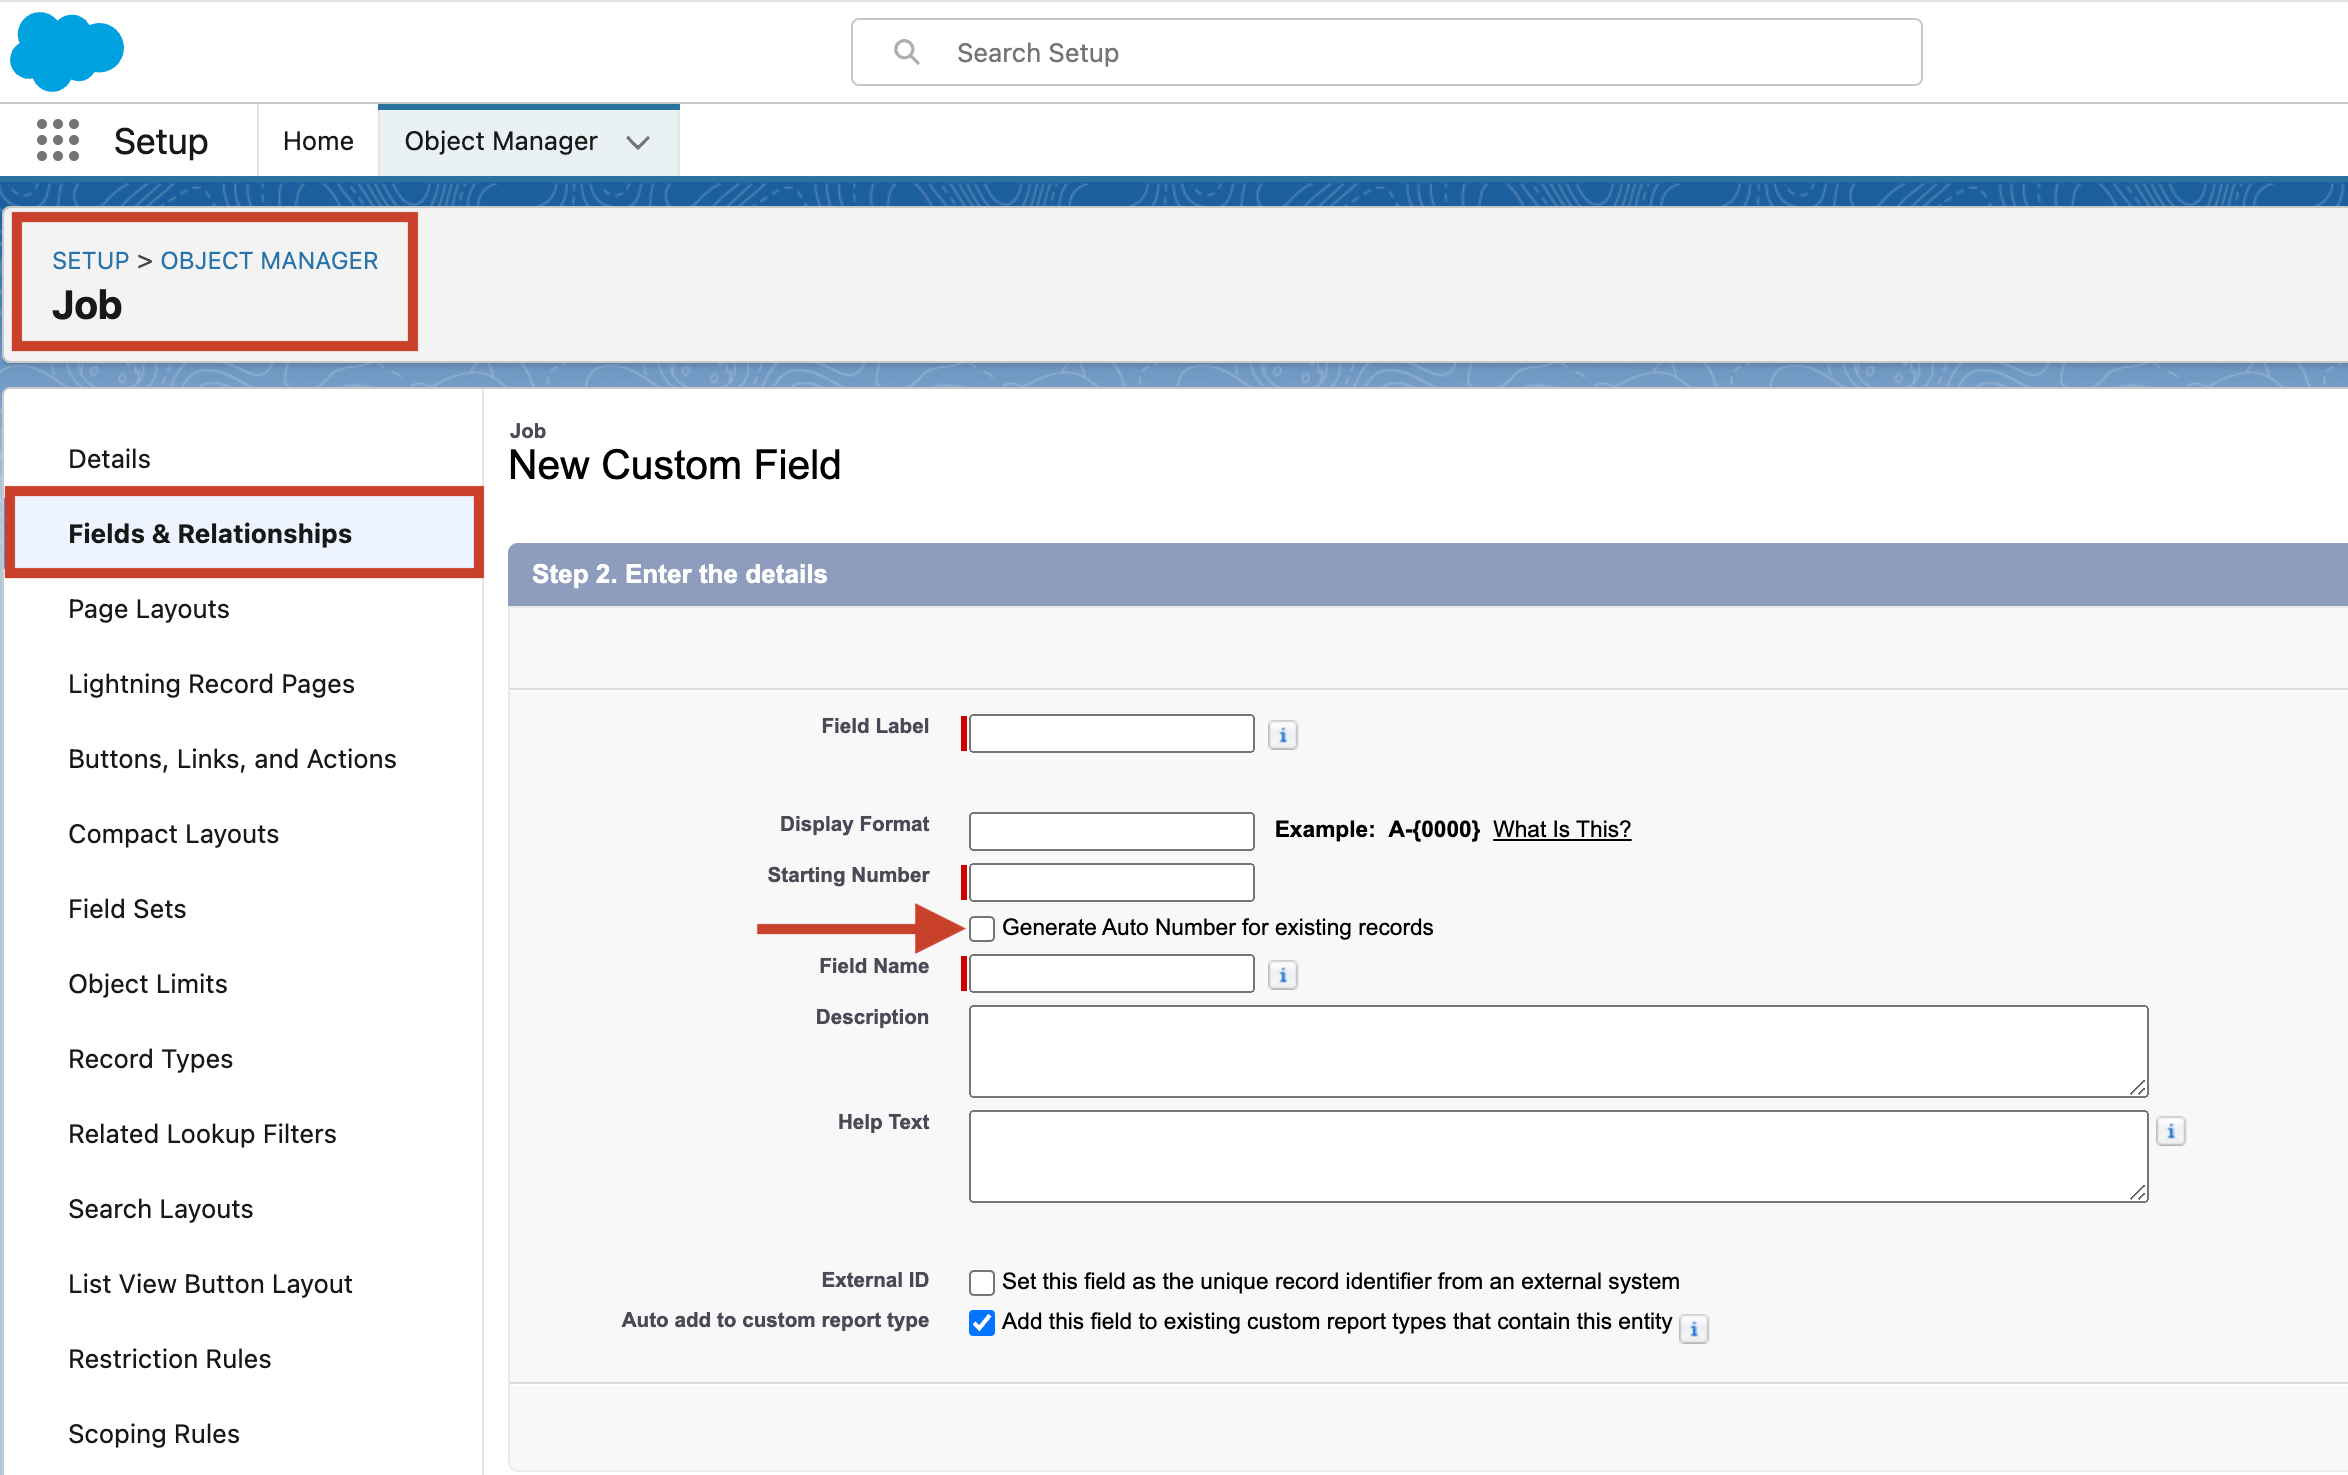
Once you select New, the New Custom Field displays.
To add a new field, do to following steps:
-
Choose the data type of field. For this example, select the Text data type.
Note
If you select one of the relationship data types (Lookup Relationship, Master-Detail Relationship, or External Lookup Relationship) then the field becomes a reference custom field. Reference custom fields are linked to another object in Salesforce; this can be a standard Skedulo object or a custom object that you have added to the system. If you are going to reference a custom object, then please refer to this section. -
Configure the field settings. These settings will change depending on the data type selected.
For this example, set the label as Name and set a maximum length of 100 characters.
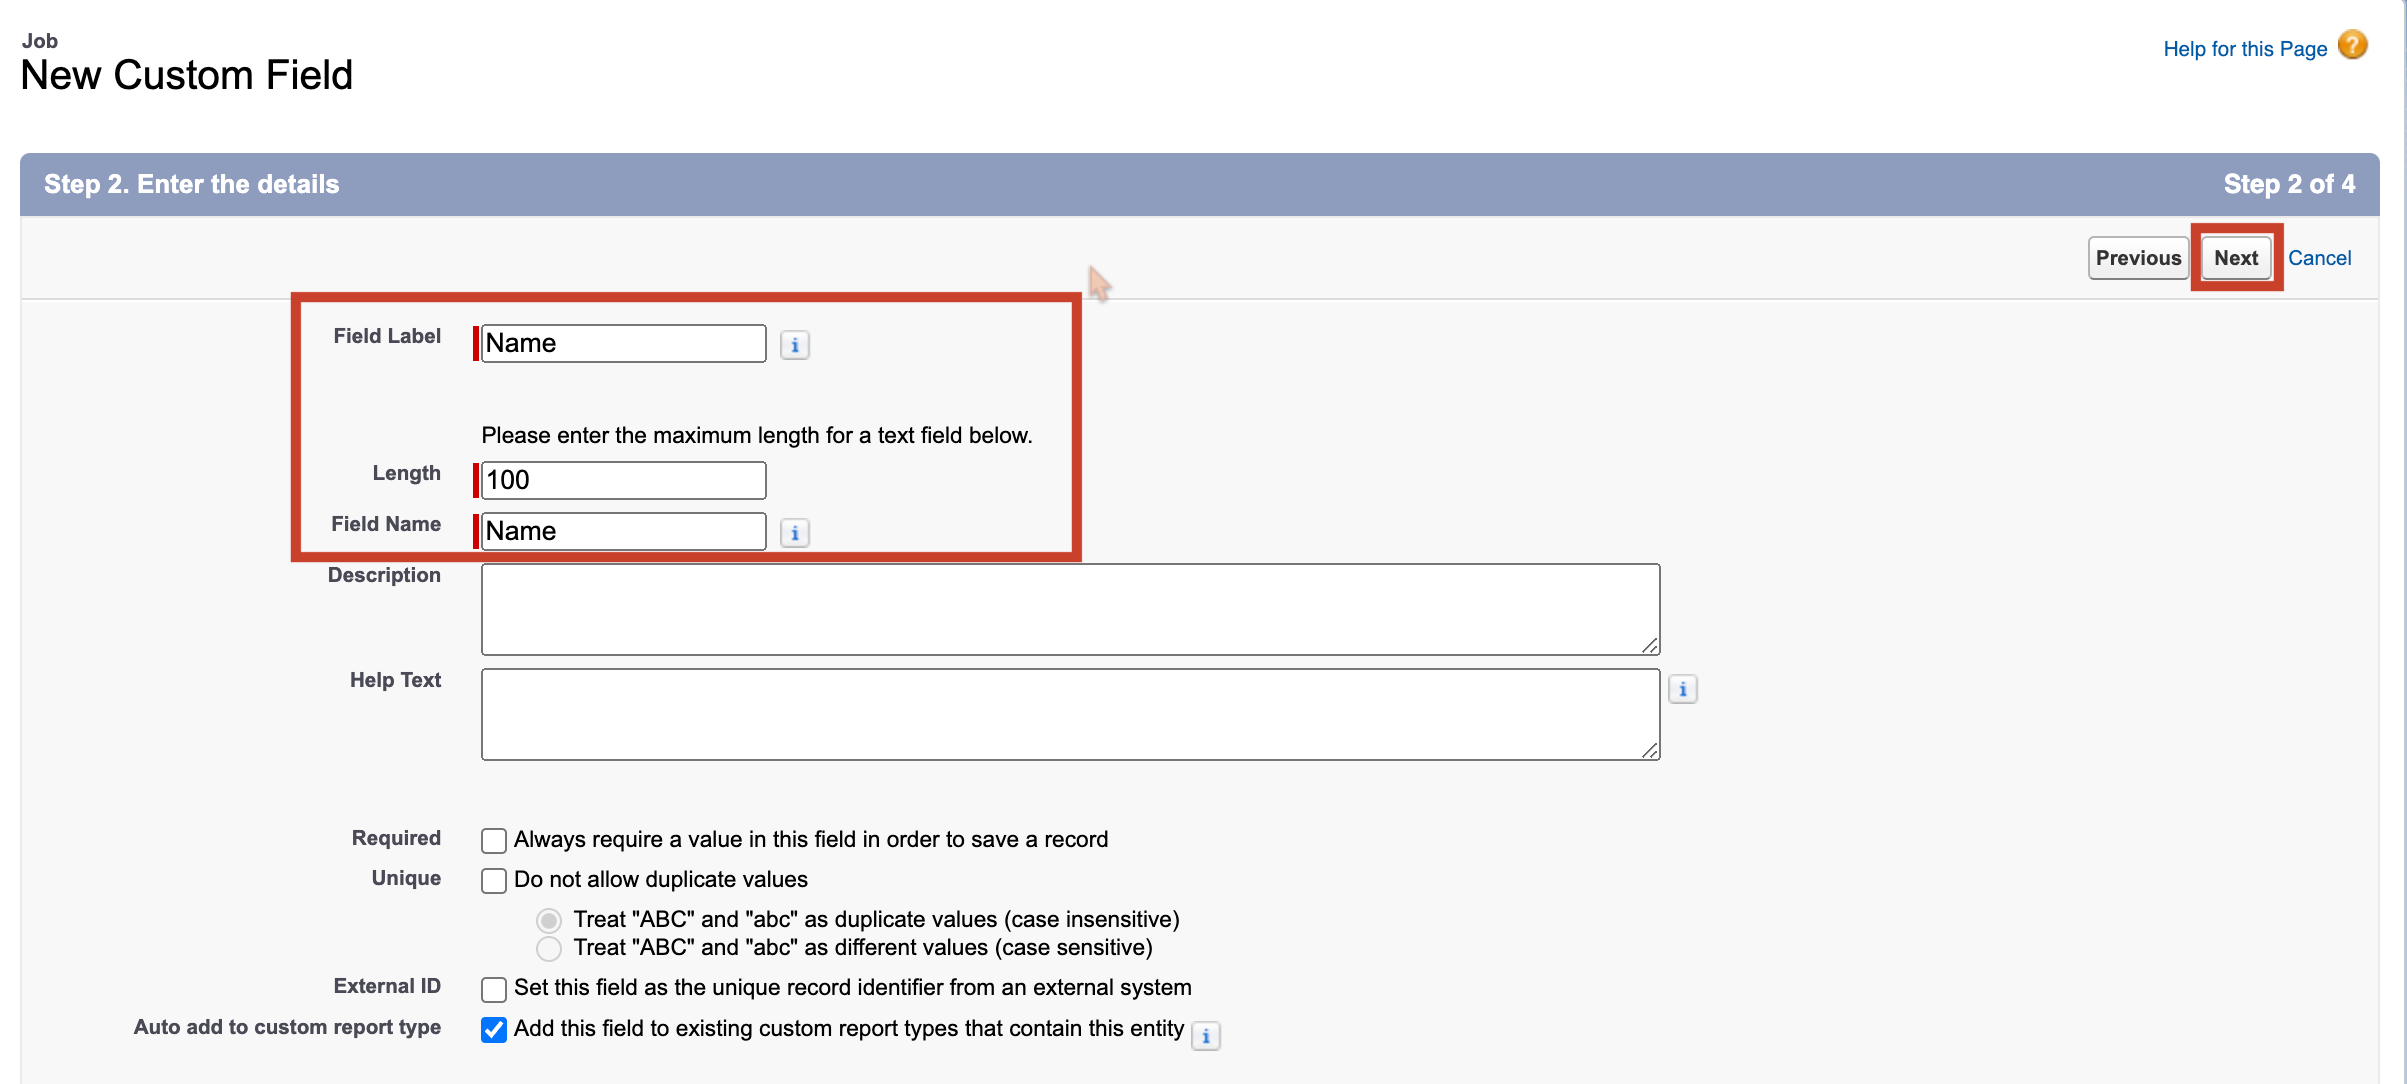
-
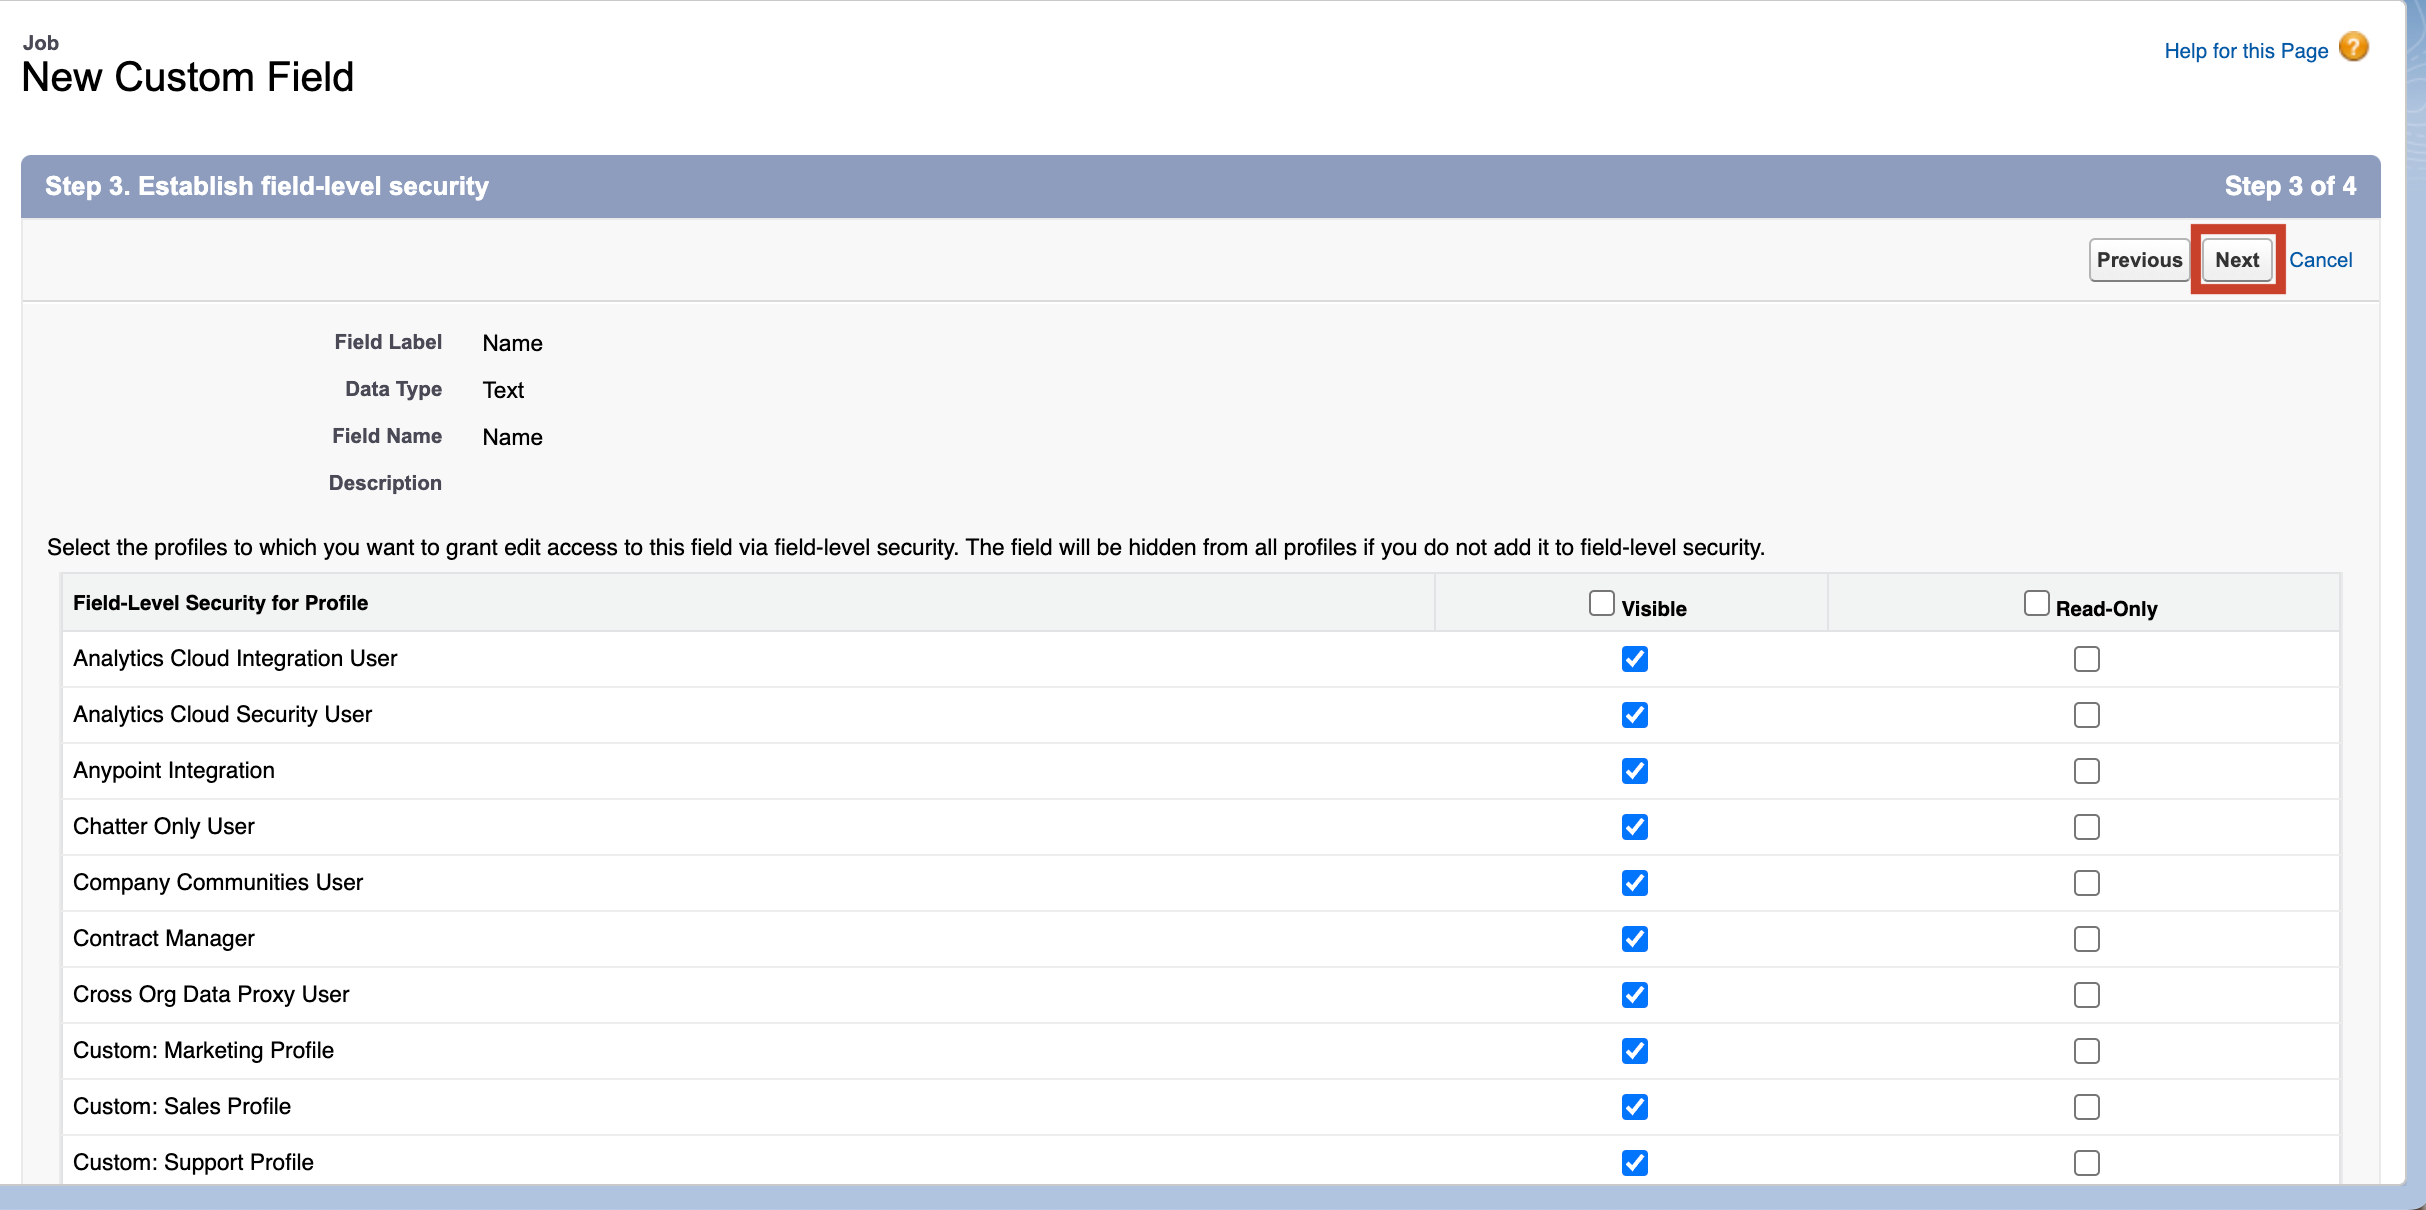
Check the default security settings provided. Then select Next.
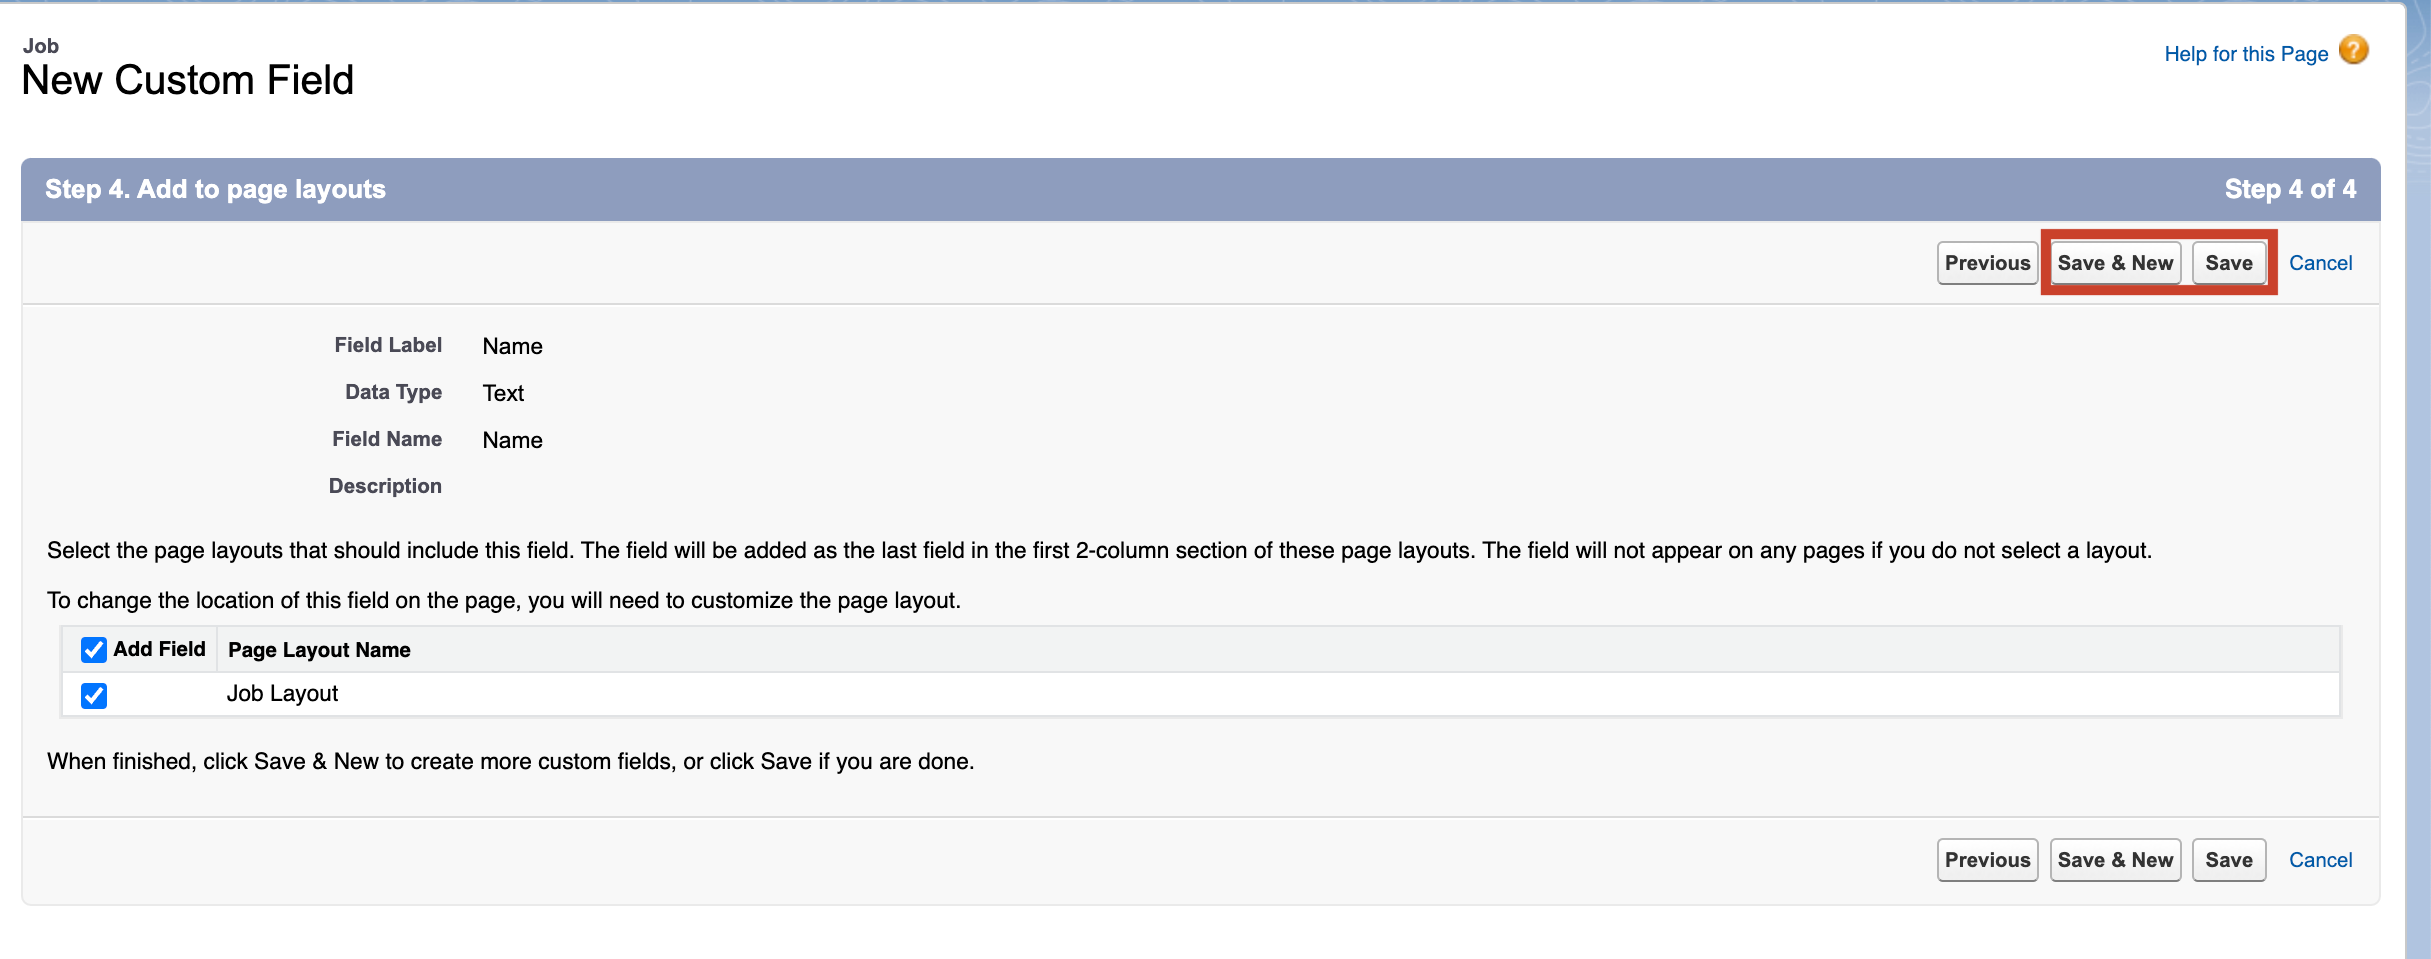
-
Review the final summary of the field you are creating. Then select Save to finish or Save & New to create more custom fields.
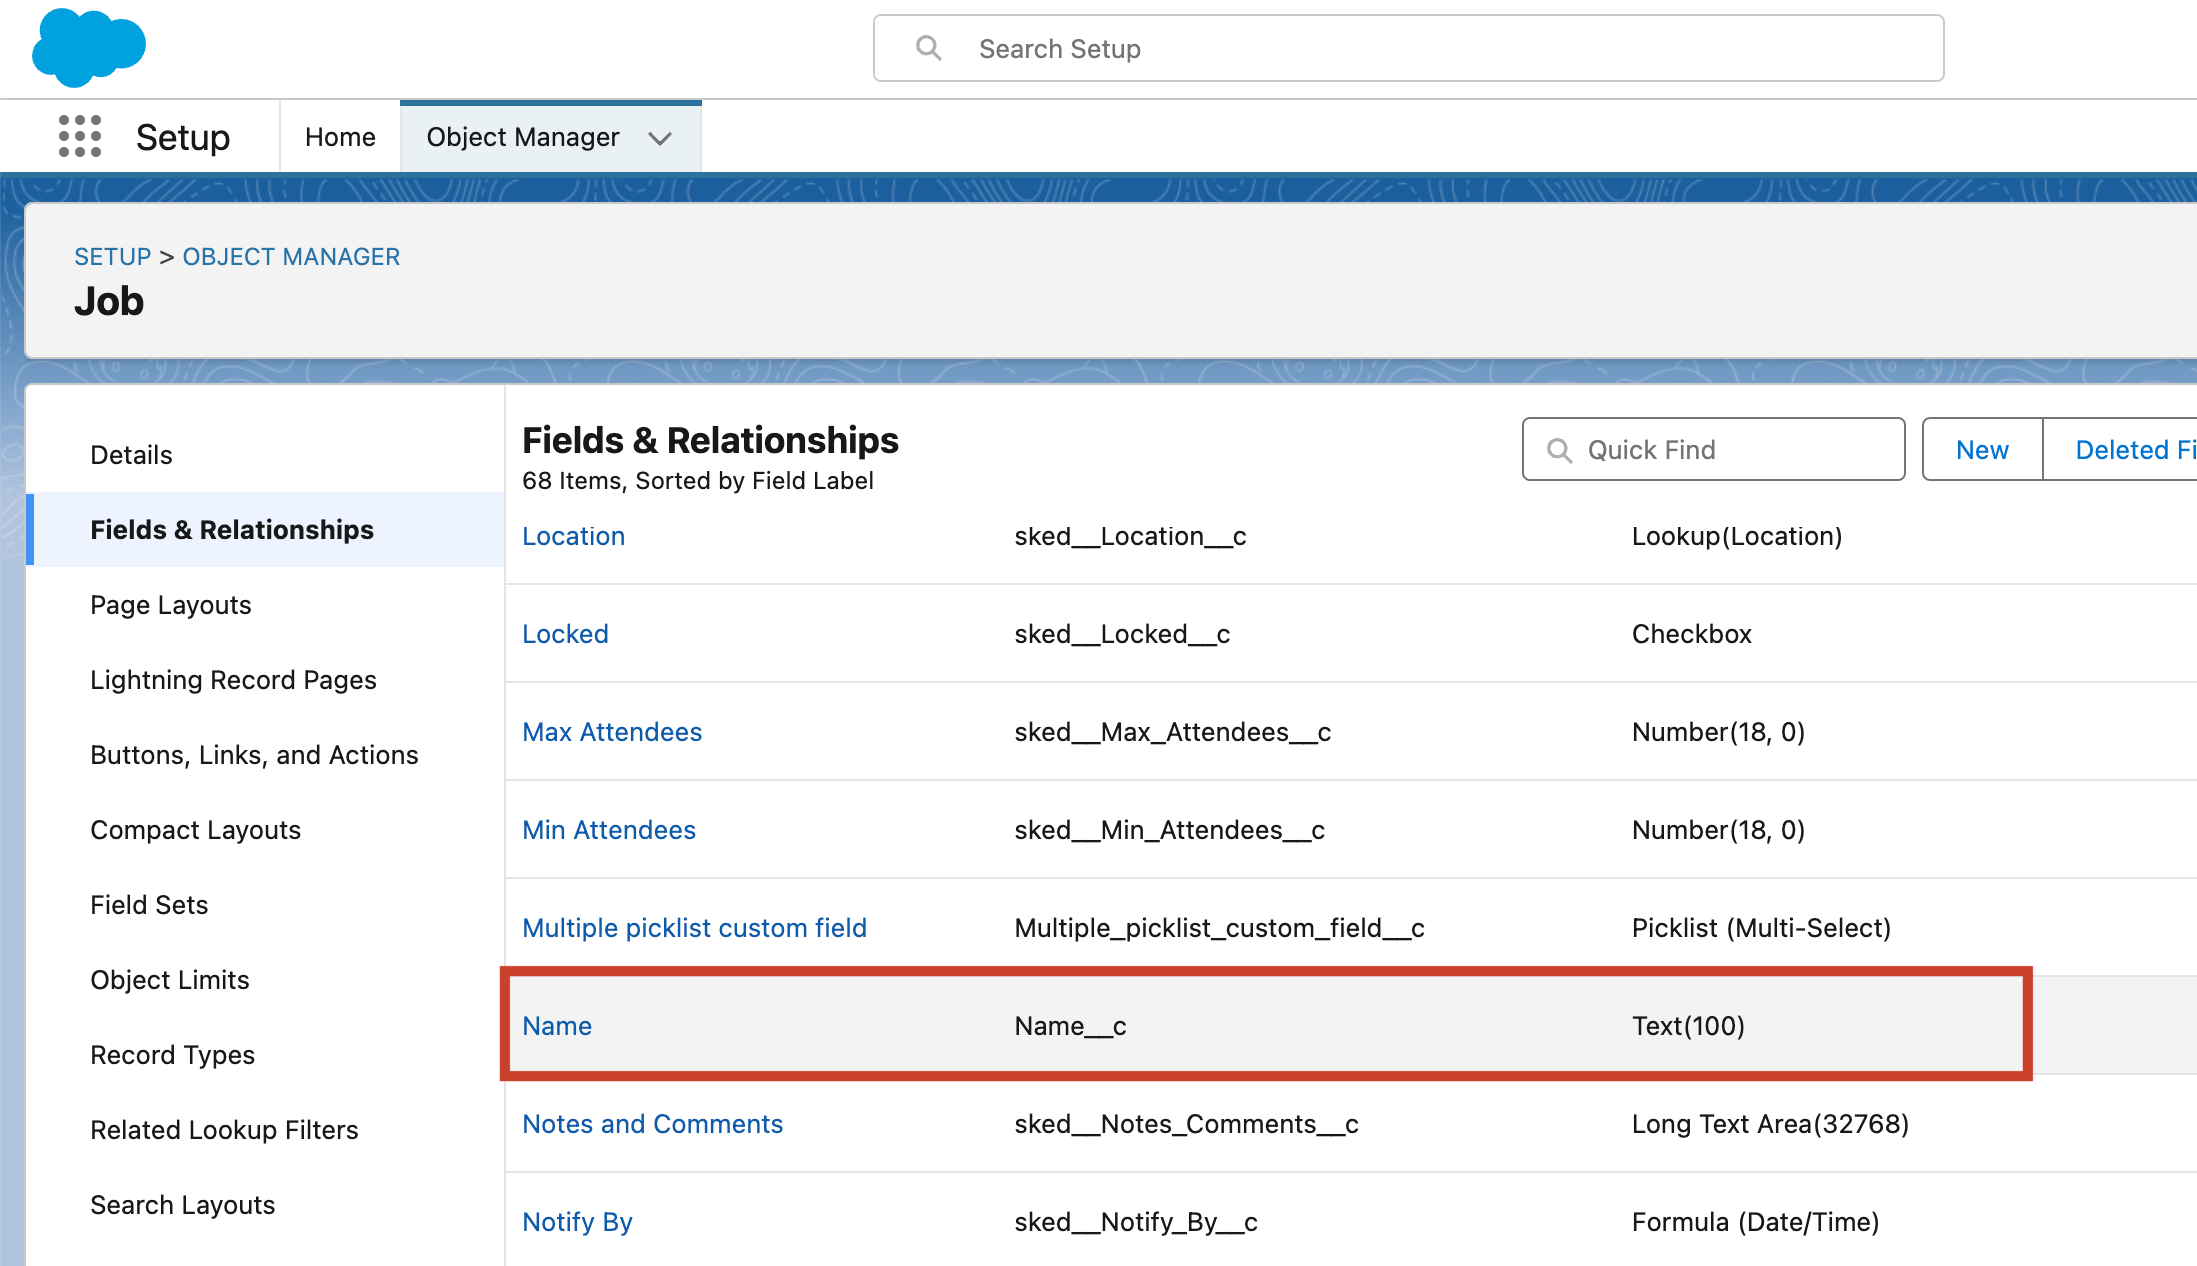
Once you have successfully created the new field, it should appear in the Custom Fields & Relationships section of the Job object page.
Also, see Manage custom fields in Skedulo for Salesforce.
Known issues
When you create Auto Number custom fields in Salesforce, you may experience issues where they do not backfill values to existing jobs if you don’t select the Generate Auto Number for existing records checkbox during creation.
Reference a custom object
If you set up a custom field that references a custom object (i.e., an object outside the standard set of Skedulo objects) then you must ensure that the object has the following fields:
-
UID: The unique key field for records of this object.
-
Name: A descriptor field that is used when displaying records of this object.
Important
- If you do not define these fields on the referenced custom object, then Skedulo cannot render the custom field correctly.
You also need to ensure that Skedulo users have permission to access these objects. For Salesforce, this may mean using a Skedulo permission set to grant users “Read” access to the newly created object. For example, the Skedulo Base Permission Set provides “Read” permissions for all Skedulo objects.
Feedback
Was this page helpful?