Manage Salesforce account and location resource scores
Overview
Salesforce provides organizations with a way to control their resource allocation at either the “Account” or “Location” level using “Resource Scores.” A resource can be included or excluded from being allocated to:
-
Work associated with a specified account.
-
From a location (that can be associated with an account).
Note
If a resource is excluded at the account level, they will not be allowed at any location associated with that account.These constraints apply to the Optimize and Suggest engine features and to work that is allocated to a resource from the work details page. Work items that are manually allocated, for example from the swimlane, will not be constrained by these scores.
Inclusion list for a location or account
Resources that are marked “whitelisted” in Salesforce will be considered as the only available resources when allocating work to a resource, location, or account using the Optimize or Suggest engines, or using the work details page.
Exclusion list for a location or account
Resources that are marked “blacklisted” in Salesforce will be excluded from being allocated work for that location or account when using the Optimize or Suggest features, or using the work details page.
Care should be taken when allocating work manually in the swimlane views. Work that is allocated by dragging and dropping items in the swimlane views overrides the inclusion and exclusion list constraints and could result in an excluded resource being allocated to a work item.
Create a new location resource score
To create a new location resource score in Salesforce, perform the following:
-
Using Salesforce Lightning, locate and select “Locations” via the “App Launcher.”
-
Select a location from the list (to view all available, ensure the list view is set to “All”).
-
With the chosen location’s details open, check the box named “Requires Whitelist.”
-
Click on the tab named “Related.”
-
Scroll down to find “Location Resource Scores” and click “New.”
-
Complete all required fields highlighted red, and check one of the approval options provided:
-
Location.
-
Resource.
-
Whitelisted (i.e., “Include”) or Blacklisted (i.e., “Exclude”).
-
-
Save the configuration.
Once in location inclusion (i.e., the location resource score) has been saved, it will be visible on Skedulo in the data table inclusions list.
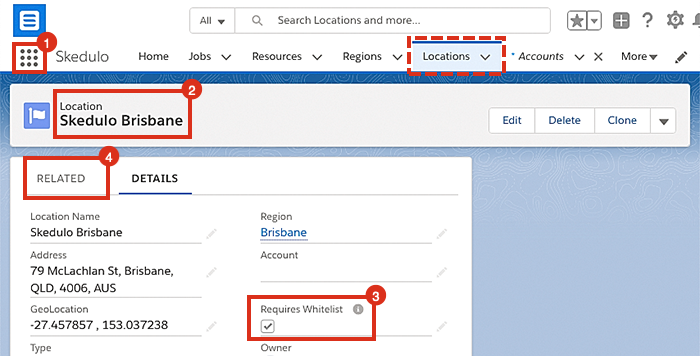
Viewing a location’s details in Salesforce CRM.

How to create a new location resource score using Salesforce CRM.
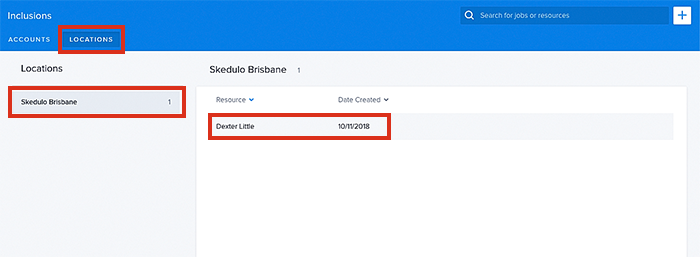
Viewing the data table for location inclusions, in Skedulo.
Also, see View inclusions and View exclusions.
Create a new account resource score
To create a new account resource score in Salesforce, perform the following:
-
Using Salesforce Lightning, locate and select Resources via the App Launcher.
-
Select a resource from the list (to view all available, ensure the list view is set to All).
-
With the chosen resource’s details open, click on the tab named Related.
-
Scroll down to find Account Resource Scores and click New.
-
Complete all required fields highlighted red, and check one of the approval options provided:
-
Account.
-
Resource.
-
Whitelisted (i.e., Include) or Blacklisted (i.e., Exclude).
-
-
Save the configuration.
Once the account inclusion (i.e., the account resource score) has been saved, it will be visible on Skedulo in the data table inclusions list.
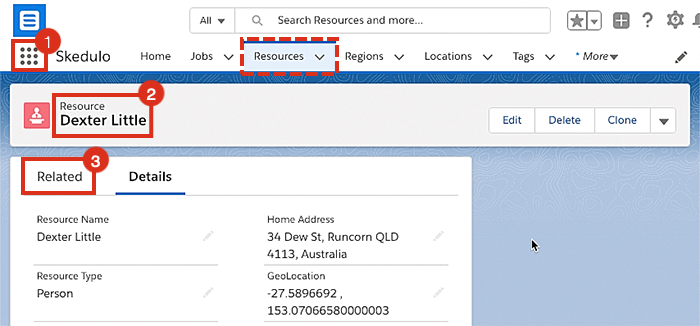
Viewing a resource’s details in Salesforce CRM.
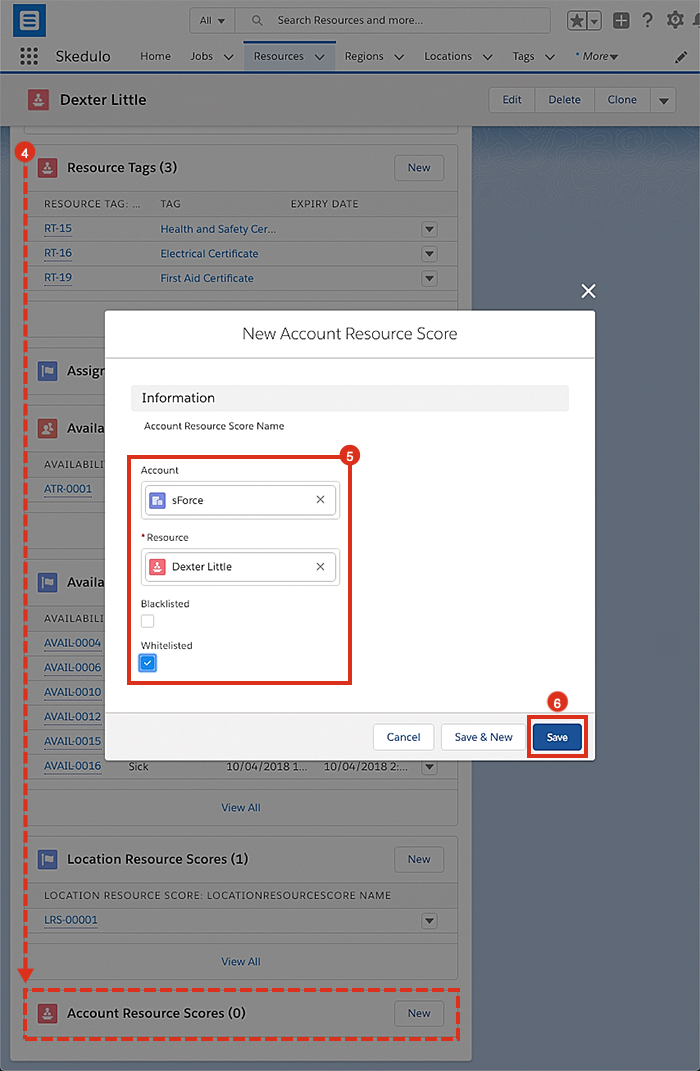
How to create a new account resource score using Salesforce CRM.
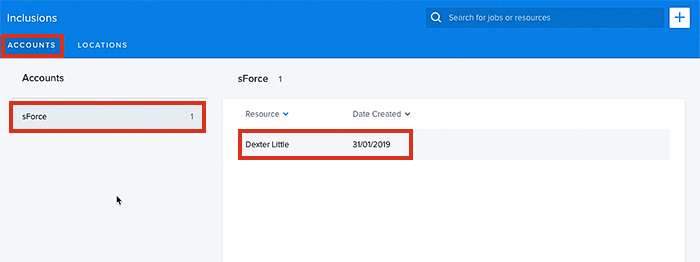
Viewing the data table for account inclusions, in Skedulo.
Note
All work must have an Account Name for account resource scores to work.Feedback
Was this page helpful?