Get started with Recurring activities
Prerequisites
The Recurring activities extension must be enabled in your team. Contact your Customer Success Manager for more information on how to do this.
Note
This extension is only available on the Skedulo Pulse Platform.Add Recurring activities to your web app navigation
After your Skedulo Customer Success Manager has added the extension to your team, an administrator can complete the setup.
There are three steps to the navigation menu configuration:
- Add an Activities section to the navigation menu.
- Replace the activities Activities page with the Activities list view page.
- Add Recurring activities to the navigation menu.
The instructions below cover how to create an Activities item in the navigation menu, under which you can access the Activities list and Recurring activities page. The same principles can be used to create navigation items in different ways and with different labels to suit your particular use cases.
Step 1/3: Add an Activities section
To add an Activities section to the navigation menu, do the following steps:
- In Settings > Web app configuration > Navigation menu, click Add menu item.
- In Menu item name, enter
Activities. - Under Type, select No link.
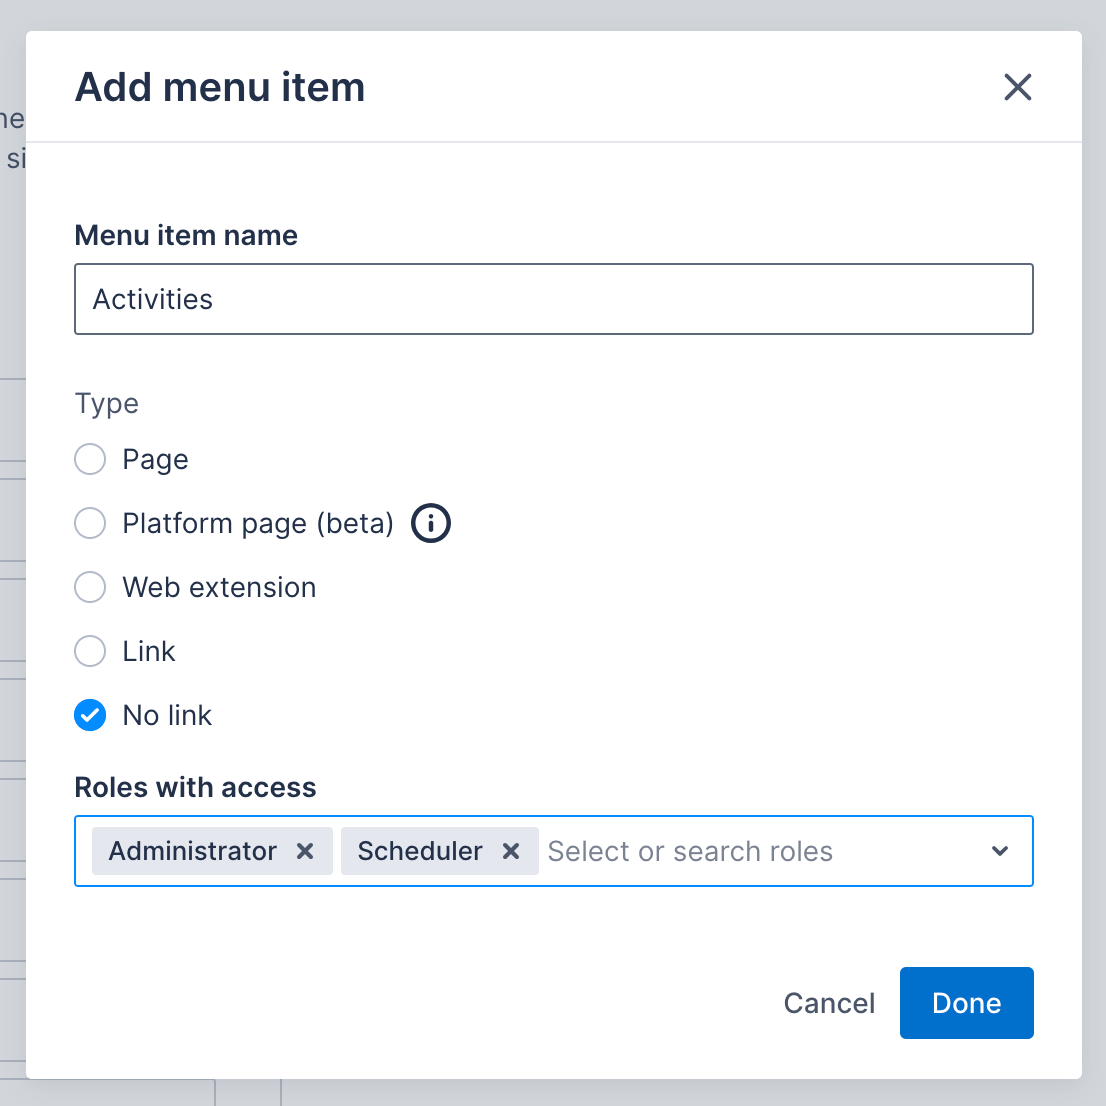
- Add the Roles with access as required.
- Click Done. The menu item will be at the bottom of the list.
- Drag and drop the Activities menu item to be the parent of the existing Activities item.
Step 2/3: Update the Activities page to the Activities list view
To update the Activities page to the list view, do the following steps:
- In the web app, navigate to Settings > Web app configuration > Navigation menu.
- Click the pencil icon on the Activities child menu item. The Edit menu item window displays.
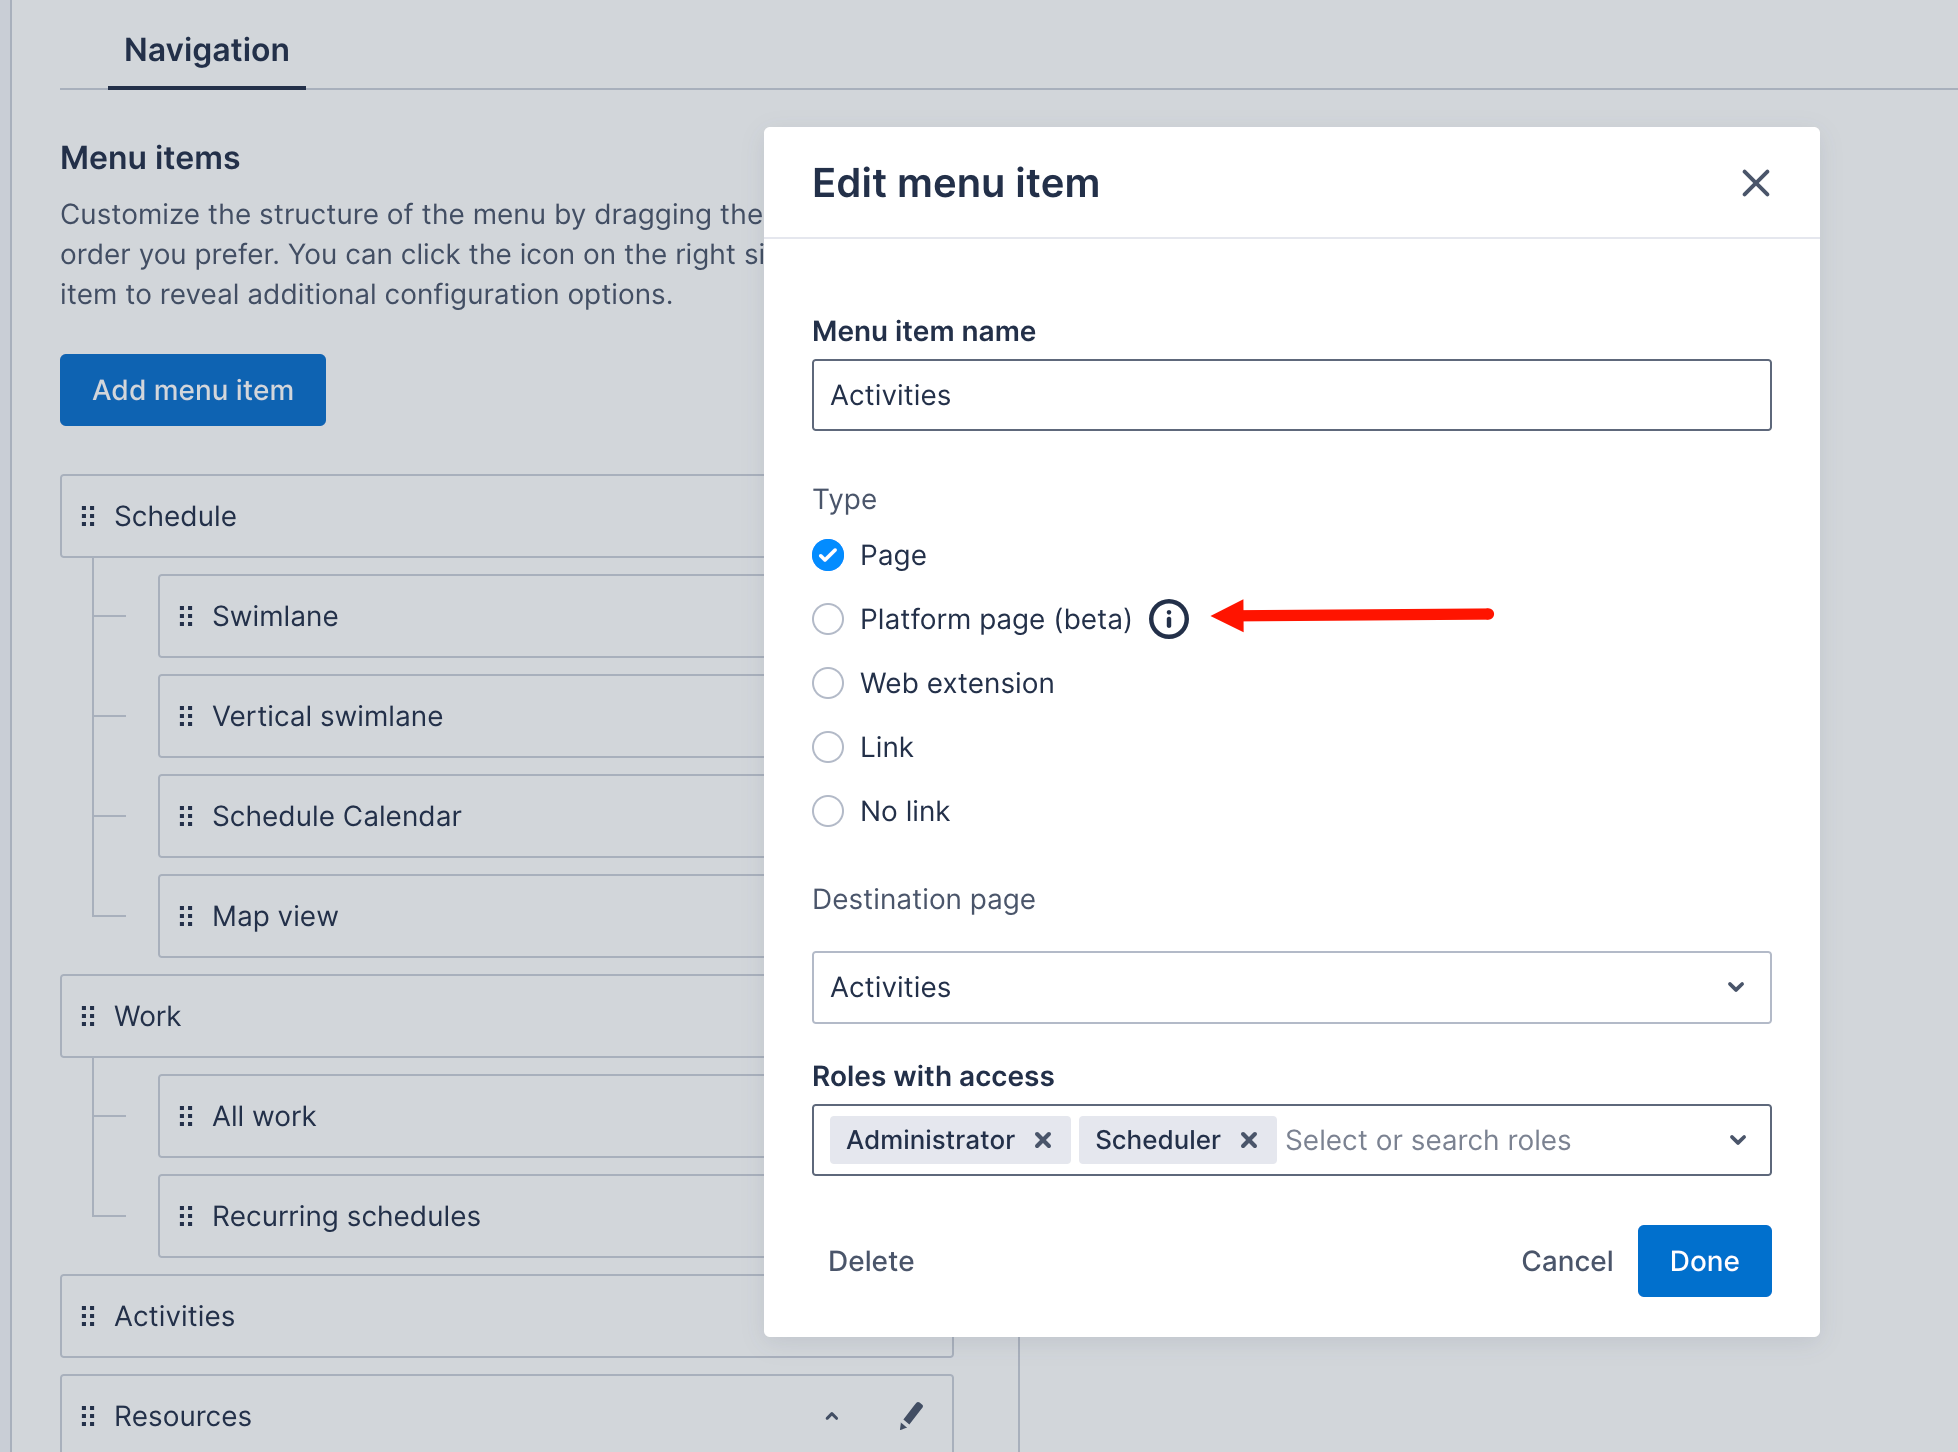
- Change the Menu item name to
All activities, or another name of your choosing. - Select Platform page.
- From the Destination platform page drop-down, select Activities list.

- Make changes to the Roles with access, if required.
- To save your changes, click Done. Or click Cancel to return to the settings without saving.
Step 3/3: Add the Recurring activities page
To add Recurring activities to the navigation menu, do the following steps:
- In Settings > Web app configuration > Navigation menu, click Add menu item.
- In Menu item name, enter
Recurring activities. - Under Type, select Platform page.
- From the Destination platform page drop-down, select Recurring activities list.
- Add the Roles with access as required.
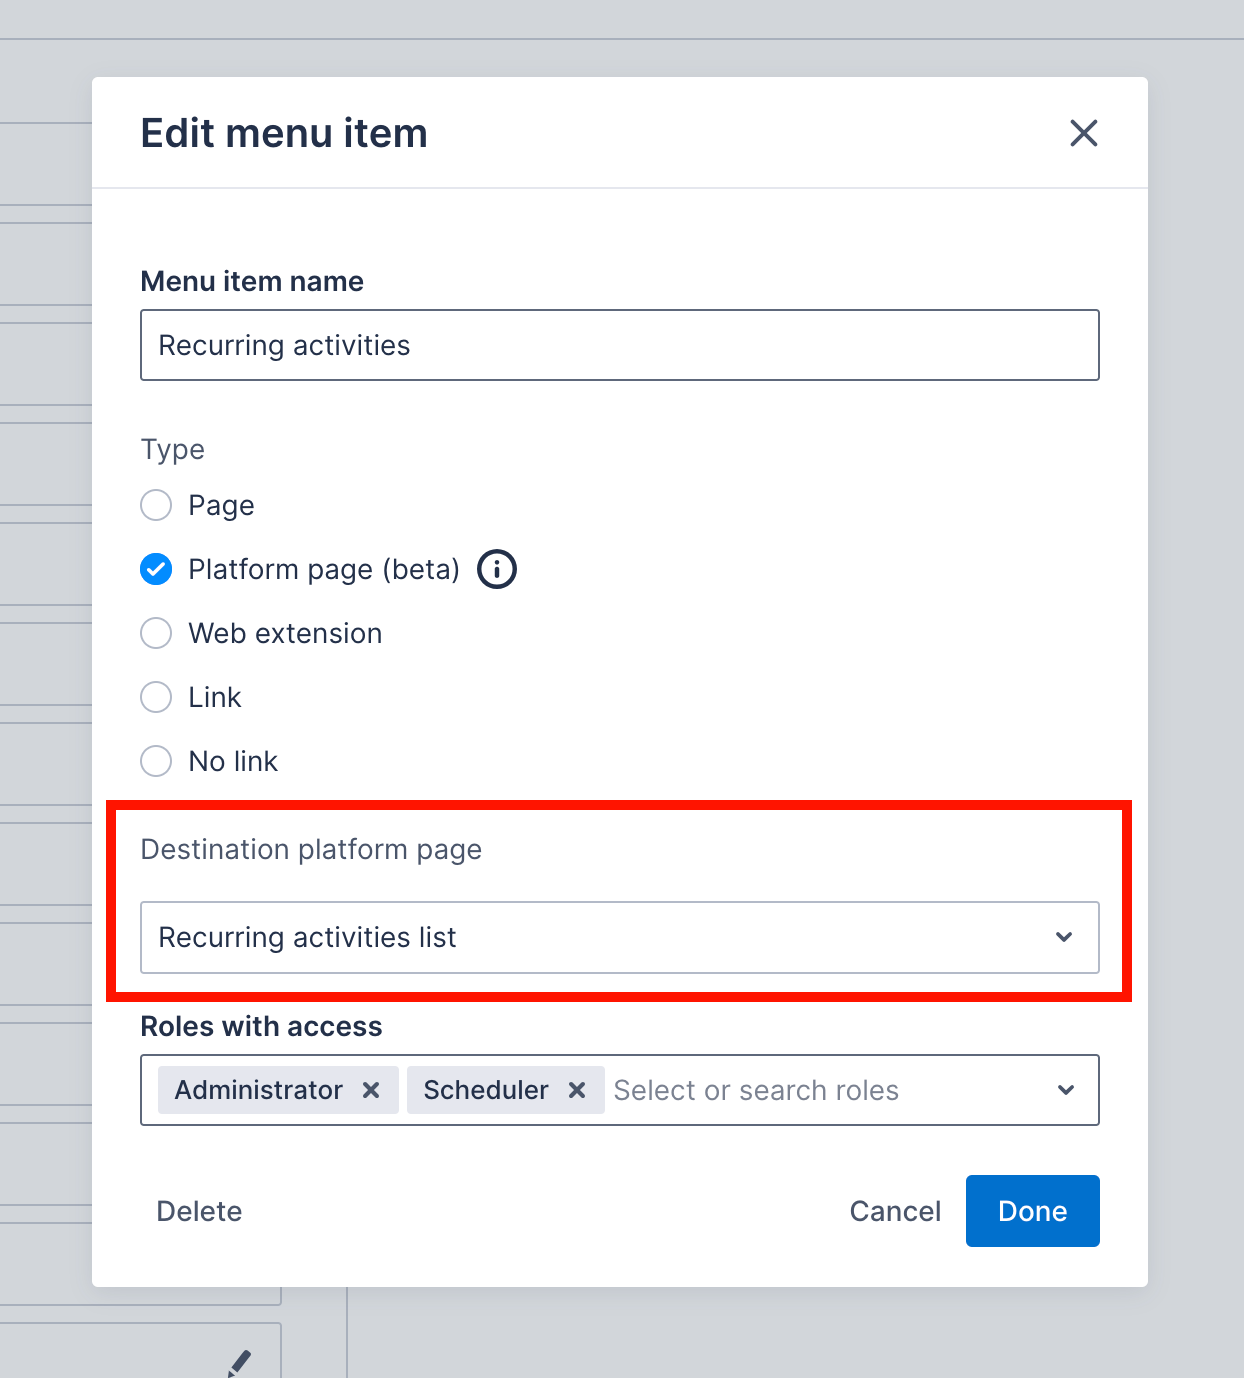
- To save your changes, click Done. The menu item will be at the bottom of the list.
- Drag the Recurring activities menu item under the Activities parent item.
- Click Save.
Feedback
Was this page helpful?