Manage recurring schedules
Overview
The following document shows you how to change, modify, or delete a recurring schedule.
A recurring schedule allows a scheduler to create work items that occur in a repeating pattern. It groups work items in a recurring schedule. If you haven’t created a recurring schedule yet, refer to Create and use recurring schedules for more information.
Prerequisites
Only users with the Administrator or Scheduler role or users with the following permission can manage a recurring schedule:
- Scheduling > Modify recurring schedules
Modify a recurring schedule
Extend a recurring schedule
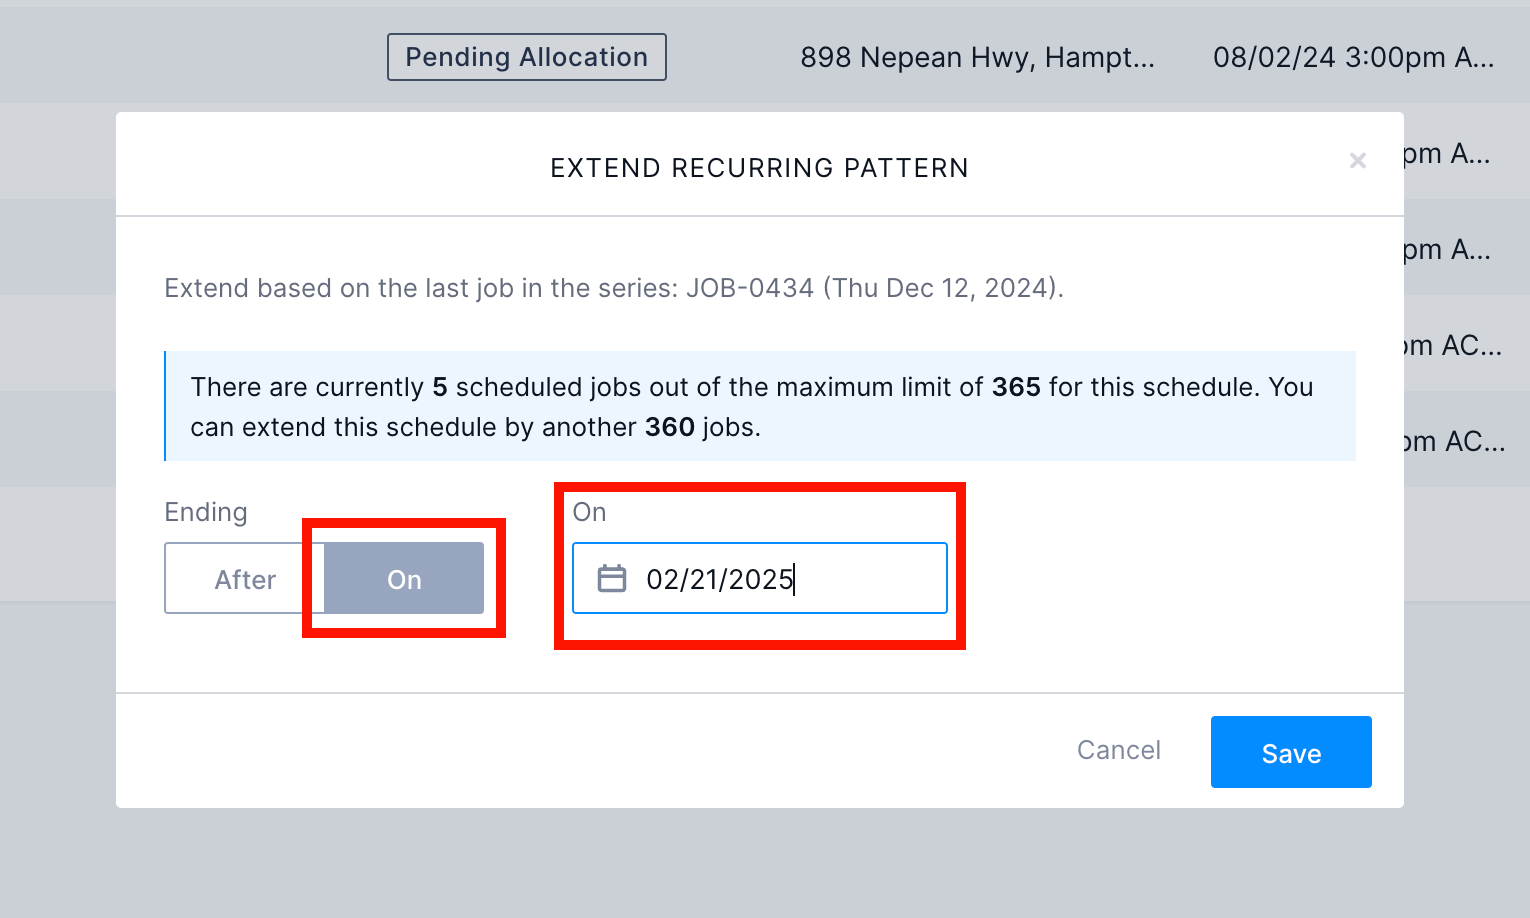
Recurring schedules are created with a defined endpoint - either after a certain number of occurrences or at a certain date. The schedule can be extended if more occurrences are required after the date that was originally required.
Notes
-
The extension will be based on the last job in the series.
-
The total number of scheduled work items cannot exceed 365. This limit applies only to scheduled work items, so you can extend the recurring schedule further as work items are completed.
Steps
To extend a recurring schedule based on the last job in the series, do the following steps:
-
On the recurring schedule record page, click Actions > Extend. The Extend recurring pattern modal displays.
-
Do one of the following:
a. To extend the schedule by a specific number of occurrences, click AFTER and enter the desired number.
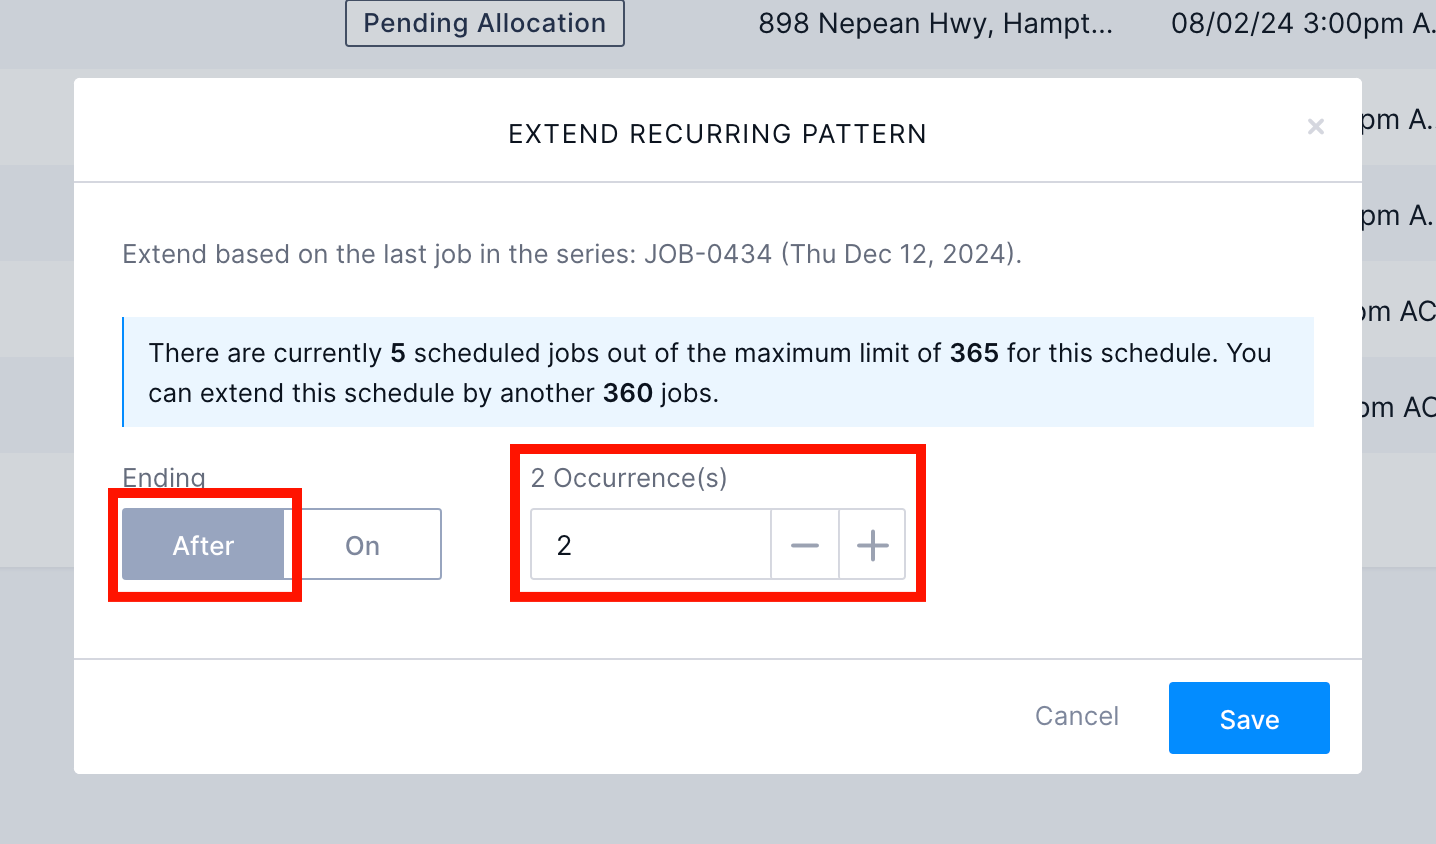
b. To extend the schedule to a specific date, click ON and select the date from the calendar in the corresponding field.
-
Click Save to apply the changes, or Cancel to return to the recurring schedule record without making changes.
Modify work in a recurring schedule
Edit recurrence of a work item in a recurring schedule
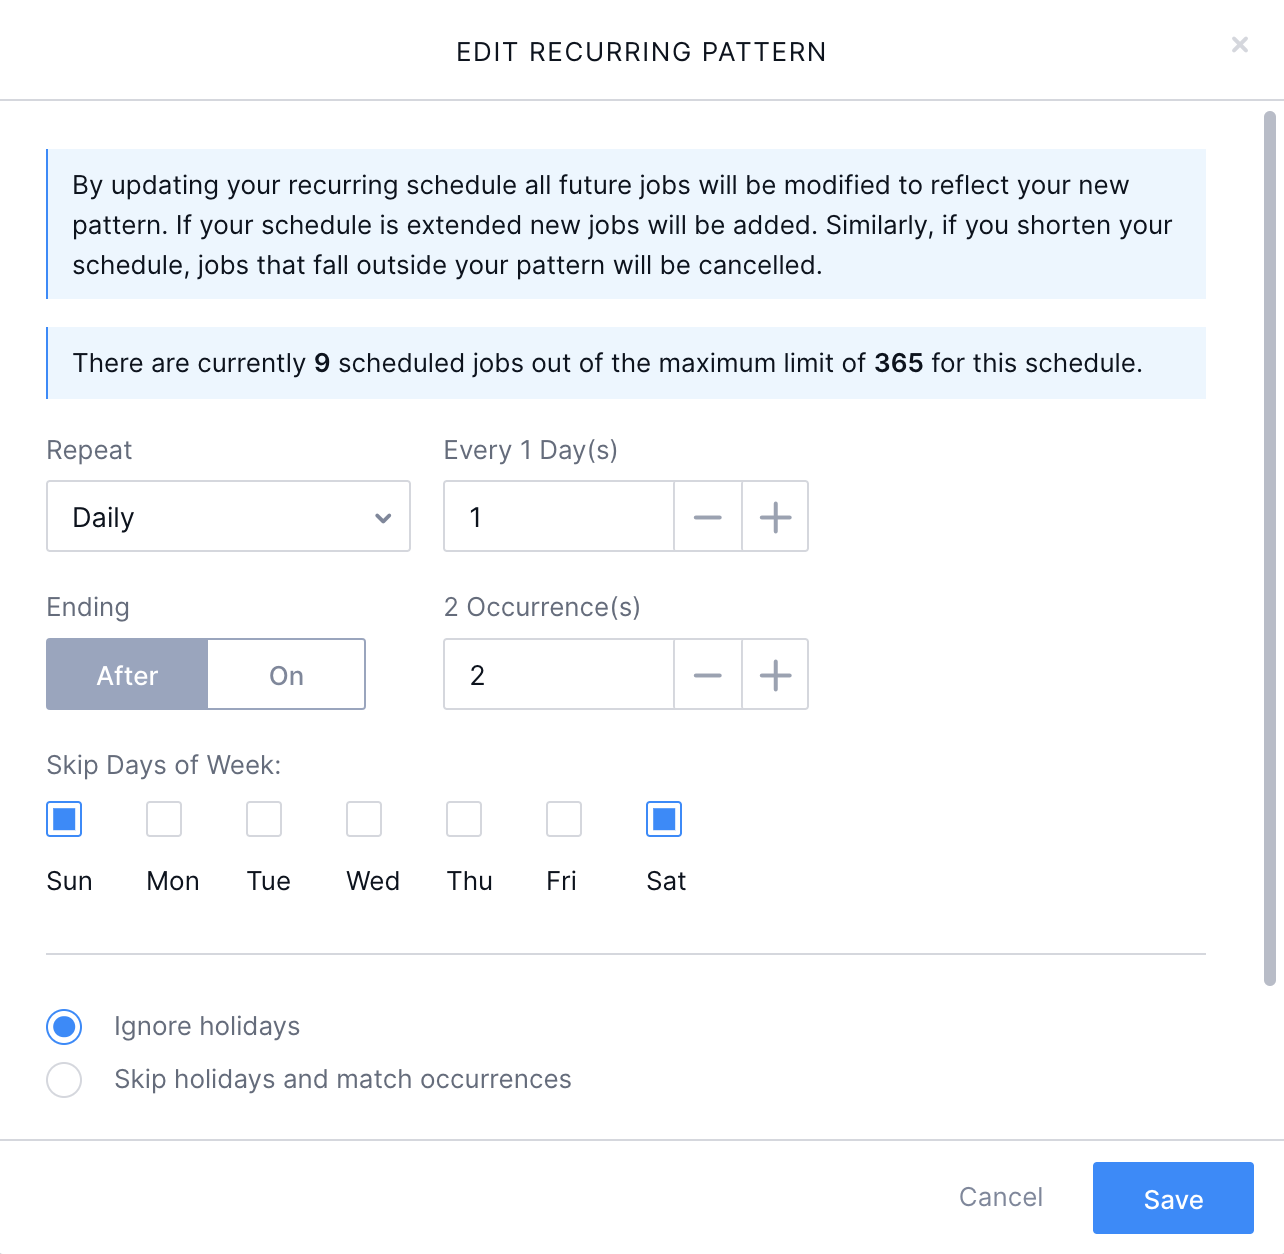
A scheduler can reconfigure all future work items in the series.
Steps
To edit the recurrence of a work item, follow these steps:
-
Go to the Recurring schedules page of the Work console and choose a recurring schedule.
-
On the recurring schedule page, click the vertical ellipse icon next to the work item you want, then click Edit Recurrence.
-
The Update Recurring Pattern modal displays. Configure the recurring pattern as you want, and then click Save to confirm your action.
-
To extend the schedule by a specific number of occurrences, click AFTER and enter the desired number.
-
To extend the schedule to a specific date, click ON and select the date from the calendar in the corresponding field.
Note
You can also trigger the Update Recurring Pattern modal when you change the date of a work item in a recurring schedule. -
Important
-
By updating your recurring schedule, all future work items will be modified to reflect your new pattern. If your schedule is extended, new work items will be added. Similarly, if you shorten your schedule, work items that fall outside your pattern will be canceled.
-
Changes cannot be applied to work items (within the series) that were created before the item you are editing. This is determined by the job name. For example, if there are JOB-OOO1, JOB-0002, and JOB-0003 in the series, and you make changes to JOB-0002, these changes will be applied to JOB-0003 and later in the sequence, but not to JOB-0001.
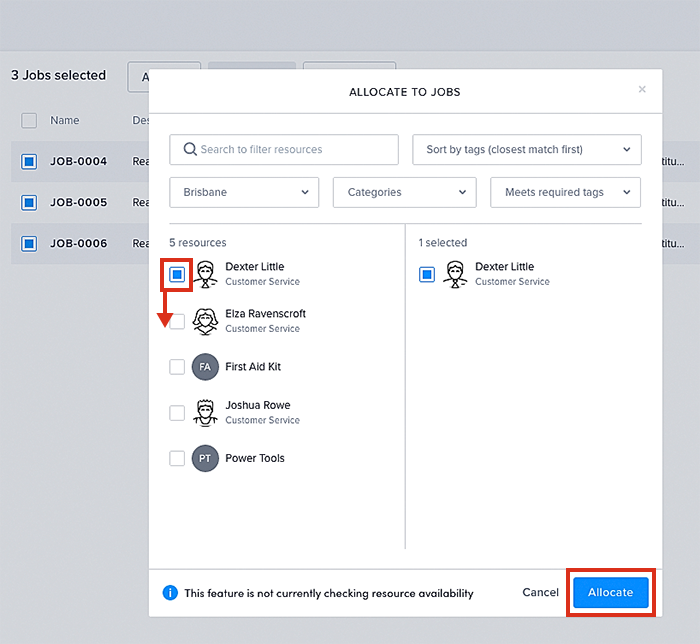
Allocate or deallocate resources in a recurring schedule
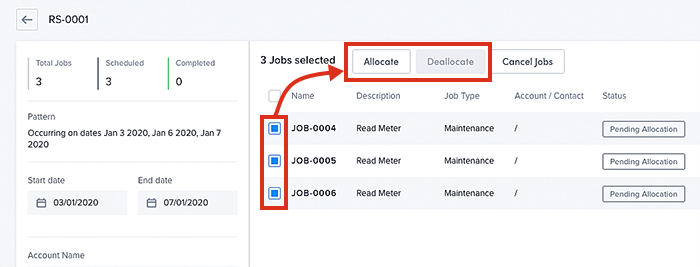
Schedulers can allocate one or more work items in a recurring schedule. In the same way, one or more jobs can be deallocated.
Steps
-
Navigate to Work console > Recurring schedules and choose a recurring schedule.
-
On the recurring schedule detail page, select work items that you want to allocate or deallocate.
-
Depending on the action you require, click on the Allocate or Deallocate buttons that appear at the top of the page.
a. If you select Allocate, the Allocate to jobs dialog appears. Select one or multiple resources to add to the work items in the recurring schedule.
b. If you select Deallocate, a confirmation pop-up apppears. Click OK to confirm your action.
Notes
Regarding Allocation:
- The button will be disabled if the organization has Multiple resource requirements enabled.
- The resource selection modal does not filter out unavailable resources (due to multiple work items).
- You can allocate resources to any work item that is not locked.
Regarding Deallocation:
- The button will be disabled if selected work items have no allocations.
- Allocations are considered invalid if they are on any of the following types of work items:
- Locked work items.
- “Completed” work items.
- “In Progress” or “Checked In” work items.
- Once selected, it will produce the same behavior as when bulk deallocating from the work items table, console, swimlane, or work pages (new and old). A single toast message will state how many work items have been updated.
Cancel work items in a recurring schedule
The easiest way to cancel work items on a recurring schedule is via the recurring schedules page of the Work console.
Steps
To cancel work items, do as follows:
-
Go to the Recurring schedules page of the Work console and choose a recurring schedule.
-
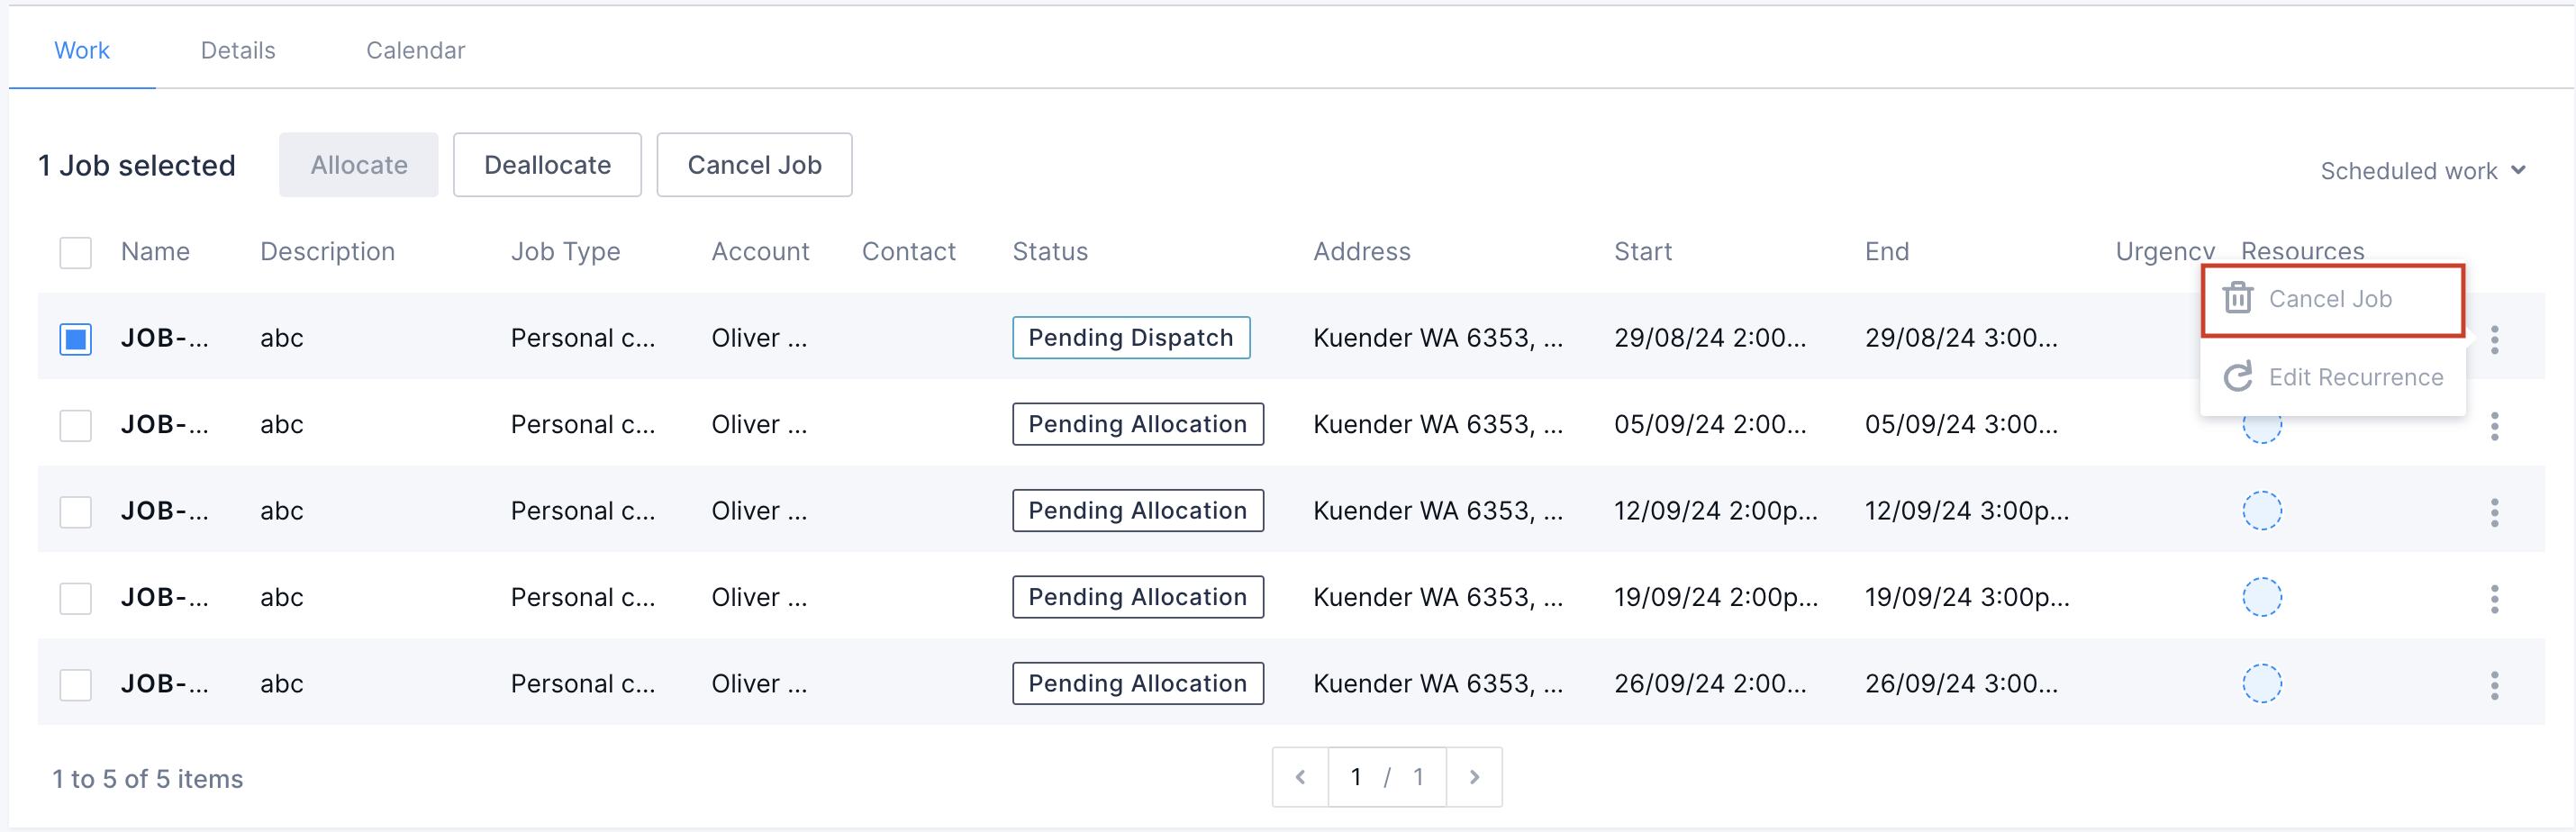
On the recurring schedule page, select multiple work items that you want to cancel and then click Cancel job.
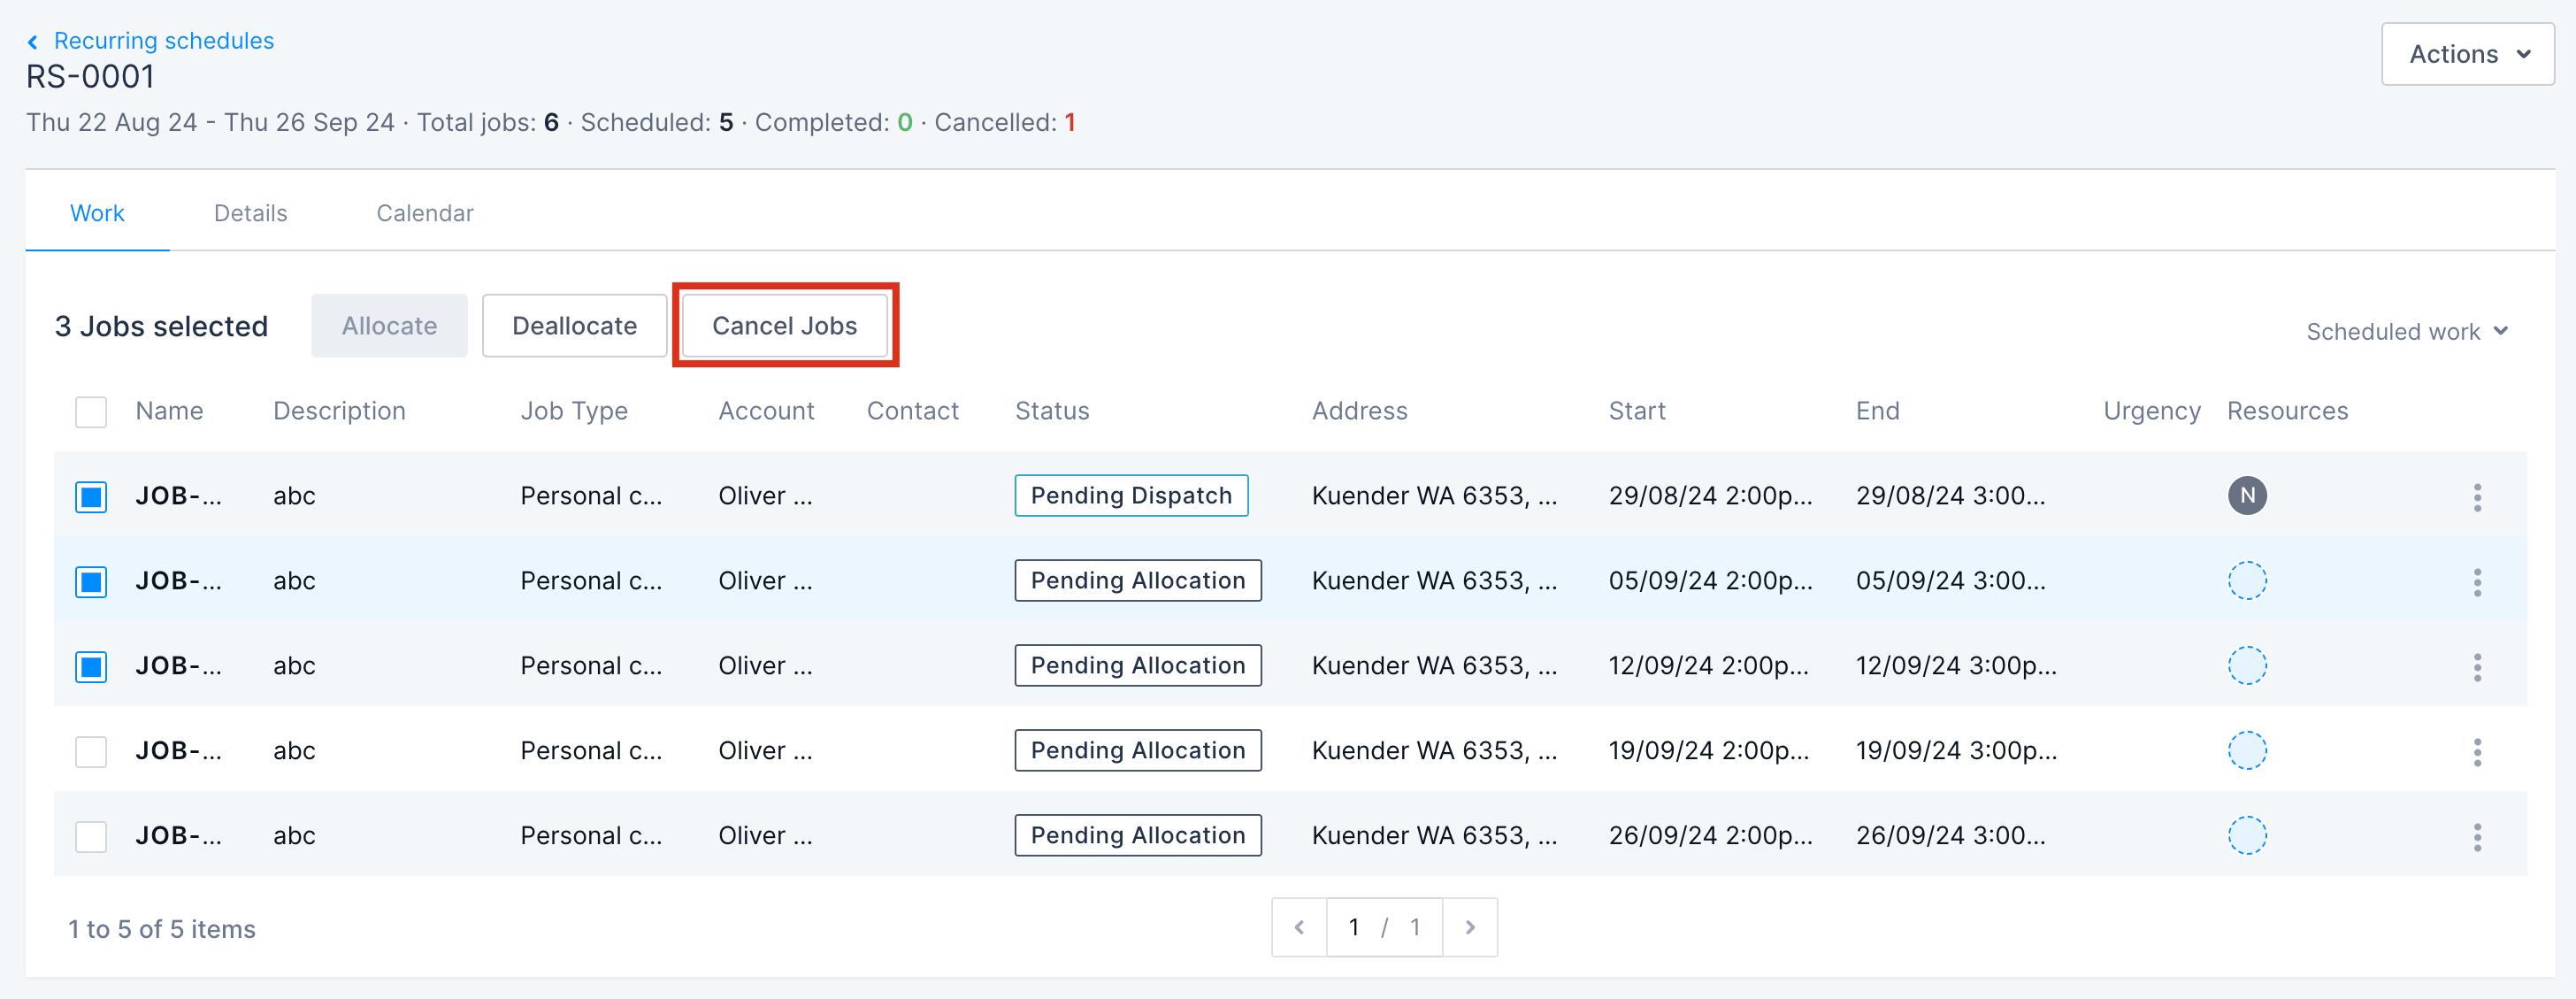
If you want to cancel only one work item, click Cancel Job via the three-dot menu.
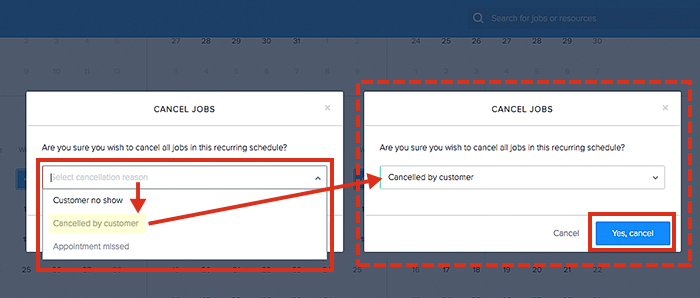
-
The Cancel jobs dialog appears, select one of the cancelation reasons from the drop-down list then click Yes, cancel.
Important
Currently, you can only cancel a work item from a recurring schedule, you cannot delete it.Tip
An alternative way to cancel work items in a series is through the Work details view.Copy and replace tasks on a recurring schedule
A scheduler can copy and replace tasks from one work item in a recurring schedule to the remaining work items in the recurring schedule that are still to occur.
The following rules apply to tasks that you want to apply across a recurring schedule:
- Any tasks on recurring work items, starting at the same time or after the current work item, will be overwritten to match the task list on the selected work item.
- If you are copying tasks from a work item in the recurring schedule that does not have a start time, then the replace action will be applied to all items in the recurring schedule.
- Queued work items (with no start time) will not be updated.
- A loading indicator (spinner) will be displayed while waiting for the copy process to complete.
- After the copy process completes successfully, a confirmation message displays.
- If there is an error, an error message displays to inform that the update failed.
- The task order will be maintained.
Steps
To copy tasks on a recurring schedule, follow these steps:
-
Go to a work item’s work details page and switch to the Tasks tab.
-
Click Copy tasks.
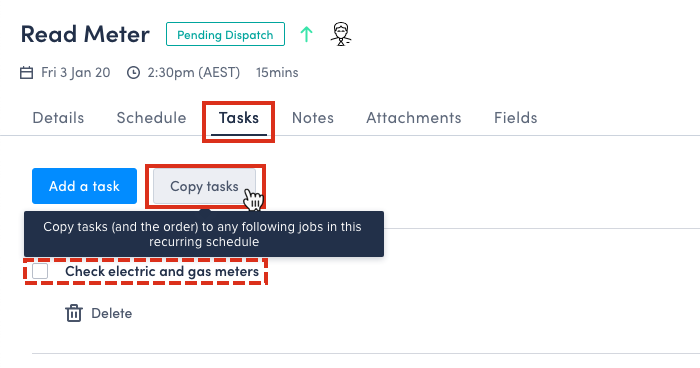
-
The confirmation pop-up appears. Review the information, then click Copy tasks to confirm your action.

Note
For recurring schedules, tasks can only be copied and replaced using the Work page (via the “Tasks” tab).Feedback
Was this page helpful?