Allocate work using Pulse Allocation Experience (Beta)
Overview
Important
-
This feature is currently in beta.
-
Beta features should be considered “in development” and may not be fully supported or complete.
-
Beta programs are invaluable for helping to validate the value and impact of features through feedback and insights. If you would like to participate in beta programs and access this feature, please contact your Skedulo Customer Success Manager.
Note
-
The Pulse Allocation Experience is only available on the Skedulo Pulse Platform.
-
This feature is currently not compatible with the Suggest and Optimization features.
The Pulse Allocation Experience provides intuitive tools and clear indicators for a streamlined, informed allocation process, enabling schedulers to efficiently and confidently allocate work to resources based on essential data and selection criteria. It is also available in the Pulse Scheduling Experience.
Allocate resources using the Pulse Allocation Experience
Follow these steps to allocate resources using the Pulse Allocation Experience:
-
Go to the Details or Schedule tab of the Work details page of the work item you want.
-
Click Allocate to open the Allocation modal. Select one or more individuals from the list of available resources.
-
Click Allocate to confirm your action.
The Allocation modal
The Allocation modal displays a list of resources filtered to meet the work item’s criteria, including availability, location, and scheduling rules. The modal differs, depending on whether multiple resource requirements are in use, or not.
Allocate work from the allocation modal
The instructions in this section apply to work items that do not have multiple resource requirements.
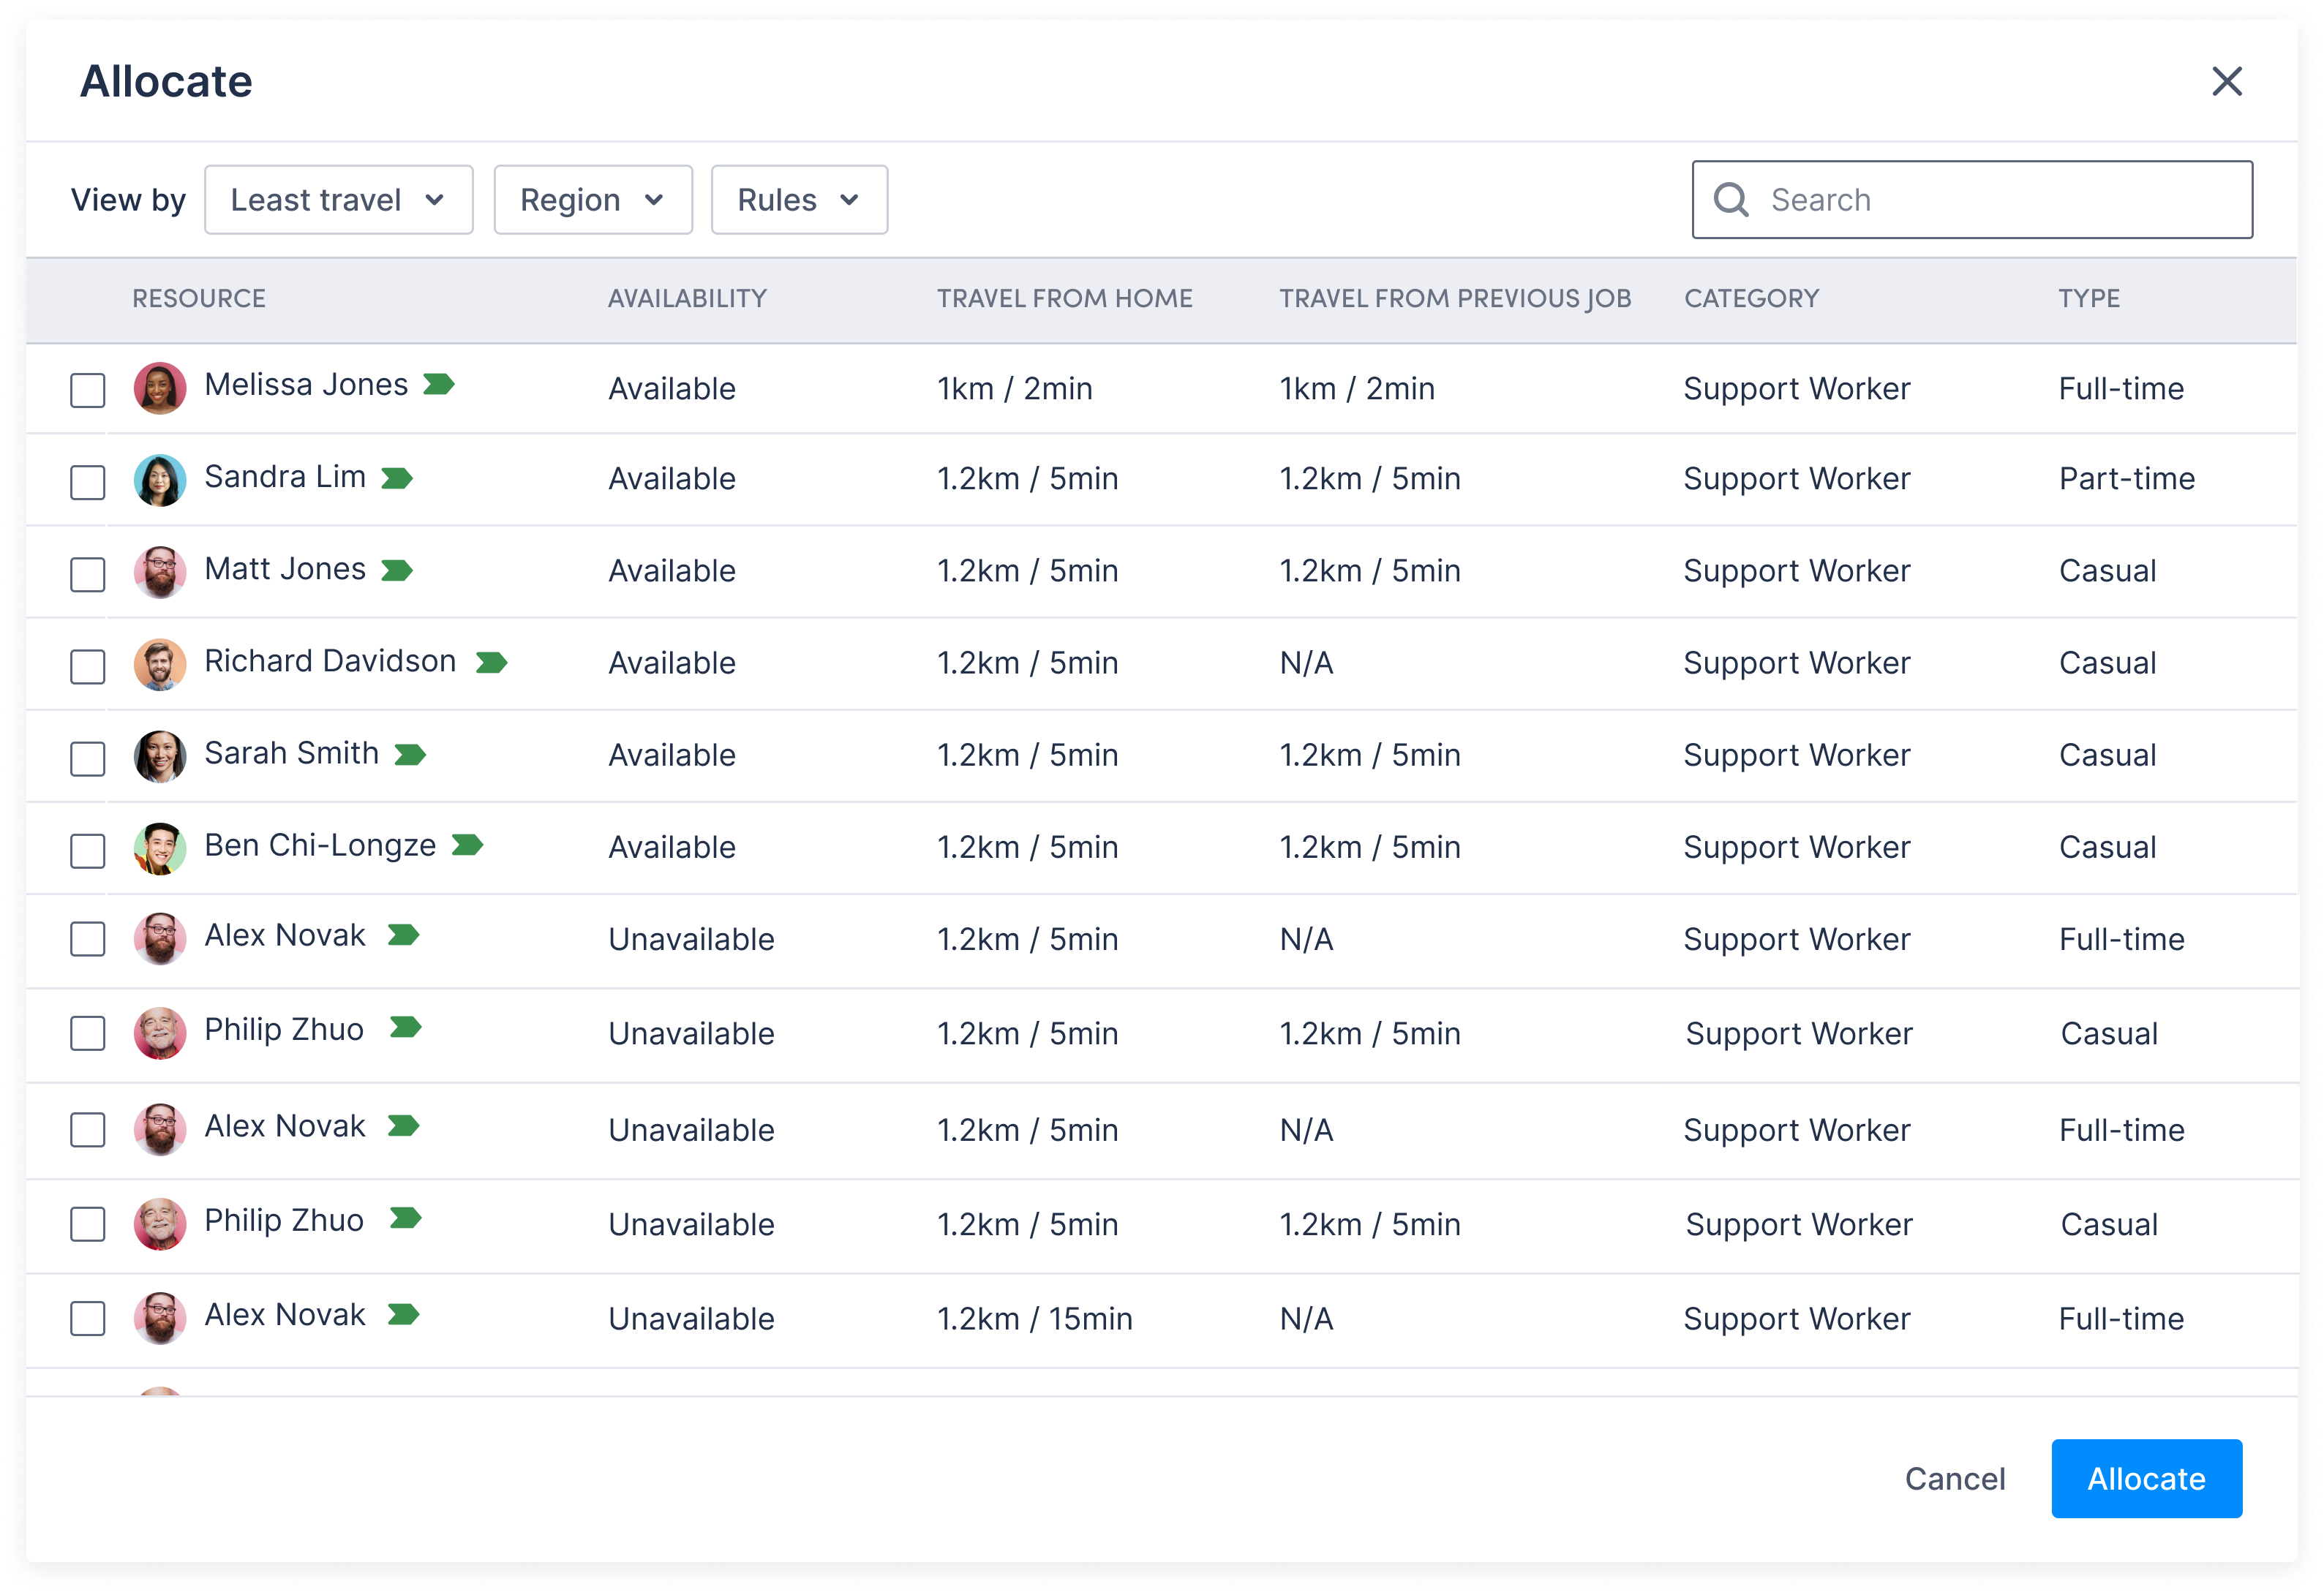
You can allocate resources quickly and accurately with essential insights. By default, the list is sorted by Least Travel, displaying only resources that meet the work item’s criteria.
Note
When you set a temporary region for a resource, travel time is calculated based on the temporary address.Use the Search field to quickly search for and select a resource, or use the View by drop-down to filter for more resources.
Allocate work with multiple resource requirements
When a job has multiple resource requirements and a user clicks Allocate from anywhere outside of the resource requirement modal, the following modal displays:
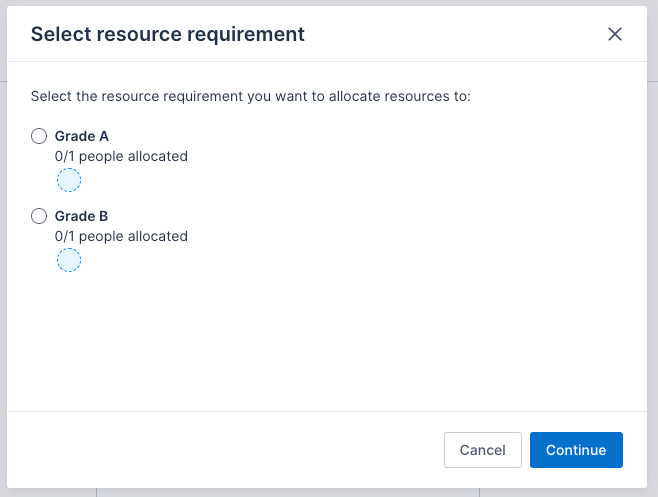
To allocate a resource, do the following steps:
-
Select the requirement that they want to allocate resources for. This determines the data that will be presented next.
-
Click Continue.
-
Select a resource. Only resources with matching skills tags appear in the allocation modal. If requirements do not have skill tags, all feasible resources will be shown and the requirement can be filled as normal.
Filter resource list
The Pulse Allocation Experience comes with some preconfigured filters. Custom views can be configured if you would like to specify how the data appears in the resource list. For more information on how to configure custom views, please see the Allocation views documentation.
The following standard drop-downs can be used to filter and sort resources based on predefined criteria:
-
Least travel: Display resources based on the shortest travel distance or duration from home or the last job. The distance and time will be shown in the corresponding columns.
-
Least utilized: Display resources with the lowest utilization over a specified time.
-
Region: Show resources based on the selected region.
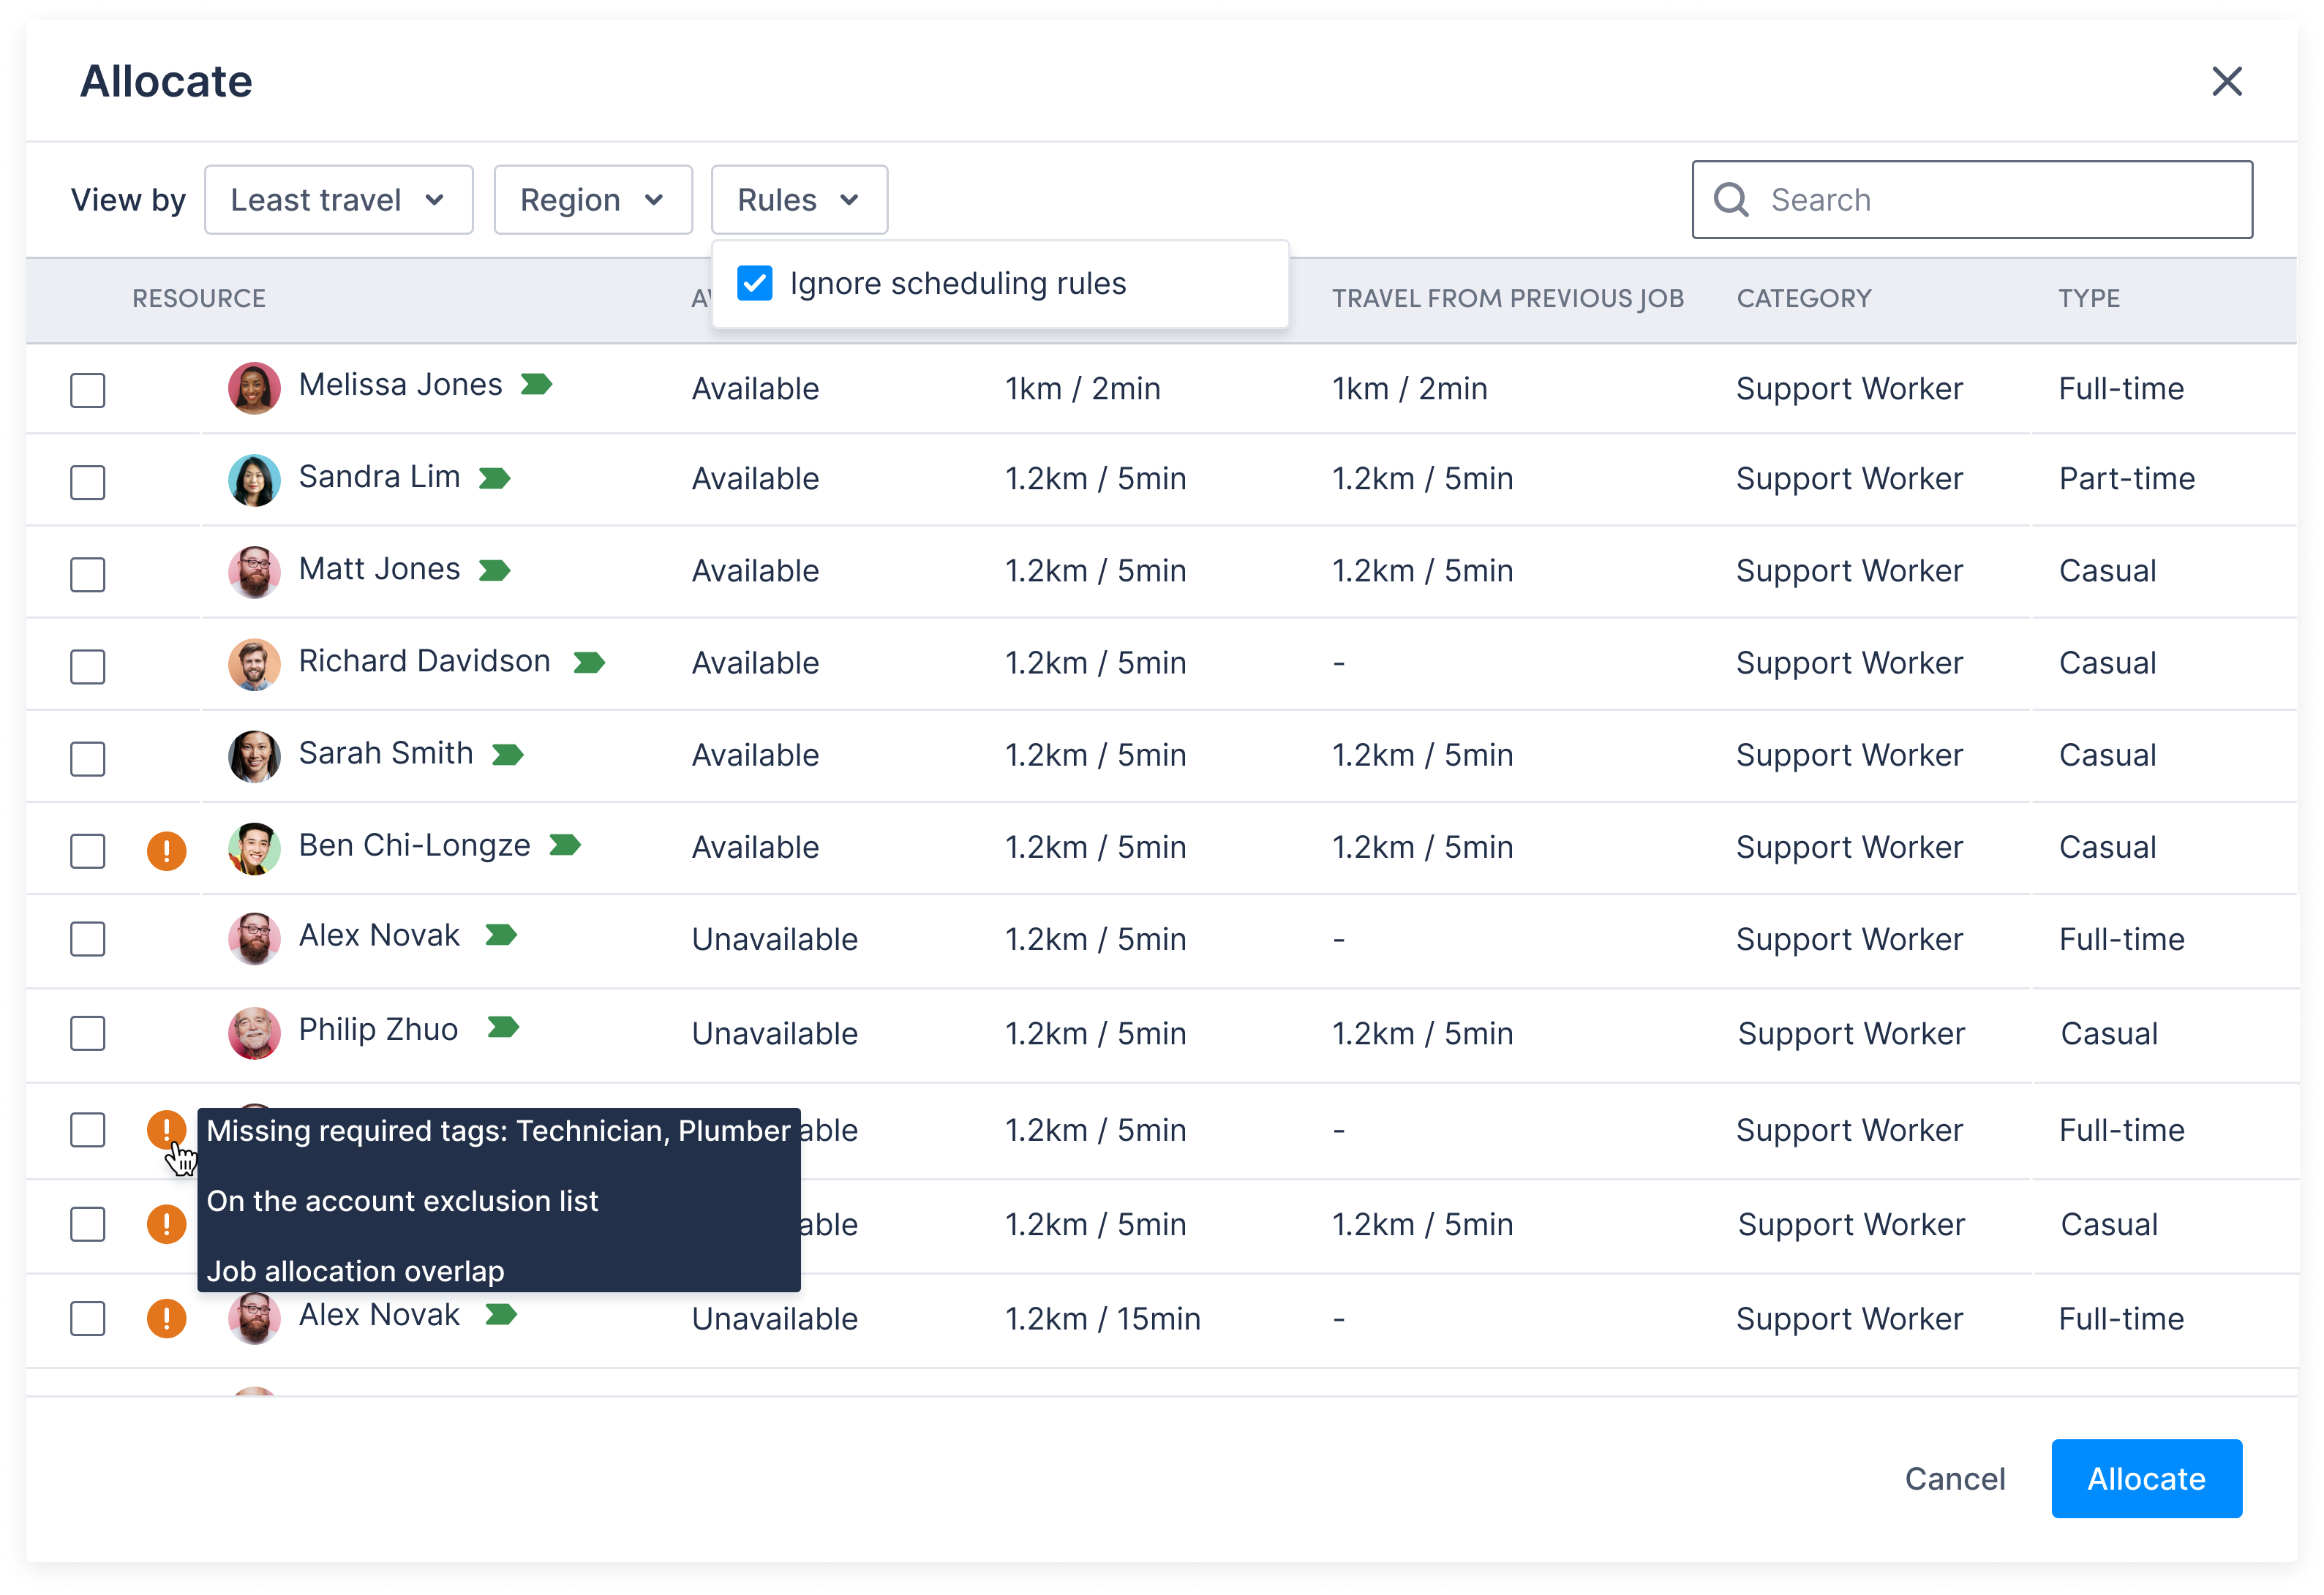
-
Rule: Enable Ignore scheduling rules to also display resources that do not comply with the scheduling rules.
When you choose to ignore scheduling rules, some resources may be displayed with a warning icon next to their avatar, indicating that they do not meet the work requirements. Hover over the icon to view all violated rules. You can still select those resources if needed.
View tags status
You can check a resource’s skill tag match status for a work item by hovering over the tags icon next to their name.
Matched tags icon
This icon appears when the resource matches all the required skill tags.
- Hover over this icon to see which skill tags the resource matches for the job.

Unmatched tags icon
This icon appears when the resource only partially matches or does not match any of the required skill tags.
- Hover over the icon to see which required skill tags the resource matches and which ones they do not match, or if none are matched at all.

Feedback
Was this page helpful?