Create a new Skedulo Plus form with Form Builder
Overview
Skedulo Pulse Platform administrators can create no-code mobile forms using the web-based Form Builder for their Skedulo Plus mobile application.
Create a new Skedulo Plus form
-
Navigate to Settings > Mobile app configuration > Mobile forms in the Skedulo web app.
-
Click Create form in the upper-right corner of the page.
-
Complete the form details:
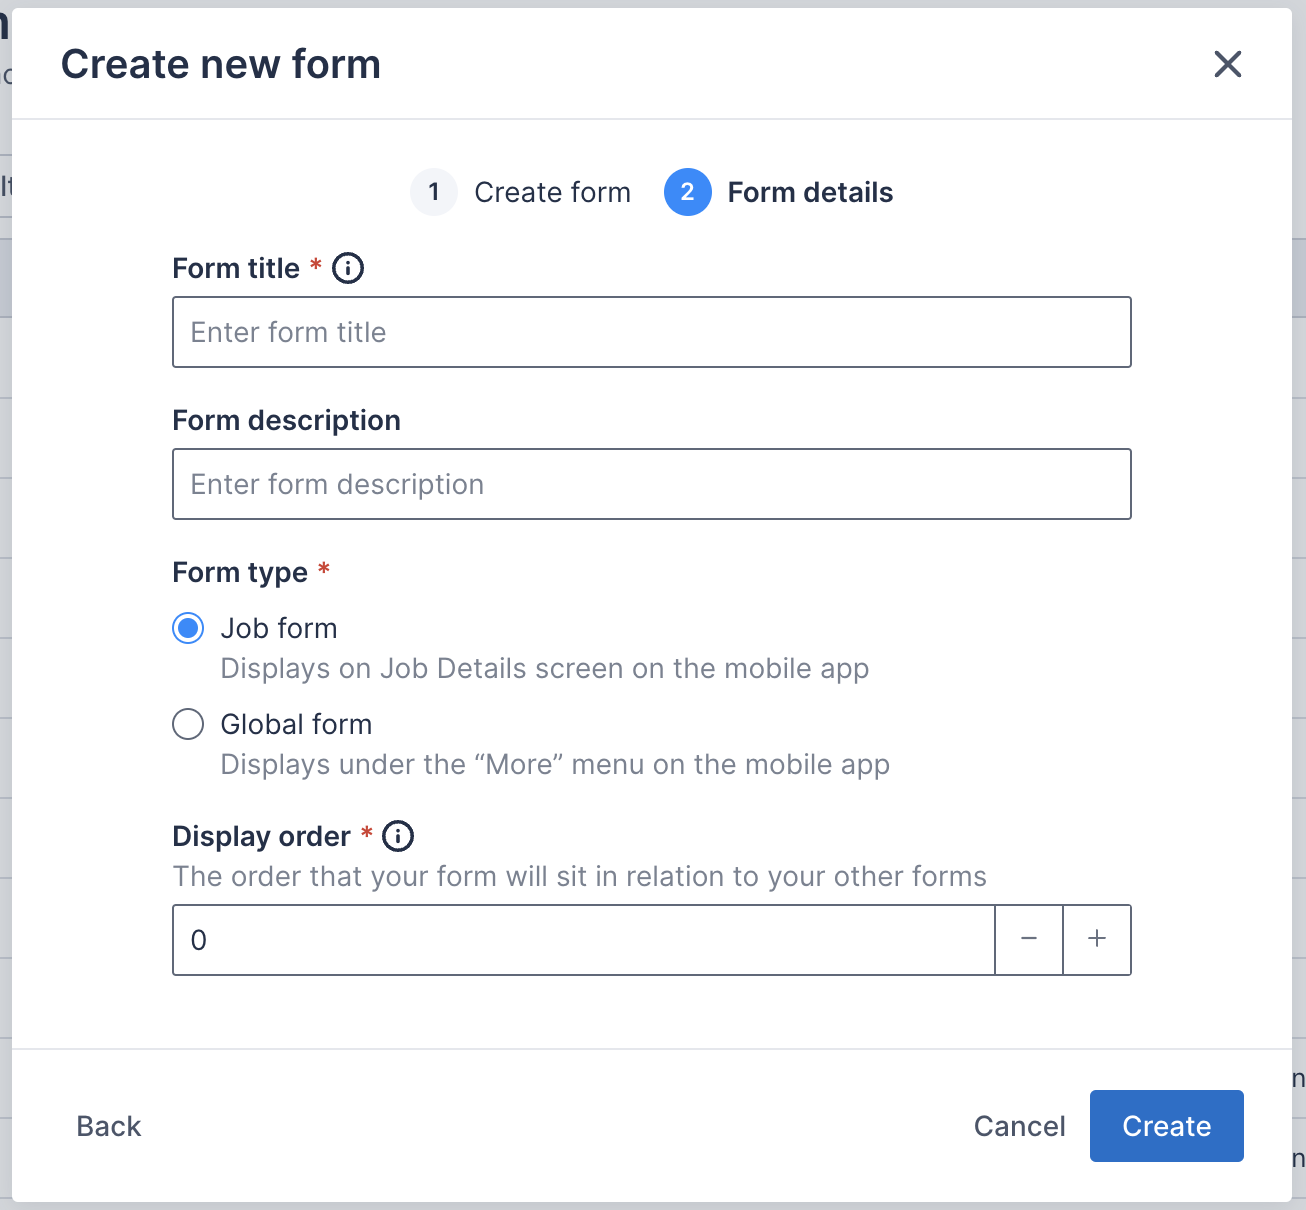
- Form title(Required): This is the title or name of the form that mobile users will see in the Skedulo Plus app.
- The form title character limit is 38.
- The form title can include alphanumeric characters, spaces, and special characters. It must start with an alphabetic character.
- The form title can be edited after the form is created.
- Form description(Optional): The form description. This appears underneath the form title in the Skedulo Plus app.
- Form type: Where the form is to be shown in Skedulo Plus.
- Job form: The form will display on the job screen in the Skedulo Plus app.
- Global form: The form will display on the More screen in the Skedulo Plus app.
- Display order: Where there are multiple forms shown in the same location, the display order determines the order in which the forms are shown. The lower the number, the higher it appears in the list.
- Form title(Required): This is the title or name of the form that mobile users will see in the Skedulo Plus app.
-
Click Create when you have completed the form details.
The form is created as a draft to be edited and configured using the Form Builder.
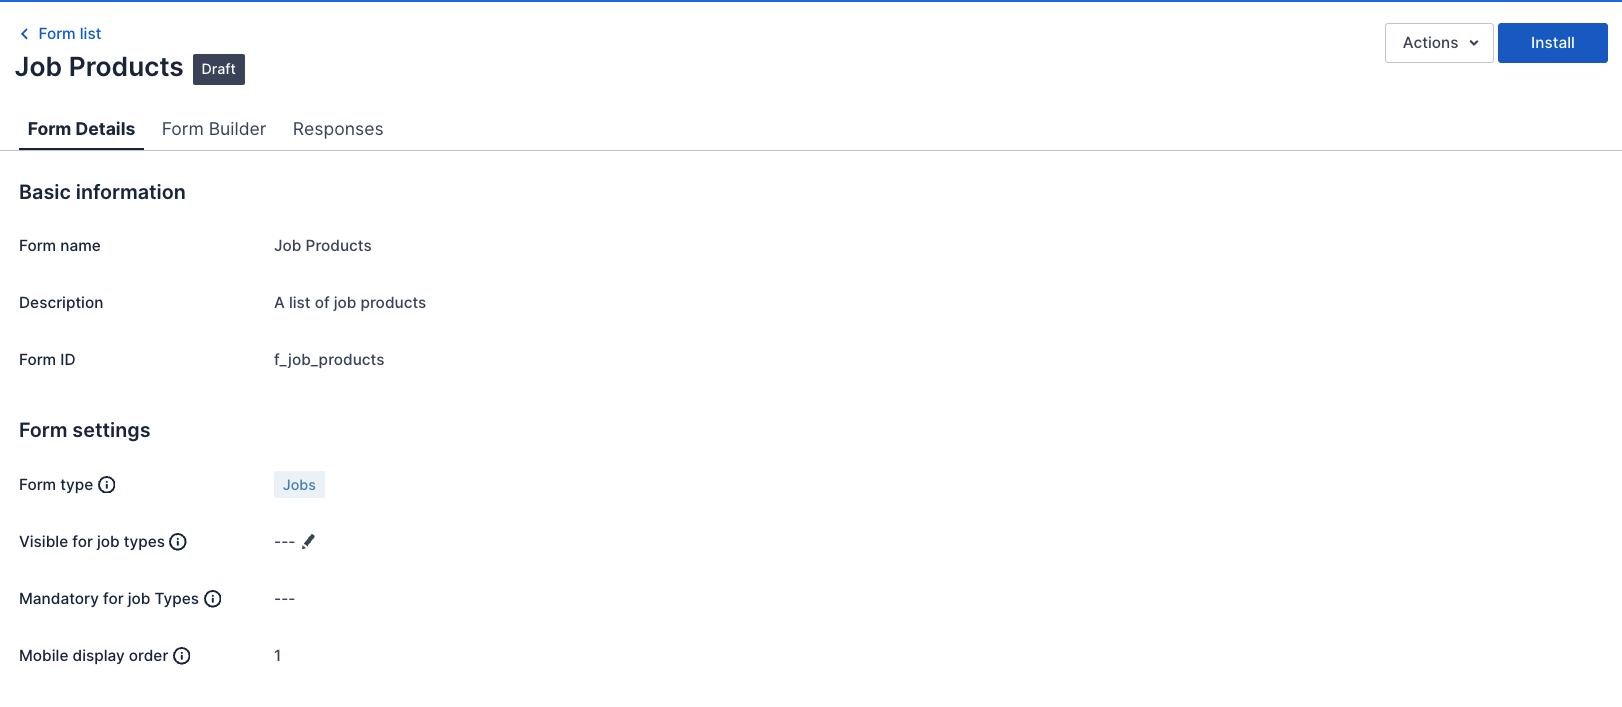
Edit the form details
-
After a form has been created, you can edit the previously created fields in the Form Details tab by hovering over the field and clicking the
 Edit button.
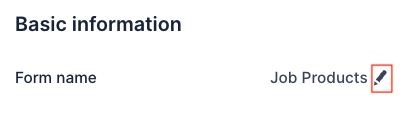
The only field that cannot be edited is the
Form type. If you need to change the type, you will need to create a new form and delete the old one. -
Edit the Form settings. To do this, hover over field value and click the pencil icon that appears.

- Visible for job types: Specify which job types or resource categories the form is visible to.
- Required for job completion on types: Specify which job types or resource categories must have the form completed before the job can be completed.
- Mobile display order: Specify the order the form must appear relative to other forms of the same type.
-
Click Save when you have completed your form edits.
Feedback
Was this page helpful?