View and manage automations
Beta feature
This feature is currently in beta, and should be considered ‘under development’. Learn about the automations beta.Overview
Automations allow you to configure processes in your Skedulo team that execute automatically for certain events. You can view a list of all automations that have been configured in your team. This includes viewing details of the configuration and the activity logs. You can also create, edit, and delete automations from the web app.
Prerequisites
Permissions
Automations currently use the same permission set as triggered actions and webhooks: there isn’t a dedicated automations permission yet.
- Viewing automations: requires the Administrator role, or a role that includes the “View webhooks and triggered actions” permission.
- Creating, editing, or deleting automations: requires the Administrator role, or a role that includes the “Modify webhooks and triggered actions” permission: this also covers activating and deactivating them.
View a list of automations
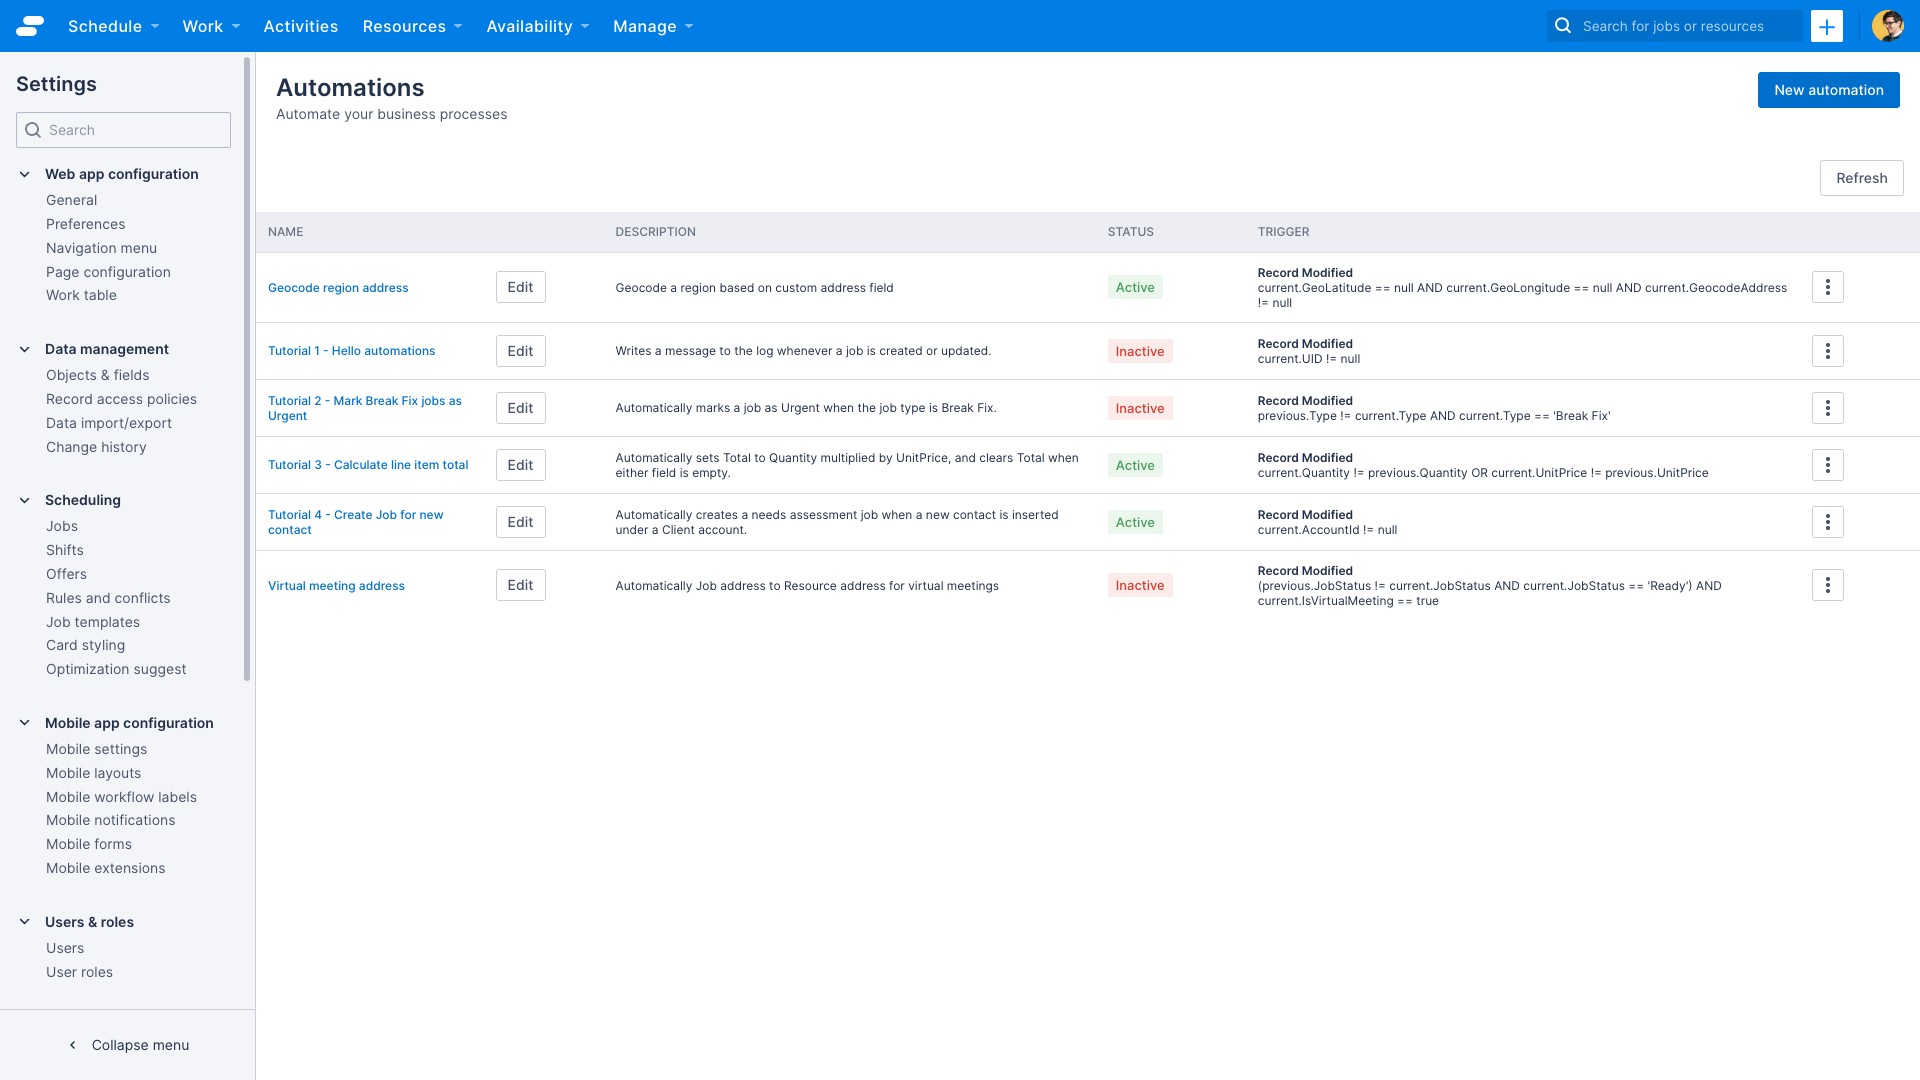
To view a list of automations in your team:
- In the web app, navigate to Settings > Configuration tools > Automations.
The list of automations displays.
Create an automation
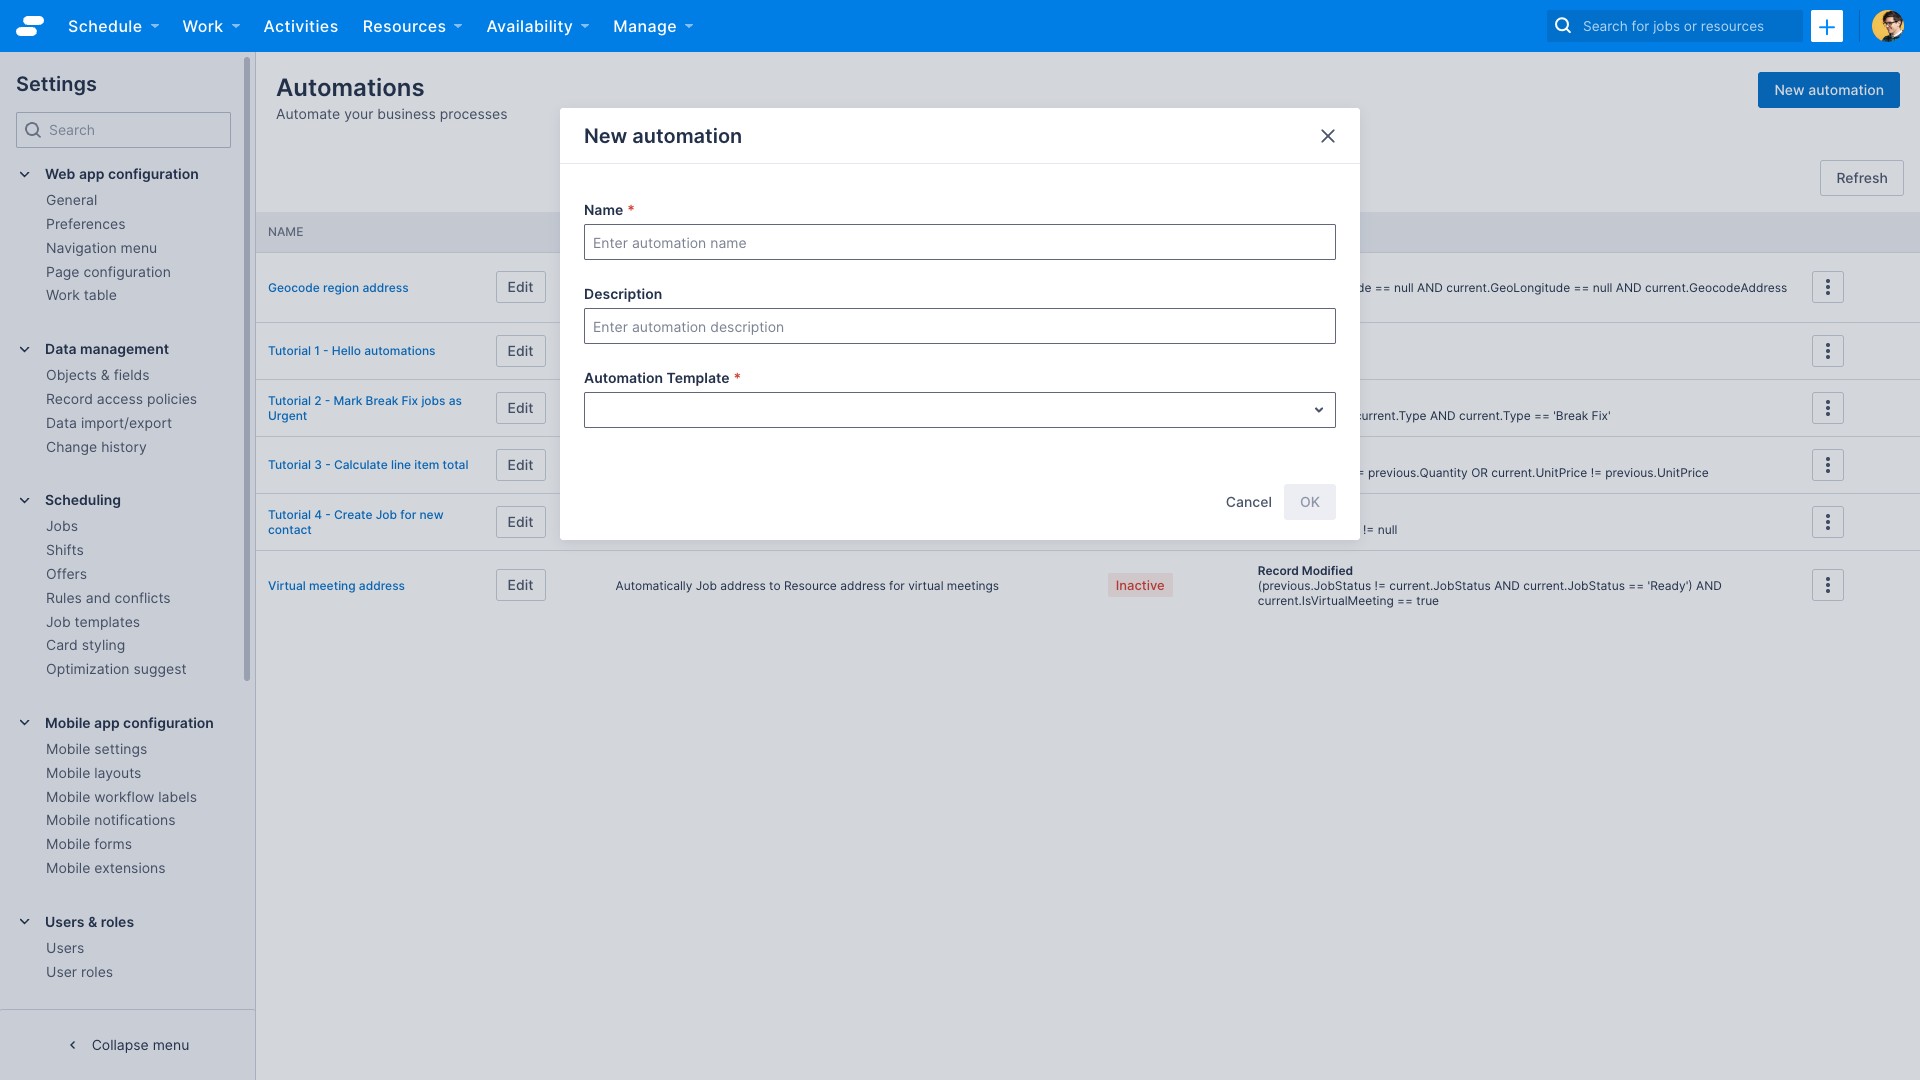
To create a new automation:
- In the automation list, click New automation. The New automation popup opens.
- Enter a unique Name for the automation
- Enter an optional description that describes what the automation does
- Select an Automation Template from the dropdown: one of Record Modified, Record Time Offset, Scheduled, or Event, matching the trigger type you want to start with
- To continue to the automation builder, click OK
You should now see the automation builder, with a default trigger and sample action. New automations are saved as Draft until you activate them from within the builder, see Activate or deactivate an automation below. You can learn more in Get to know the automation builder UI
View automation details
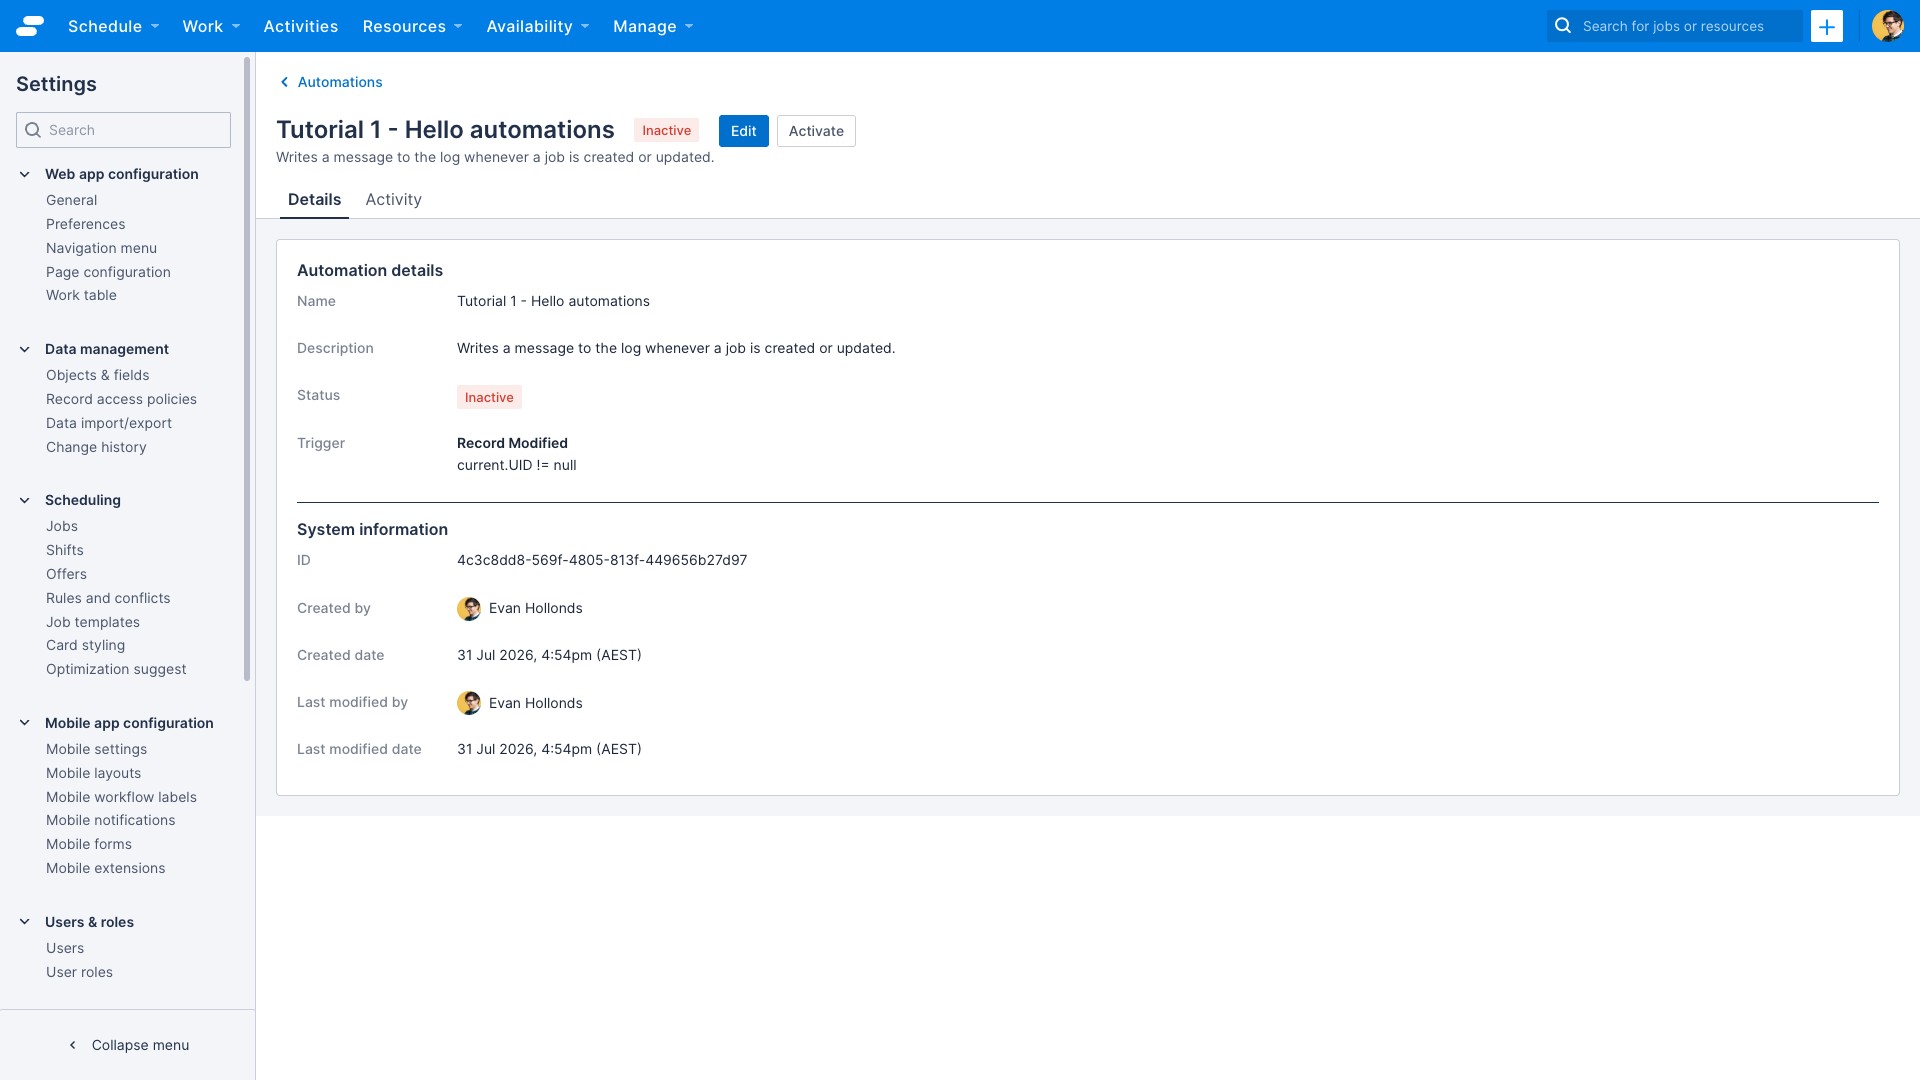
To view details of an automation:
- In the list of automations, click the name of the automation you want to view.
The automation’s Details tab displays.
View automation activity (logs)
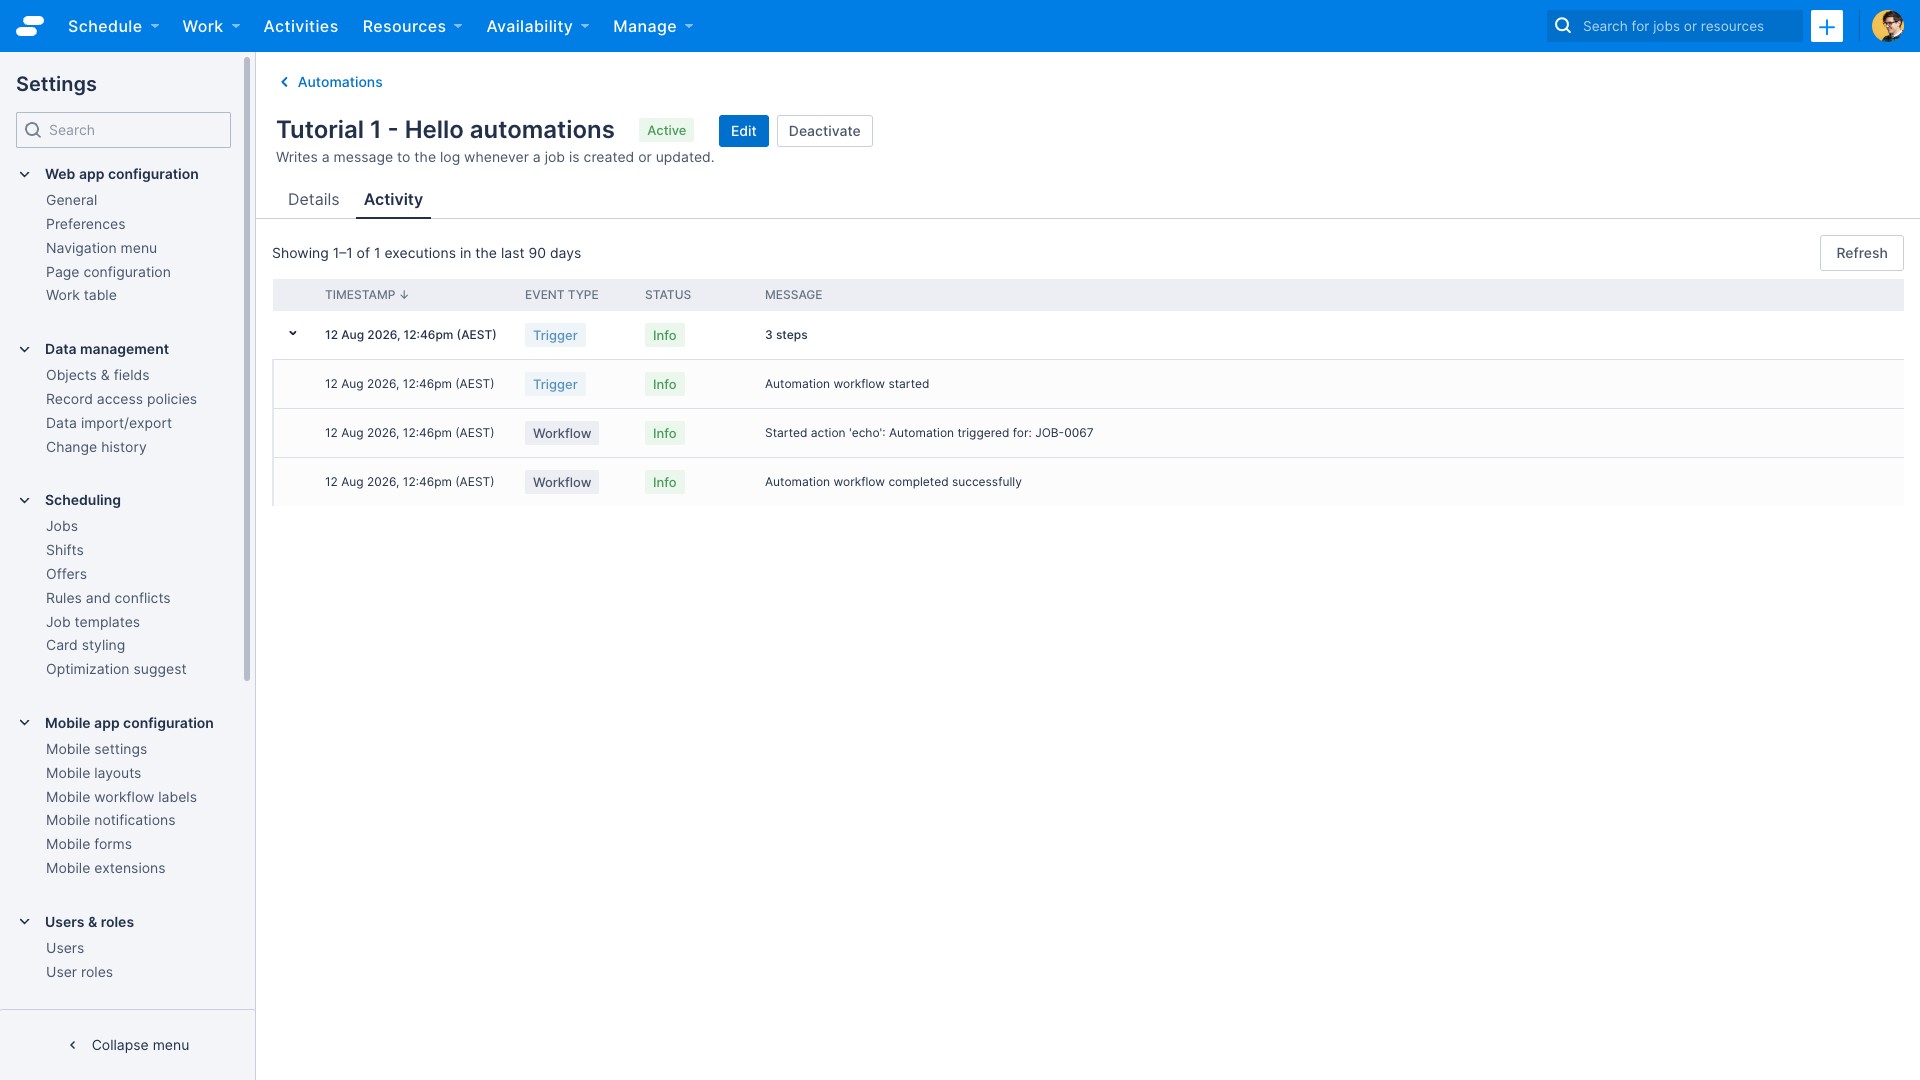
To view the activity logs for a specific automation:
-
In the automation list, click the name of the automation you want to view.
The automation’s Details tab displays.
-
Click the Activity tab label.
The list of automation activities displays, grouped by workflow execution.
-
Click a row to expand it and see the individual step messages for that execution.
Activity logs are added when an automation is triggered, for example, when a record is modified that matches the criteria of the automation’s trigger configuration.
Edit an automation
To edit details of a specific automation:
- Locate the automation you wish to edit in the automation list
- Click the Edit button near the name
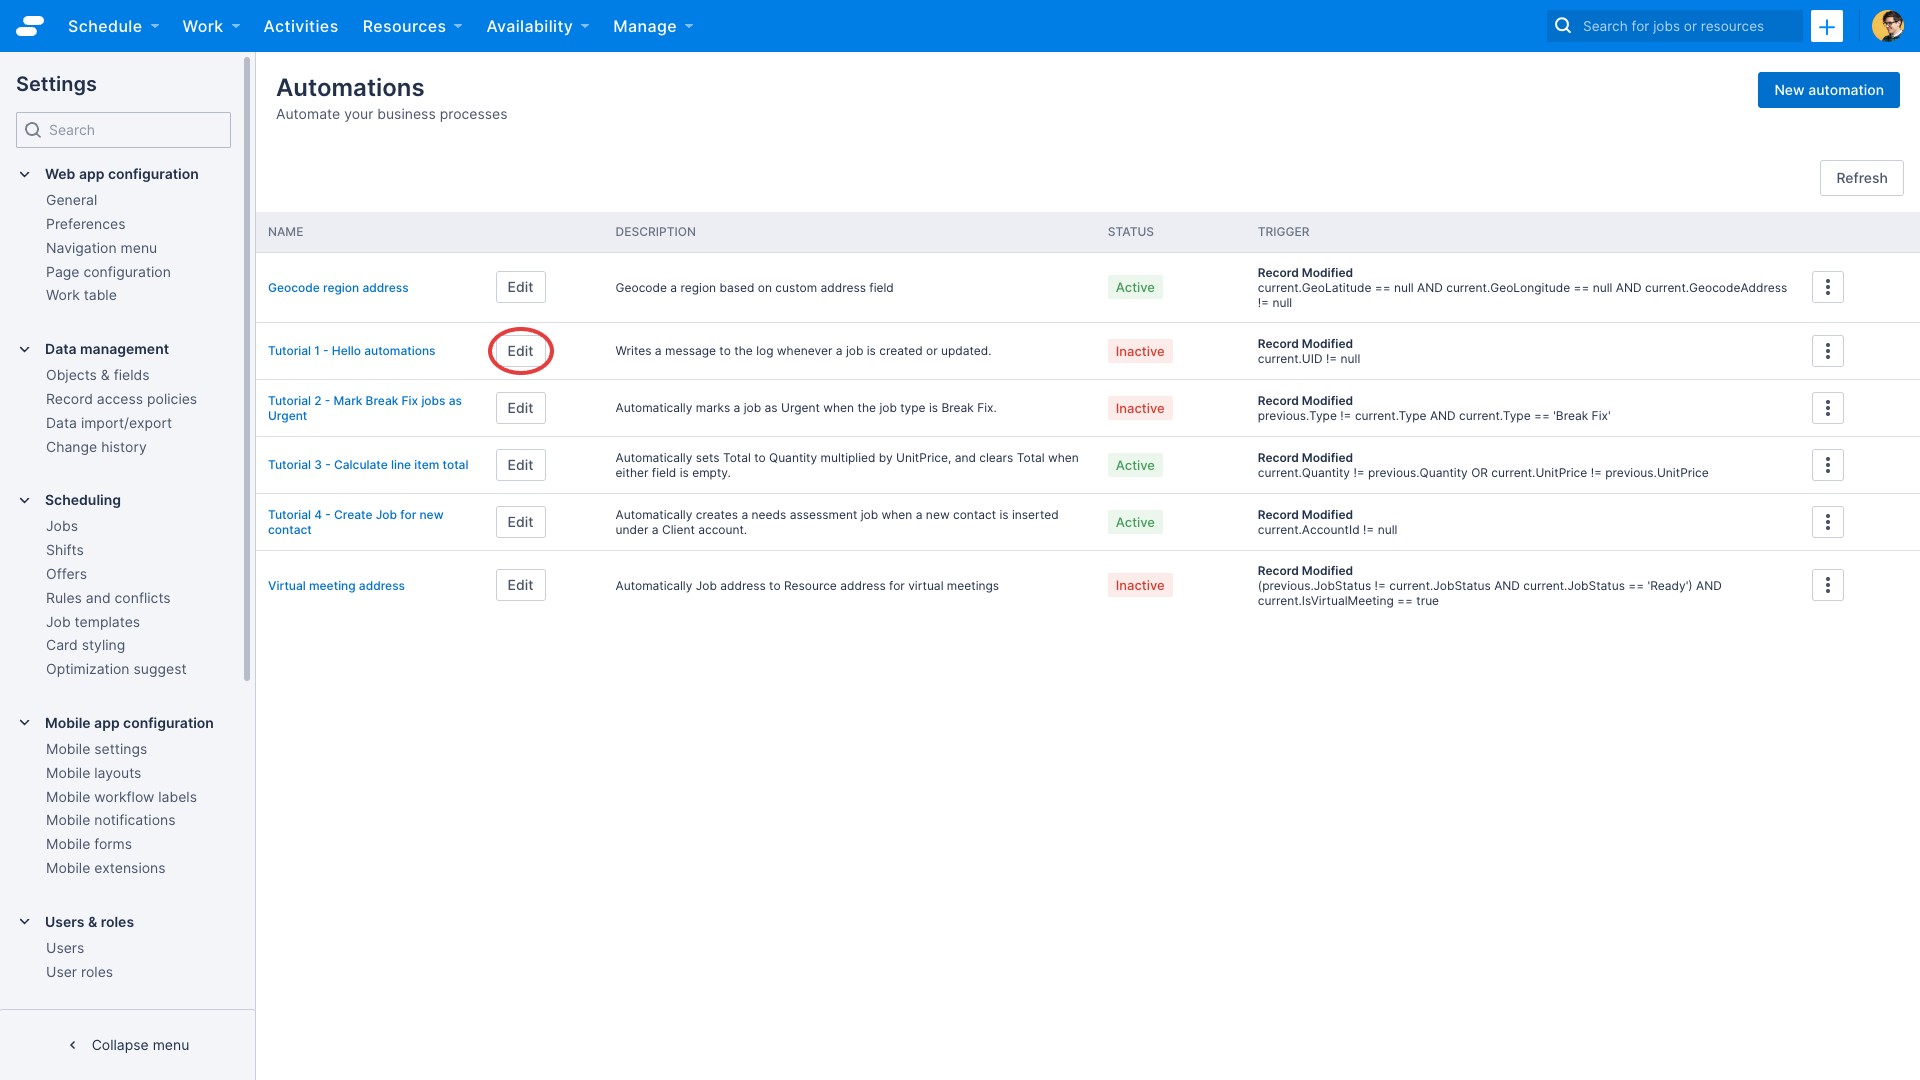
Alternatively, you can:
- Navigate to the Details page for an automation
- Click the Edit action button in the header
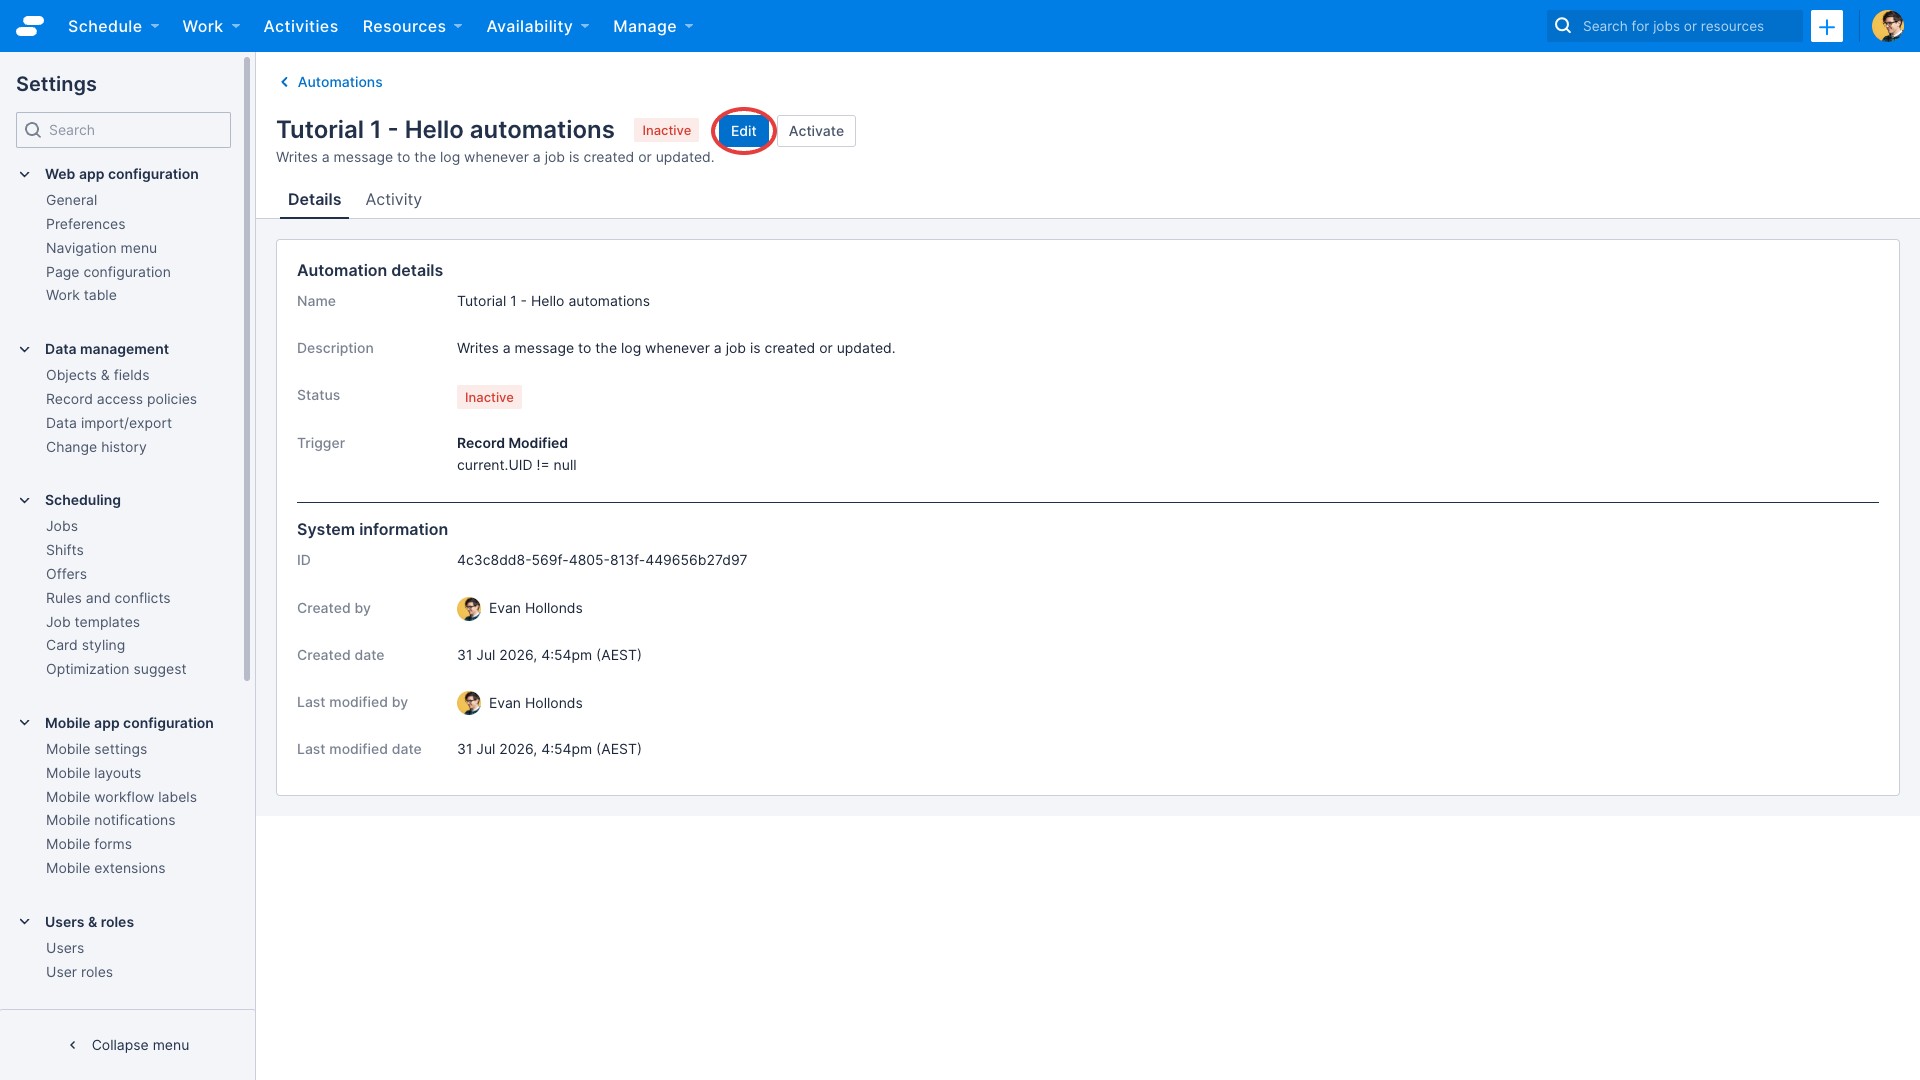
You should now see the automation builder, with the previously defined automation visible. You can learn more in Get to know the automation builder UI
Activate or deactivate an automation
An automation can have one of three statuses: Draft, Active, or Inactive. New automations are saved as Draft, and only run once activated.
A Draft automation has no Activate/Deactivate control in the list or on the detail page: you must open it in the automation builder and click Activate there (see Get to know the automation builder UI). Once an automation has been activated at least once, it can be toggled between Active and Inactive as follows:
To activate or deactivate an automation from the automation list:
- Navigate to the Automation list
- Locate the automation you want to activate or deactivate in the list, click the actions menu (three vertical dots in the last column). You will be offered a choice to either Activate or Deactivate depending on the current state of the automation
Or from the automation detail page:
- Navigate to the Automation detail page
- Click the Activate or Deactivate action button in the header, depending on the current state of the automation
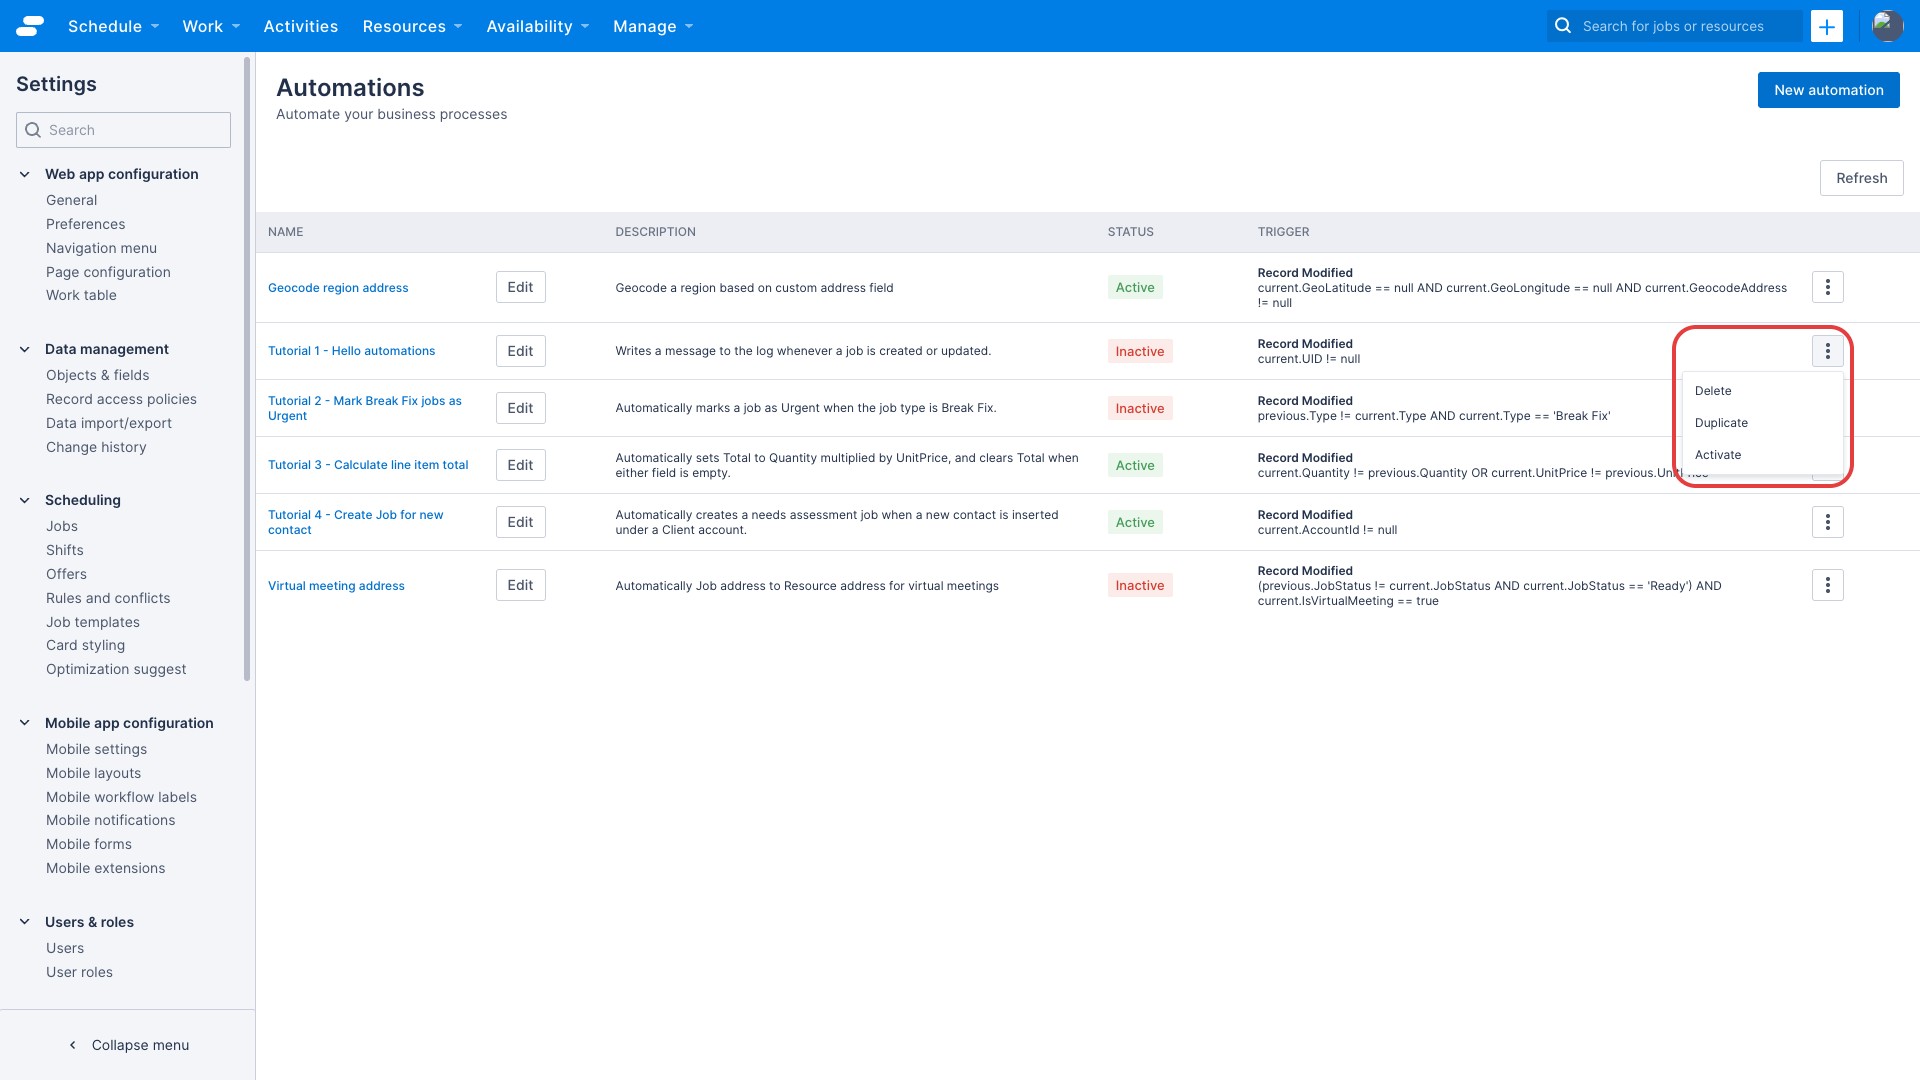
Delete an automation
To delete an automation:
- Navigate to the Automation list
- Locate the automation you want to delete in the list, click the actions menu (three vertical dots in the last column).
- Click the Delete menu item.
- A confirmation dialog asks you to confirm the deletion. Click Delete to proceed.
Duplicate an automation
If you would like to create a new automation that is very similar to an existing one, you can duplicate an existing automation:
- Navigate to the Automation list
- Locate the automation you want to duplicate in the list, click the actions menu (three vertical dots in the last column).
- Click the Duplicate menu item. The Duplicate automation popup opens.
- You can modify the Name and Description fields
- To continue to the automation builder, click OK
- Modify the automation and click Save as Draft or Activate to finish
Feedback
Was this page helpful?