Tutorial 1 - Hello automations
Beta feature
This feature is currently in beta, and should be considered ‘under development’. Learn about the automations beta.Overview
In this tutorial you will create a simple automation that runs whenever a job is created or updated. The automation will use an Echo action to write a message to the activity log. This is a great way to verify that your trigger configuration is correct before adding more complex actions.
By the end of this tutorial you will have:
- Created a new automation
- Configured a record modified trigger to listen for new or updated jobs
- Added and configured an Echo action
- Saved and activated the automation
- Tested the automation by creating/updating a job
- Reviewed the activity log to confirm the Echo action ran
Prerequisites
- You must have the Administrator role, or a role that includes the “Modify webhooks and triggered actions” permission.
- You should be familiar with the automation builder UI. If not, read Get to know the automation builder UI first.
Step 1: Create a new automation
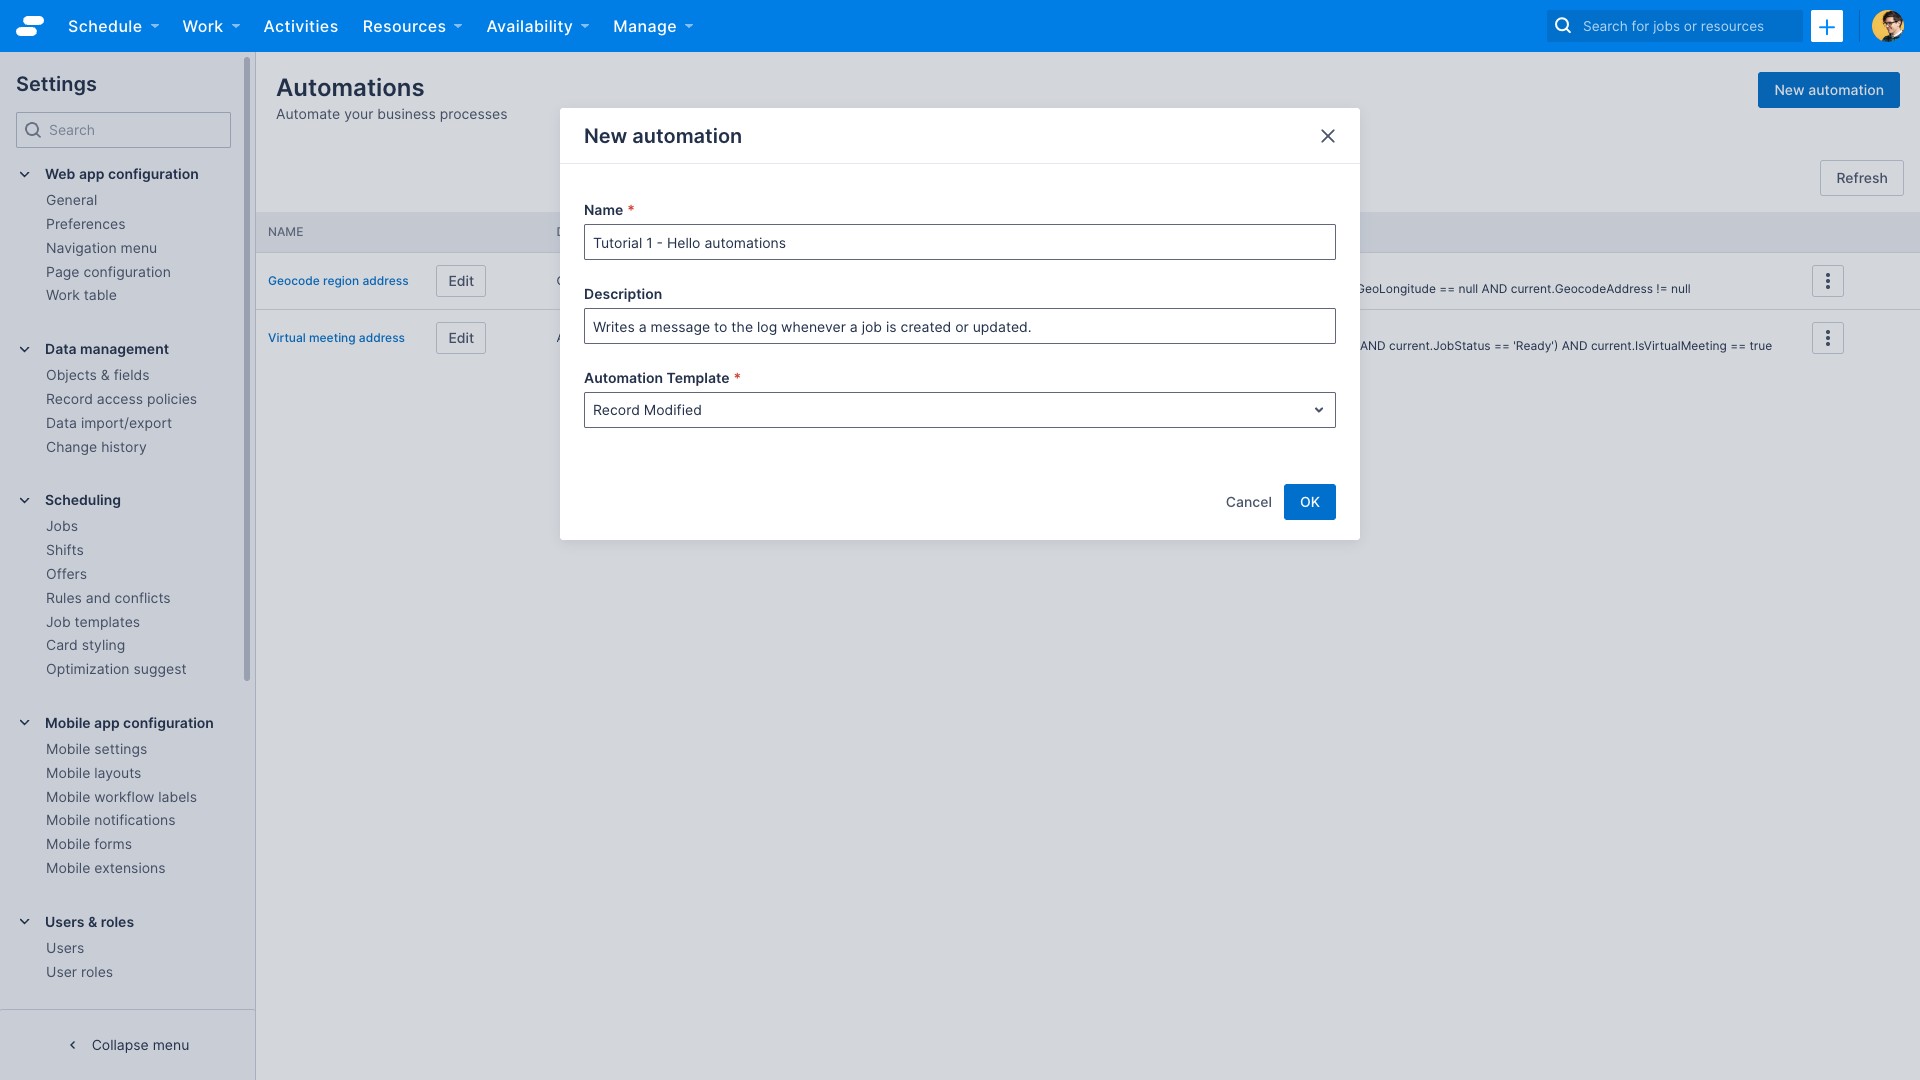
- In the web app, navigate to Settings > Configuration tools > Automations.
- Click New automation.
- In the New automation dialog, enter a Name for the automation, for example:
Tutorial 1 - Hello automations - Optionally, enter a Description such as
Writes a message to the log whenever a job is created or updated. - Select the Record Modified template.
- Click OK to continue to the automation builder.
The automation builder opens with a default trigger step and is pre-populated with an Echo action by default.
Step 2: Configure the trigger
The trigger defines what event starts the automation. You will configure it to fire whenever a Job record is created or updated.
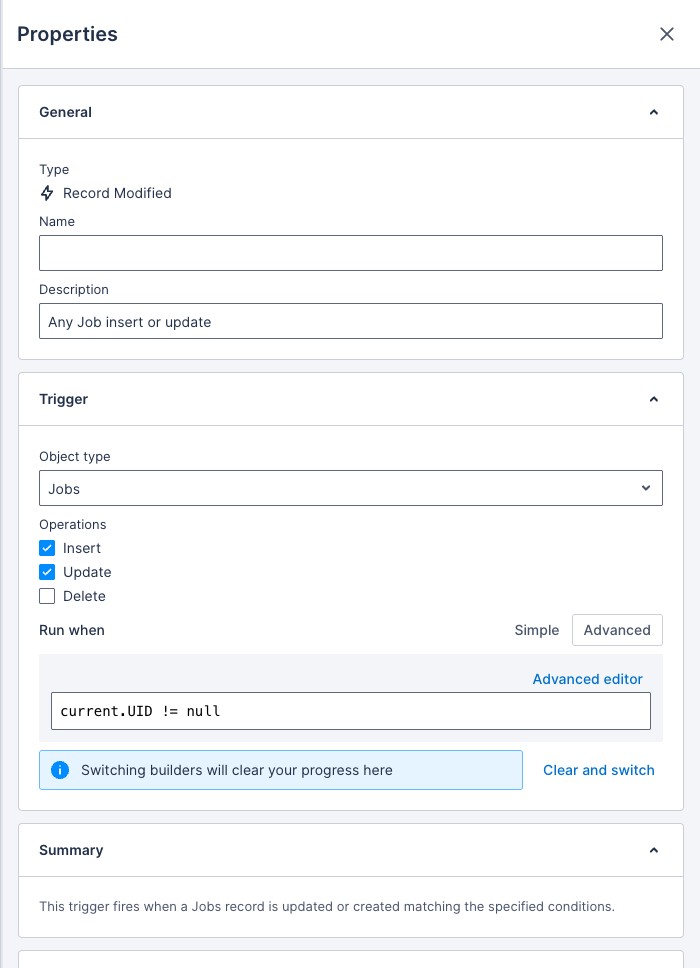
- On the workflow canvas, click the Trigger step (the blue rectangle). The step properties panel opens on the right.
- Under Trigger section, find the Object type field and select Jobs from the dropdown list.
- Under Operations, enable the Insert and Update checkboxes. This tells the automation to run when a job is created or when an existing job is modified.
- Under Run when, supply a filter for the trigger. Since this should run for any record, use a filter that always evaluates to true. Click Advanced and enter:
current.UID != null
This filter means the UID of the current version of the record is not null, which is always the case.
Tip
Run when accepts EQL (Elastic Query Language) expressions in its Advanced mode. See the EQL filter documentation for details.Step 3: Configure the Echo action
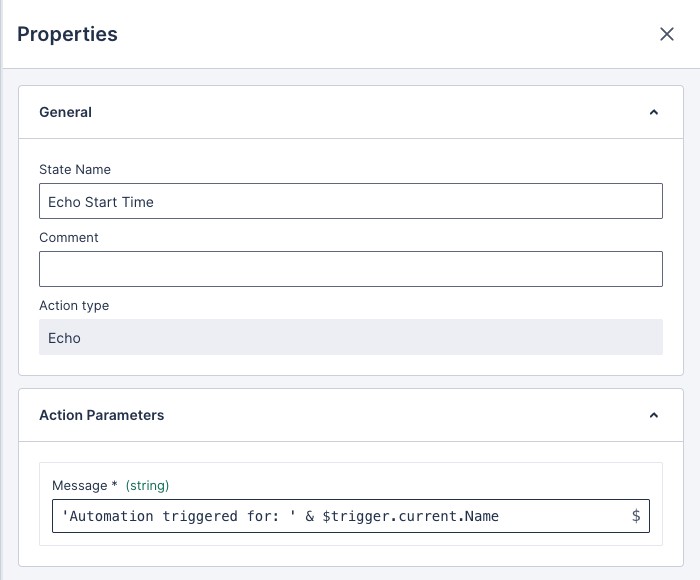
- Click the Echo step on the workflow canvas to open its properties in the step properties panel.
- In the Message field, enter the text you want written to the activity log. For example:
'Automation triggered for: ' & $trigger.current.Name
The $trigger.current.Name is a reference to the Name field of the current version of the record that caused the trigger to run the automation.
Tip
To browse all available workflow variables, click the $ icon next to any field, or type$ directly into the field. A variable picker will appear showing all outputs from earlier steps in the workflow.
Step 4: Activate the automation
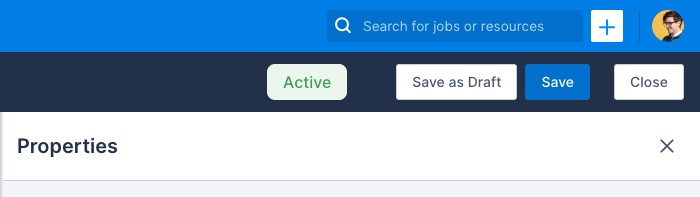
- In the automation builder header, click Activate. This automation is currently a Draft: clicking Activate validates the whole workflow and makes it live in one step. If you’d rather leave it as a draft for now, click Save as Draft instead, and activate it later from the automation detail page.
- If there are any configuration errors, they will be highlighted in the builder. Resolve them and click Activate again.
- Once saved successfully, click the Close button to leave the automation builder. You will be shown the automation detail page for the automation you just created, now showing a status of Active.
The automation will fire the next time a job is created or updated.
Step 5: Create a job to trigger the automation
Now you will create a job to test that the automation fires correctly.
- Use the Quick create button in the main navigation bar at the top of the page. It’s the white button with the + plus sign in it.
- Click + Job in the menu.
- You will be taken to the Job create page. Enter details for all required fields.
- Save the job.
Creating the job fires an Insert operation on the Jobs object, which matches the trigger you configured.
Step 6: Review the activity log
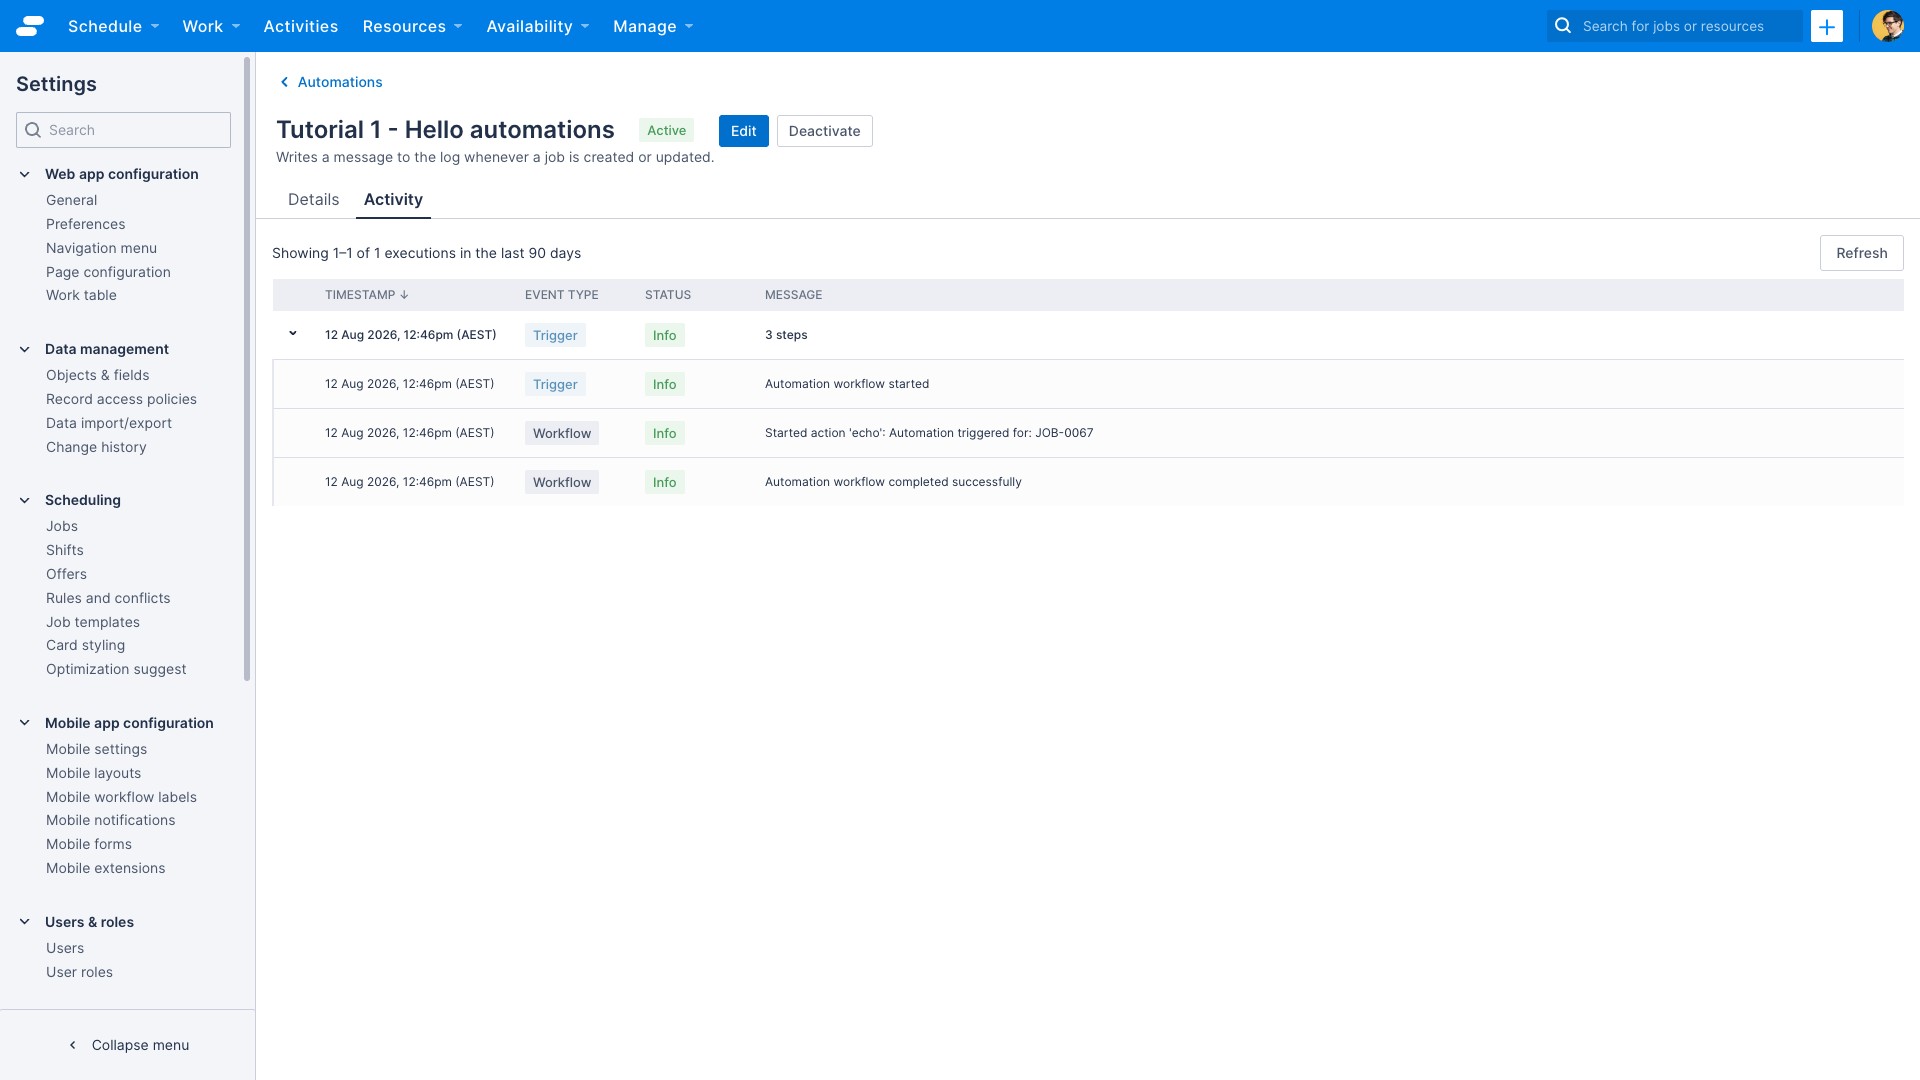
After creating the job, the app should return you to the automation detail page. Let’s confirm it ran and check the output of the Echo action. If not navigate back to the automations list, and click the name of the ‘Tutorial 1 - Hello automations’ entry.
-
Click the Activity tab.
-
Each row represents one workflow execution. Click the most recent (topmost) row to expand it and see the individual step messages for that run.
There should be entries in the activity tab that correspond to the steps in the automation that you created.
You should see something like:
Timestamp Event type Status Message {date/time} Trigger Info Automation workflow started {date/time} Workflow Info Started action ’echo’: Automation triggered for: JOB-XXXX {date/time} Workflow Info Automation workflow completed successfully Note the entries within an expanded execution are ordered oldest to newest, showing the order the steps actually ran in.
-
Locate the Echo step in the activity details. You should see the message you configured, with the job’s name substituted in place of
$trigger.current.Name, for example:Automation triggered for: JOB-0001
You should be able to see from the log that:
- The trigger in your automation detected the new job
- The workflow ran the echo step
- The workflow completed successfully
Note
Activity logs may take a few seconds to appear. If the log is empty, wait a moment and click the refresh button in the top right of the list.What you learned
In this tutorial you:
- Created an automation using the Record Modified template
- Configured the trigger to respond to Insert and Update operations on the Jobs object
- Added an Echo action and used a workflow variable in the message
- Activated and tested the automation, verifying it worked by reviewing the activity log
Next steps
- Proceed to the next tutorial
Feedback
Was this page helpful?